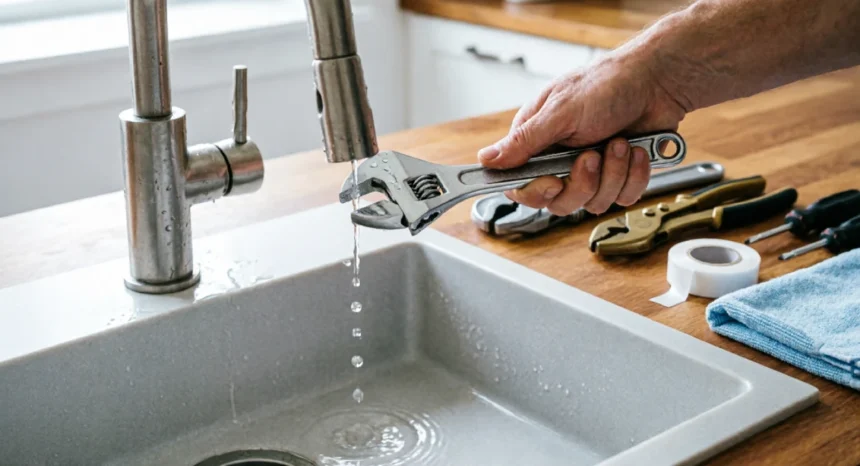
How to Fix a Leaking Tap Without Replacing the Whole Fixture
That steady drip from your tap is not just annoying. A single dripping tap can waste thousands of litres of water over the course of a year, and most people’s first instinct is to call a plumber or buy a brand-new fixture.
- Why Your Tap Is Leaking (And Why It Probably Does Not Need Replacing)
- The Difference Between a Washer-Based Tap and a Cartridge Tap
- How to Tell Which Part Is Causing the Drip
- Tools and Materials You Need Before You Start
- How to Shut Off the Water Before Any DIY Plumbing Fix
- How to Fix a Leaking Tap with a Worn Washer (Step-by-Step)
- How to Remove the Tap Handle Without Damaging It
- Inspecting and Replacing the Rubber Washer
- Reassembling the Tap and Testing for Leaks
- How to Fix a Leaking Tap with a Cartridge or Ceramic Disc
- How to Remove a Tap Cartridge Safely
- Replacing vs. Cleaning a Cartridge
- Fitting the New Cartridge and Checking the Seal
- Fixing a Leak at the Base of the Tap (O-Ring Replacement)
- Common Mistakes Beginners Make During Tap Repairs
- When a DIY Tap Repair Is Not the Right Option
- Conclusion
Here is the good news: you almost certainly do not need to do either. In most cases, you can fix a leaking tap without replacing it using tools you probably already own and a replacement part that costs a few dollars at any hardware store.
This guide walks you through everything, from identifying the cause of the leak to completing the repair correctly the first time. No plumbing experience required.
Why Your Tap Is Leaking (And Why It Probably Does Not Need Replacing)
Taps leak for a small number of reasons, and nearly all of them come down to worn or degraded internal parts rather than a problem with the fixture itself.
The most common culprits are:
- A worn rubber washer that no longer creates a watertight seal when the tap is closed
- A degraded O-ring on the tap spindle, which causes water to seep around the base
- A faulty or mineral-clogged cartridge in modern single-lever or mixer taps
- A loose packing nut that allows water to escape around the stem
None of these requires a new tap. Each one is a straightforward dripping tap repair that involves removing the affected part and fitting a replacement. The fixture stays exactly where it is.
The only time full replacement makes sense is when the tap body itself is cracked, the valve seat is severely corroded, or the fixture is so old that replacement parts are no longer available. For the vast majority of standard household taps, that situation simply does not apply.
The Difference Between a Washer-Based Tap and a Cartridge Tap
Before you pick up any tools, you need to know which type of tap you are dealing with. The repair process is slightly different for each.
Washer-based taps (also called compression taps) are the older, more traditional style. They have separate hot and cold handles that you turn clockwise to close. Inside, a rubber washer presses against a valve seat to stop the water flow. These are extremely common in older homes and are the easiest type to repair.
Cartridge taps are more common in modern kitchens and bathrooms. They include single-lever mixer taps and many two-handle designs with a smoother turning action. Instead of a washer and jumper valve, they contain a self-contained cartridge unit with ceramic discs. When this cartridge wears out, it is removed and replaced as a single piece.
If your tap handles turn with a stiff, screw-like action and require multiple full rotations to open or close, you have a washer-based tap. If the handle moves with a short quarter-turn or side-to-side action, it is almost certainly a cartridge tap.
How to Tell Which Part Is Causing the Drip
Pinpointing the source of the leak before you start saves time and means you buy the right replacement part on the first trip to the store.
Check these three things:
Where is the water coming from? If water drips from the spout when the tap is fully closed, the washer or cartridge is the issue. If water pools around the base of the tap body, a degraded O-ring is the likely cause. If water seeps around the handle itself, the packing nut may be loose, or the O-ring on the spindle has worn.
Does it drip when fully closed? A tap that drips only when closed points directly to a sealing problem inside the valve, which is a washer or cartridge issue.
Is the drip constant or pressure-related? A slow, steady drip is usually a worn washer. A leak that worsens when water pressure is high can indicate a cartridge problem or a damaged valve seat.
Tools and Materials You Need Before You Start
Getting everything ready before you open the tap saves you from running to the hardware store mid-repair with the water shut off. Here is what you need:
- Adjustable spanner: Used to loosen and tighten the headgear nut and packing nut. Choose one with a smooth jaw to avoid scratching chrome fittings.
- Flathead screwdriver: For prying off decorative caps and loosening certain packing nuts.
- Phillips screwdriver: For removing the retaining screw that holds the tap handle in place.
- Replacement rubber washers: Come in assorted packs. Match the size to your existing washer, usually 12mm or 15mm for standard household taps.
- O-rings: Small rubber rings that seal the spindle and tap body. Assorted packs cover most standard sizes.
- Tap cartridge (if applicable): Only needed for cartridge taps. Check the tap brand and model before buying.
- Silicone-based plumber’s grease: Applied to O-rings and rubber parts before reassembly to extend their lifespan and improve the seal.
- Cloth or old towel: To protect the sink surface and give you a clean space to lay out parts in the order you removed them.
- Small container or tray: Useful for holding screws and small parts so nothing rolls into the drain.
You do not need a full plumber’s toolkit for this job. The items above cover the complete repair from start to finish.
Where to Buy Replacement Washers and Cartridges
Rubber washers and O-rings are available at any hardware store or home improvement retailer. Assorted packs are inexpensive and give you multiple sizes in one purchase, which is useful since sizes vary slightly between tap brands.
Cartridges are a different matter. They are often brand-specific, and fitting the wrong one means the repair will not work. Before buying a replacement cartridge, check the tap for a brand name (usually stamped on the body or handle), then search for the matching cartridge online or ask at the hardware store.
The most reliable approach for beginners: remove the old part first, take it with you to the store, and match it physically. This removes all guesswork and ensures you leave with exactly the right component.
How to Shut Off the Water Before Any DIY Plumbing Fix
This step is not optional. Starting any tap repair without shutting off the water first will result in water spraying across your kitchen or bathroom the moment you loosen the headgear nut.
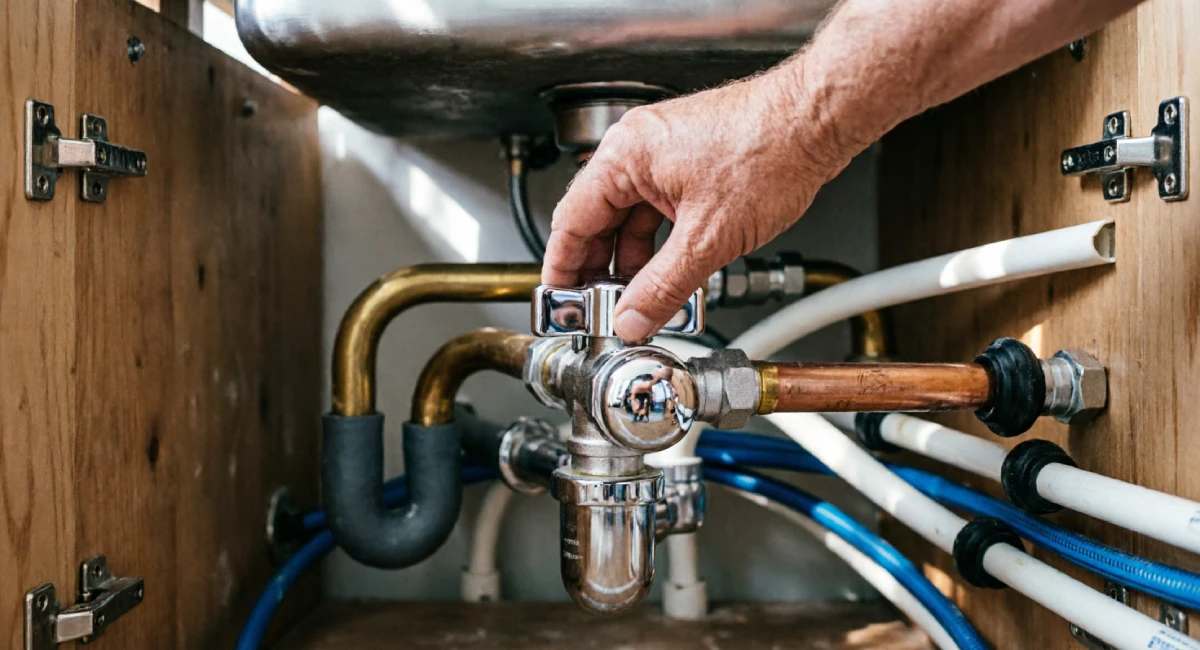
Start by looking under the sink or basin for an isolation valve. This is a small inline valve fitted directly on the supply pipe, usually with a flat-head screw slot on the front. Turn the slot a quarter-turn clockwise until it is perpendicular to the pipe. That closes the valve and cuts the water supply to that tap only.
Once you have closed the isolation valve, turn the tap on fully. This releases any remaining water pressure in the pipe and confirms the shut-off is working. If the flow slows to a trickle and stops, you are ready to proceed.
If the isolation valve is stiff and difficult to turn, apply gentle pressure without forcing it. Old valves can seize over time. A small amount of penetrating oil left for a few minutes can help. If it will not move at all, go directly to the mains stopcock instead.
What to Do If You Cannot Find the Isolation Valve
Older homes were often built without isolation valves on individual fixtures. If there is no valve under your sink, you will need to shut off the water at the mains.
The main stopcock is usually located under the kitchen sink, inside a cabinet near the water meter, or in a utility area. It is a larger valve, often a traditional brasswork handle or a round wheel-type fitting. Turn it clockwise to close.
Shutting off the mains cuts water to the entire property, so repair as efficiently as possible. After completing the job, it is worth having an isolation valve fitted to the supply pipes under the fixture. It costs very little and makes every future repair significantly easier.
How to Fix a Leaking Tap with a Worn Washer (Step-by-Step)
This section covers the repair process for traditional washer-based compression taps. It is the most common dripping tap repair you will encounter, and it is straightforward once you know the sequence.
Shut off the water first using the steps above, then follow these steps in order.
Step 1: Place your cloth over the sink basin to protect the surface and create a clean workspace.
Step 2: Remove the decorative cap on top of the tap handle (if present). It usually pops off with a flathead screwdriver. Underneath, you will find a retaining screw.
Step 3: Unscrew the retaining screw with a Phillips screwdriver, then pull the handle straight up and off the spindle. If it resists, twist it gently while pulling. Do not force it.
Step 4: With the handle removed, you will see the headgear nut, a large hexagonal nut that secures the internal mechanism to the tap body. Wrap your spanner jaw with a cloth to protect the chrome finish, then loosen the headgear nut by turning it counter-clockwise.
Step 5: Once loose, unscrew the headgear by hand and pull it out. Attached to the bottom of the headgear is the jumper valve, which holds the rubber washer.
Step 6: Inspect the washer, then replace it (see the section below for details).
Step 7: Reassemble in reverse order.
How to Remove the Tap Handle Without Damaging It
Most tap handles sit on a splined or threaded spindle and are secured by a single screw beneath a cap. The cap is usually a small plastic or metal disc printed with “H” or “C” (hot or cold). It either pops off with light prying or unscrews counter-clockwise.
Once the screw is out, the handle should lift off cleanly. If it feels stuck, grasp it firmly and apply a slow, steady upward pull while giving it a slight back-and-forth twist. This breaks any mineral build-up that has bonded the handle to the spindle.
Avoid using a hammer or excessive force. Chrome and plastic handles crack easily under impact. If the handle truly will not move after a few firm attempts, a handle puller tool (available at hardware stores for a few dollars) applies even upward pressure without any risk of damage.
Inspecting and Replacing the Rubber Washer
With the headgear out, look at the washer at the base of the jumper valve. A worn washer will show clear signs: it may be flattened, cracked along the edge, hardened, or have a visible groove worn into its face where it has been pressing against the valve seat.
To remove the old washer, locate the small brass nut holding it in place at the bottom of the jumper valve. Unscrew this nut counter-clockwise (it may be tight), remove the old washer, and set it aside.
Take the old washer to your parts pack and find a match that is the same diameter and thickness. Fitting an oversized washer will cause it to fold inside the valve seat when the tap closes, which maintains the drip. An undersized one will not seal properly either. The fit needs to be accurate.
Place the new washer onto the jumper valve, screw the brass nut back on finger-tight, then give it a quarter-turn snug with a small spanner. Do not overtighten, as this can distort the washer and compromise the seal.
Reassembling the Tap and Testing for Leaks
Reassemble in the reverse order of disassembly:
- Insert the jumper valve back into the headgear
- Thread the headgear back into the tap body by hand, turning clockwise
- Tighten the headgear nut with your spanner, firm but not excessively
- Slide the handle back onto the spindle
- Replace and tighten the retaining screw
- Press the decorative cap back into place
With everything reassembled, turn the isolation valve back on slowly by rotating it counter-clockwise a quarter-turn. Then open the tap fully to flush any debris, run it for ten seconds, and close it completely.
Watch the spout for thirty seconds. No drip means the repair worked. If there is still a slight drip, check that the headgear nut is fully tightened and that the washer is seated flat.
How to Fix a Leaking Tap with a Cartridge or Ceramic Disc
Cartridge taps work differently from washer-based taps, but the repair logic is the same: find the worn component, remove it, and fit a replacement.
The key difference is that a tap cartridge is a self-contained unit. You do not replace individual washers or discs inside it. You remove the entire cartridge as one piece and fit a new one in its place. This makes the repair slightly quicker once you have the right replacement part.
Shut off the water supply before starting, using the same method described earlier.
How to Remove a Tap Cartridge Safely
Step 1: Remove the tap handle using the same method as washer-based taps: locate and remove the decorative cap, unscrew the retaining screw, and pull the handle off.
Step 2: With the handle removed, you will see the cartridge sitting inside the tap body. It may be held in place by a retaining clip (a small U-shaped or C-shaped metal clip) or a threaded retaining nut. If there is a clip, use needle-nose pliers or a flathead screwdriver to slide it out.
Step 3: Before pulling the cartridge out, take a photo of it with your phone. This records the orientation, which is critical for reassembly.
Step 4: Pull the cartridge straight upward, applying steady pressure. Some cartridges grip tightly, particularly in older taps. A cartridge puller tool makes this easier, but firm hand pressure with a twisting motion usually works.
Step 5: Note which direction the cartridge was facing, particularly where the hot and cold inlets align.
Replacing vs. Cleaning a Cartridge
Not every cartridge needs to be replaced immediately. If the leak is minor and the tap is relatively new, the cartridge may just be clogged with limescale or mineral deposits from hard water.
To clean a cartridge, submerge it in a container of white vinegar for one to two hours, then scrub it gently with an old toothbrush. Rinse it under running water, refit it, and test the tap. In areas with hard water, this can resolve a drip caused by mineral build-up rather than physical wear.
If the ceramic discs inside the cartridge are visibly cracked, the cartridge body is warped, or the leak persists after cleaning, full replacement is the only reliable fix. Cleaning a physically worn cartridge is a temporary measure at best.
Fitting the New Cartridge and Checking the Seal
Match the new cartridge to the old one before fitting. Check that the inlet positions, cartridge diameter, and stem height are identical.
Insert the new cartridge in the same orientation as the original, using your photo as a reference. Press it firmly down into the tap body until it is fully seated. Refit the retaining clip or retaining nut to secure it.
Reassemble the handle, replace the decorative cap, and turn the water back on slowly. Open and close the tap a few times to seat the cartridge discs properly. A correctly fitted cartridge produces a smooth handle action with no resistance points, no drip from the spout, and no moisture at the base of the tap.
Fixing a Leak at the Base of the Tap (O-Ring Replacement)
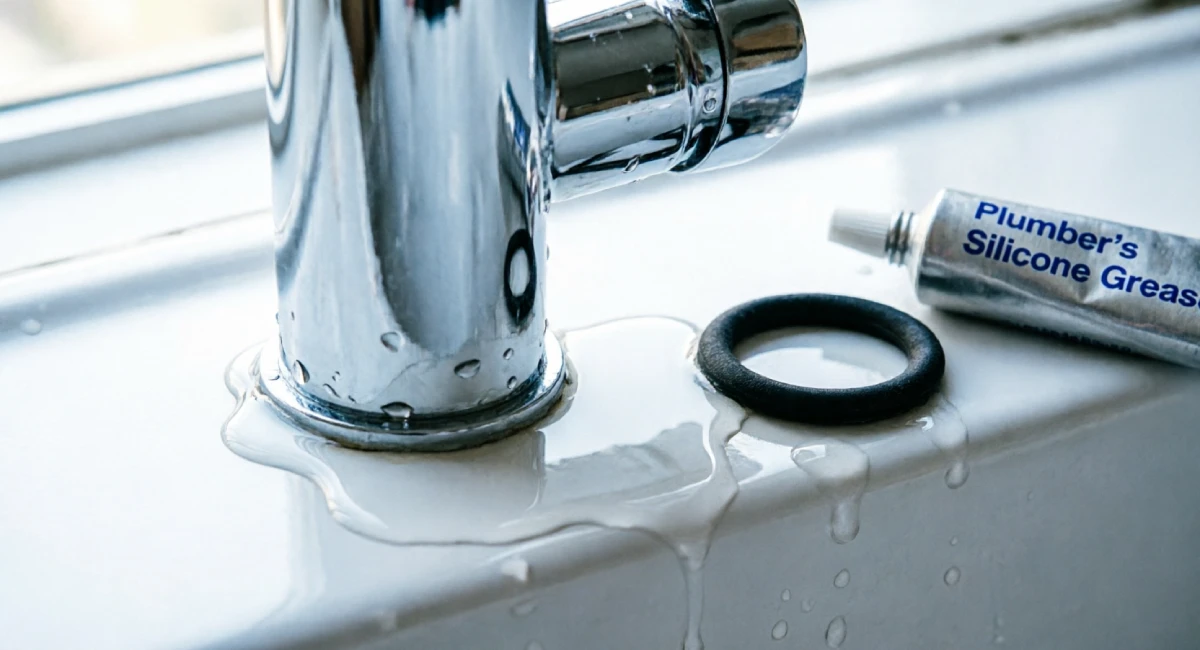
If water is gathering at the base of the tap rather than dripping from the spout, the problem is almost certainly a worn O-ring. The O-ring is a small rubber ring that seals the tap spindle where it passes through the tap body. Over time, this ring dries out, hardens, and loses its ability to seal.
The repair follows this sequence:
Step 1: Shut off the water supply and open the tap to release pressure.
Step 2: Remove the tap handle and headgear using the same method described in the washer section.
Step 3: With the spindle exposed, locate the O-ring. It sits in a groove around the spindle, usually near the lower section. There may be more than one O-ring on a single spindle.
Step 4: Ease the old O-ring out of its groove using a flathead screwdriver. Take care not to scratch the spindle.
Step 5: Match the replacement O-ring to the old one. It should sit snugly in the groove without being stretched or loose.
Step 6: Apply a thin coat of silicone-based plumber’s grease to the new O-ring before fitting it. Roll it into the groove until it sits evenly all the way around.
Step 7: Reassemble the tap, restore the water supply, and check the base for any moisture after a few minutes of normal use.
Why Plumber’s Grease Matters for O-Ring Repairs
Fitting a dry O-ring is one of the most common mistakes in basic tap repair. Without lubrication, the rubber experiences friction with every tap, and it wears down significantly faster than it should. A lubricated O-ring can last for years. A dry one may fail within months.
Use only silicone-based plumber’s grease. It is compatible with rubber and maintains a stable consistency over a wide temperature range.
Do not use petroleum jelly, general-purpose lubricating oil, or cooking oil. These products are not compatible with rubber and will cause the O-ring to swell, degrade, and fail prematurely. Silicone grease is inexpensive and available at any hardware store alongside the O-rings themselves.
Common Mistakes Beginners Make During Tap Repairs
Most failed tap repairs come down to one of a handful of avoidable errors. Being aware of them before you start is half the solution.
Overtightening fittings. This is the most common mistake. The headgear nut, retaining screw, and brass washer nut all need to be firm, not forced. Overtightening cracks the tap body, strips threads, and distorts rubber components. If something feels tight, stop. Snug is enough.
Using the wrong washer size. A washer that does not match the original will not seal correctly, regardless of how carefully the rest of the repair is done. Always measure or physically match before fitting a replacement.
Skipping the water shut-off. It seems obvious, but it happens. Even partially open isolation valves will release water pressure the moment the headgear is loosened. Always confirm the water is off by opening the tap and waiting for the flow to stop completely before proceeding.
Reassembling in the wrong order. Lay parts out in the exact sequence you removed them, left to right. Reassemble right to left. This simple habit prevents putting components back in the wrong position.
Forcing a stuck handle. Taps that have not been serviced in years can develop significant mineral bonding between the handle and spindle. Forcing with a lever or hammer risks cracking the handle or bending the spindle. Use slow, steady pressure and a twisting motion instead.
When a DIY Tap Repair Is Not the Right Option
Most dripping tap repairs are well within beginner capability. But there are a few situations where a plumber is genuinely the right call, and recognising them early prevents a straightforward job from turning into a costly problem.
Corroded valve seat. The valve seat is the surface inside the tap body that the washer presses against. If this surface is pitted or corroded, a new washer will not form a proper seal, and the drip will return quickly regardless of how carefully the repair was done. Valve seat grinding requires a specialist tool and some experience to do correctly.
Persistent leak after two full repairs. If you have replaced the washer or cartridge correctly and the drip returns within a few days, there is likely an underlying issue, such as a damaged valve seat or a hairline crack in the tap body, that goes beyond a standard component replacement.
Cross-threaded or stripped fittings. If the headgear nut does not thread smoothly, do not force it. Cross-threading the tap body causes permanent damage that may require the fixture to be replaced after all. Stop, assess, and get professional advice.
Leaks inside the wall. If you notice moisture behind the wall near the tap, discolouration on the plasterwork, or a leak that does not come from the tap itself, that is not a DIY repair. This requires locating and accessing concealed pipework, which goes well beyond basic tap maintenance.
Knowing when to stop is a skill in itself. Attempting a repair that falls outside your current ability costs more in the long run than calling a plumber at the right moment.
Conclusion
Fixing a leaking tap without replacing the whole fixture is one of the most practical home repair skills you can build. It saves money, reduces water waste, and builds confidence for tackling other small jobs around the home.
The process is the same every time: shut off the water, identify the tap type, remove the affected component, fit the correct replacement, and reassemble carefully. Whether it is a worn rubber washer, a failing cartridge, or a degraded O-ring, each repair follows a clear and repeatable sequence.
Work through this guide one section at a time, lay your parts out in order, and take your time. Most beginners complete a full washer or O-ring replacement in under thirty minutes on their first attempt.
If you manage to fix a leaking tap without replacing it using these steps, share this guide with someone else who might find it useful. And if the leak comes back after two careful attempts, that is the right time to bring in a professional. There is no loss in knowing where your limits are.