Your kitchen cabinets are dated, worn, or no longer your style. But a full replacement runs $5,000 to $25,000 — and that is before anyone touches the countertops or flooring.
- Why Updating Cabinets Instead of Replacing Them Makes Financial Sense
- Start With a Deep Clean — The Step Most People Skip
- How to Paint Kitchen Cabinets for a Long-Lasting Finish
- Swapping Out Cabinet Hardware — The Fastest Update You Can Make
- Cabinet Refacing — When You Want a Bigger Change Without Full Replacement
- Adding Trim, Molding, and Architectural Detail to Flat Cabinets
- Open Shelving — Replacing Some Upper Cabinets to Change the Whole Feel
- Contact Paper and Peel-and-Stick Solutions for Renters and Short-Term Fixes
- How to Update Kitchen Cabinets Without Replacing Them — Realistic Before and After Expectations
- Conclusion
The good news: you do not need to replace them. There are practical, budget-friendly ways to update kitchen cabinets without replacing them, and most are within reach for a confident weekend DIYer. No contractor required.
This guide walks you through every method worth trying — from a deep clean and a coat of paint to cabinet refacing and open shelving. By the end, you will know exactly which approach fits your kitchen, your skill level, and your budget.
Why Updating Cabinets Instead of Replacing Them Makes Financial Sense
Let’s put the numbers on the table first.
A full kitchen cabinet replacement in the United States typically costs between $5,000 and $25,000, depending on kitchen size, cabinet material, and whether you hire installation. In the UK and Canada, figures are similarly steep. That price tag includes demolition, disposal, new units, and labor.
Now compare that to a DIY cabinet refresh. A full paint job on a 10-cabinet kitchen costs roughly $100 to $300 in materials. New hardware runs $30 to $80. Add trim molding, and you are still well under $500 total.
The result? A kitchen that looks dramatically different for a fraction of the cost.
Cabinet boxes are almost always structurally sound for decades. The surfaces age first — the paint, the doors, and the hardware. And those are exactly the things you can change without touching the boxes at all.
This guide covers six practical methods: deep cleaning, painting, hardware replacement, refacing, trim work, and open shelving. You can use one or combine several. Either way, the results are real.
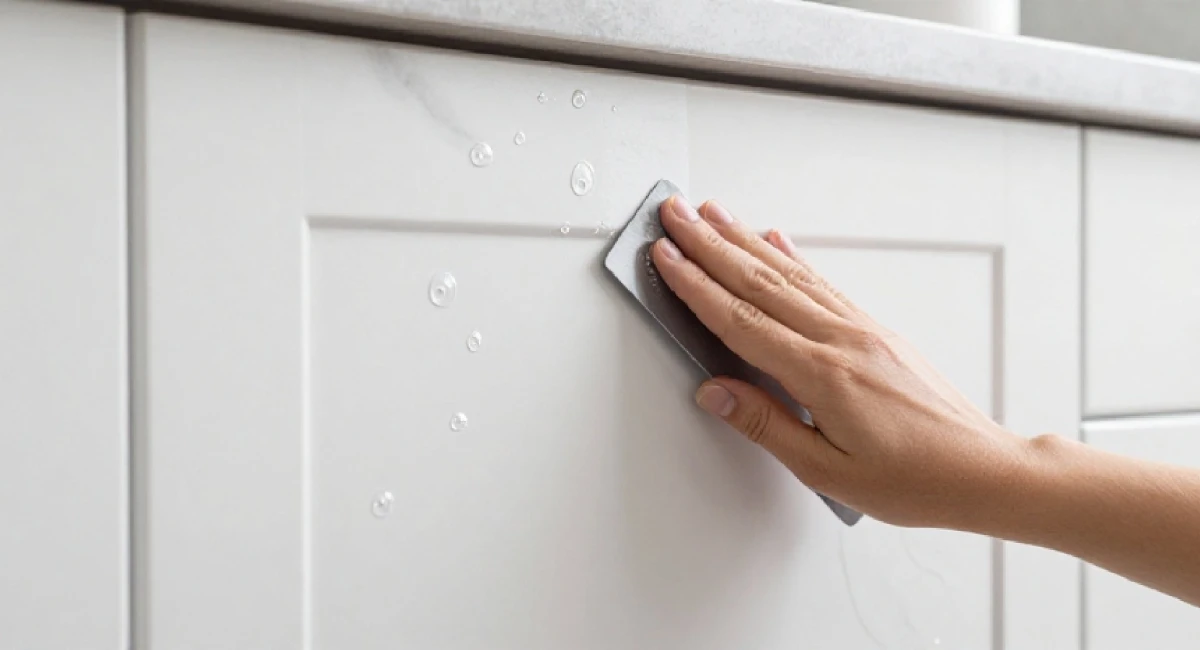
Start With a Deep Clean — The Step Most People Skip
Before you buy a single can of paint or a new handle, clean your cabinets properly. This step gets skipped more than any other, and it changes more than people expect.
Grease, cooking residue, and airborne oil build up on cabinet surfaces over months and years. This layer makes your cabinets look dull and feel slightly sticky. It also causes paint to peel, primer to fail, and new hardware to look off against a grimy surface.
A proper cleaning takes about two hours and costs almost nothing. Use a TSP substitute (trisodium phosphate substitute) mixed with warm water for painted or primed surfaces. For heavier grease, a dedicated kitchen degreaser works faster. Standard dish soap cut with hot water handles light residue well.
Wipe in sections, rinse with a clean, damp cloth, and let the surfaces dry completely before doing anything else.
You may be surprised. Cabinets that looked beyond saving sometimes look quite good after a thorough cleaning. At a minimum, you are starting from a clean base — and every method that follows depends on it.
What to Use on Different Cabinet Materials
Different cabinet materials need slightly different approaches:
- Wood veneer: TSP substitute solution or a mild degreaser. Wipe with the grain. Dry immediately to avoid moisture soaking in.
- MDF: Use a damp cloth, not a wet one. Excess water causes MDF to swell at edges and corners. Work quickly and dry thoroughly.
- Thermofoil: Warm soapy water only. Avoid anything abrasive or solvent-based, which can lift the film at the edges.
- Laminate: Mild degreaser or dish soap. Skip steel wool or abrasive pads — they scratch the surface and make it harder to paint later.
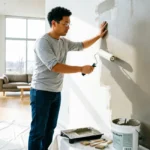
How to Paint Kitchen Cabinets for a Long-Lasting Finish
Painting is the highest-impact change you can make to kitchen cabinets, and it is more doable than most people think. The key is preparation. Rush the prep, and the finish will show it within a year. Do it properly, and your cabinets can look factory-fresh for years.
Here is the process that works:
- Remove all doors and drawer fronts. Paint them flat on sawhorses or a drop cloth. Trying to paint cabinet doors while still attached produces drips and uneven coverage.
- Sand lightly. You are not stripping the surface — just scuffing it so primer can grip. 120 to 150 grit sandpaper is enough. Wipe away all dust with a tack cloth afterward.
- Prime with an oil-based or shellac-based primer. This is the step most beginners skip, and it is the most important one. Water-based primers raise the wood grain and can cause bleed-through on older painted surfaces. Oil-based primer blocks stains, bonds better, and gives you a smoother topcoat.
- Apply thin coats of cabinet-grade enamel. Two to three thin coats outperform one thick one every time. Cabinet enamel levels out to a hard, semi-gloss finish that holds up to daily use. Chalk paint is a popular alternative — it requires less prep but needs a topcoat of wax or clear enamel to be durable. Standard latex wall paint is not recommended for cabinets; it chips too easily.
- Allow full cure time. Paint may feel dry to the touch in hours, but full hardness takes two to four weeks. Treat your cabinets gently during that period.
Common beginner mistakes: using a cheap brush (bristle marks everywhere), skipping the primer (peeling within months), and rehanging doors before the paint is fully cured (the doors stick to the frame).
Best Paint Colors for a Kitchen That Feels Larger and Brighter
Color choice matters more than most people expect. Here are directions that work well:
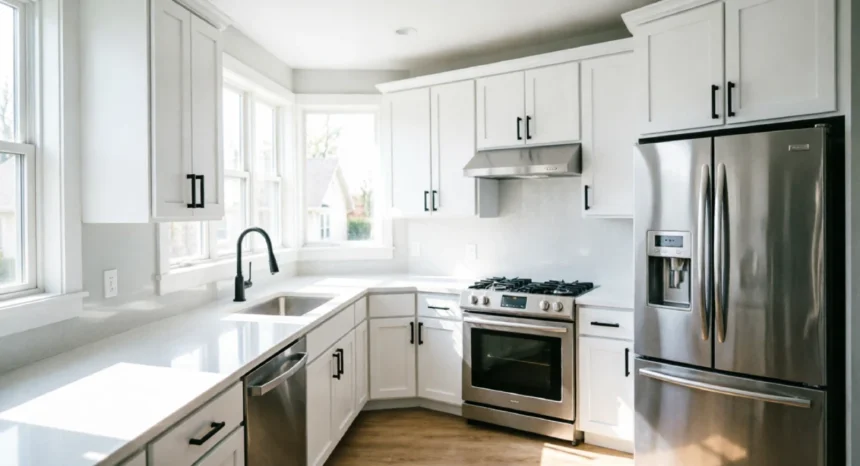
- Crisp white: Benjamin Moore Chantilly Lace and Sherwin-Williams Extra White are two top picks for a clean, airy result. White reflects light and makes a small kitchen feel noticeably larger.
- Soft gray or greige: A greige (gray-beige) like Sherwin-Williams Agreeable Gray reads as neutral and pairs easily with most countertops and flooring. It works especially well in kitchens with warm wood tones or cream-colored countertops.
- Navy or deep green on lower cabinets: Two-tone cabinets add depth and personality at low cost. Paint uppers white or light gray and lowers a deep navy or forest green. The contrast works in most kitchen sizes.
Lighter colors generally make a kitchen feel bigger. Darker colors add weight and intention — which works well for larger kitchens or as an accent.
How Long Does a Painted Cabinet Finish Actually Last?
With proper preparation and good-quality paint, a cabinet paint job lasts between five and ten years before it needs repainting or touch-up.
Factors that shorten that lifespan: humidity (kitchens near a stove generate a lot of steam), how often you clean the surfaces, and whether you use the right products. Cheap paint on an unprimed surface may start showing chips within a year or two.
To extend the life of your finish: wipe spills quickly, avoid scrubbing with abrasive pads, and touch up small chips before they spread. A cabinet finish is not permanent, but it is far more durable than most people expect when done right.
Swapping Out Cabinet Hardware — The Fastest Update You Can Make
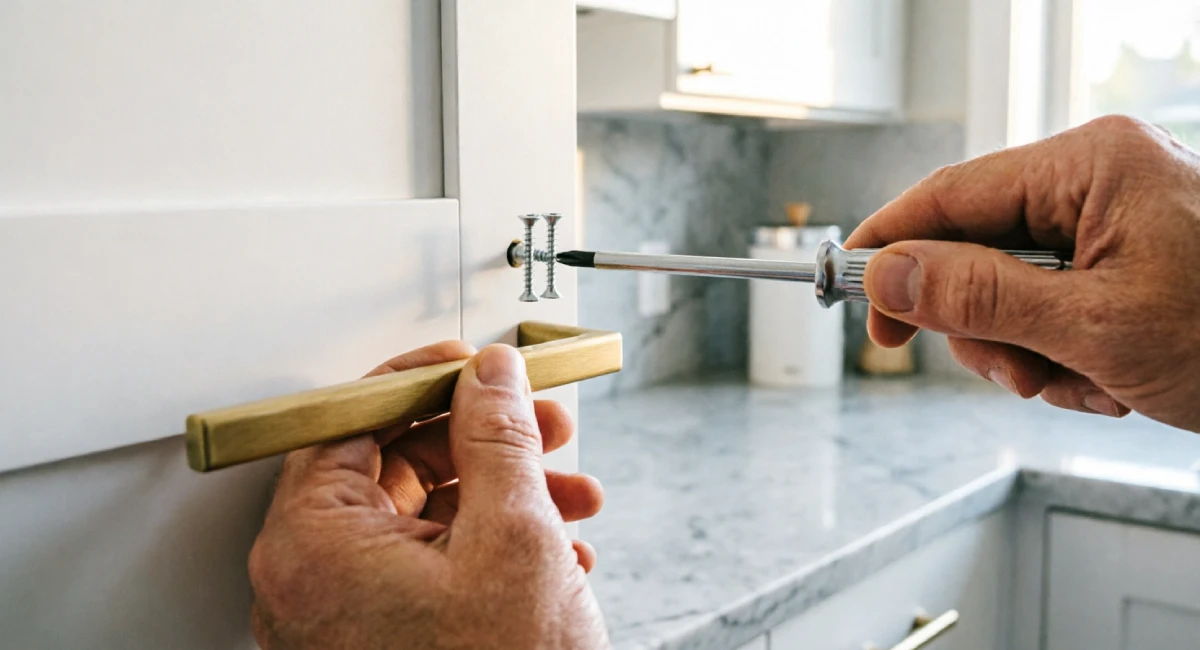
If you want the fastest visible change for the least amount of money, new handles and knobs are it. A full set of cabinet hardware for a kitchen of ten cabinets typically costs between $30 and $80, depending on style and finish.
The visual difference is immediate. Hardware is one of the first things a person notices when they walk into a kitchen.
When choosing hardware, match the style to your cabinet doors:
- Shaker cabinets (recessed panel) suit bar pulls and simple cup pulls. Minimal and clean.
- Flat-panel cabinets can handle bolder hardware — a longer bar pull adds visual definition to an otherwise plain surface.
- Traditional cabinets (raised panel, ornate detail) pair well with knobs or bin pulls in warmer finishes like brushed brass or oil-rubbed bronze.
Before you order, check your existing hole spacing. Most kitchen hardware uses a 3-inch (76mm) center-to-center spacing for smaller pulls, or 5-inch (128mm) for longer bar pulls. Measure the distance between the two screw holes on your current hardware before buying anything new. This saves a return trip to the store.
Which Hardware Finishes Are Working Well Right Now
The finish you choose sets the tone for the whole kitchen:
- Matte black: Works with white, gray, navy, and greige cabinets. Modern and sharp. Shows water spots in high-humidity kitchens but wipes clean easily.
- Brushed brass: Adds warmth and works well with white or dark cabinets. More forgiving of fingerprints than polished brass.
- Satin nickel: The most neutral option. Pairs with almost any cabinet color and does not draw attention to itself — which can be exactly what you want.
- Unlacquered brass: Develops a natural patina over time. Works well in kitchens going for a lived-in or vintage look. Requires occasional polishing if you want to keep it bright.
For family kitchens with young children, satin nickel and brushed brass show fewer fingerprints than matte black. Worth factoring in before you commit.
How to Fill Old Hardware Holes If Your New Handles Do Not Line Up
This is a common problem and an easy fix.
If your new hardware uses a different hole spacing, you have two options:
Wood filler: Fill the old holes with a paintable wood filler, let it dry fully, sand smooth, prime, and paint. Once painted over, the old holes are invisible. This is the cleanest solution if you are painting the cabinets anyway.
Back plates: A decorative back plate sits behind the handle and covers the original holes without any filling required. This works well if you are not painting, and it adds a subtle decorative layer to the hardware itself. Make sure the back plate is large enough to cover the old hole positions before you order.
Cabinet Refacing — When You Want a Bigger Change Without Full Replacement
Cabinet refacing sits between a paint job and a full replacement. It involves replacing the cabinet doors and drawer fronts while leaving the existing cabinet boxes in place.
The result looks like a brand-new kitchen to anyone who does not know what they are looking at. The bones stay; the face changes completely.
Refacing makes sense when:
- Your cabinet boxes are structurally solid (no rot, no warping, no serious water damage)
- Your current doors are peeling, damaged, or dated beyond what paint can fix
- You want a style change that goes further than color alone — switching from flat-panel to shaker, for example
Cost-wise, professional cabinet refacing typically runs between $1,000 and $6,000, depending on kitchen size, door material, and whether you hire it out or do it yourself. That is still significantly less than a full replacement.
DIY refacing kits are available from home improvement retailers. They include replacement doors, drawer fronts, and veneer strips for the cabinet boxes. The process requires careful measuring, basic tools, and patience — but it is achievable over a weekend for someone comfortable with DIY work.
Veneer Sheets vs. New Cabinet Doors — Which Approach Works Better
These are two distinct options within refacing:
Peel-and-stick veneer sheets cover the face frames and sides of existing cabinet boxes. They are cheaper (often $50 to $150 for a full kitchen) and fully DIY-friendly. The downside is durability — veneer can lift at edges in humid kitchens and does not hold up as well as solid doors over time.
Replacement cabinet doors give a cleaner, more durable result. You can order custom-sized doors from cabinet suppliers, online retailers, or even IKEA (their door panels work with many standard cabinet box sizes). The finish looks far more professional.
To measure for replacement doors accurately: measure the cabinet opening width and height, then add the overlay amount (typically 1/2 inch per side for standard overlay hinges). Double-check every opening individually — cabinet openings in the same kitchen are often slightly different sizes.
Adding Trim, Molding, and Architectural Detail to Flat Cabinets
Most builder-grade flat-panel cabinets look plain and generic. A small amount of trim molding changes that entirely.
The most popular approach is creating a faux-Shaker look by gluing thin panel molding (also called lattice strip or screen molding) in a rectangular pattern on the face of each cabinet door. The result, once painted, is nearly indistinguishable from a factory-made Shaker door.
Here is what you need:
- Thin panel molding or lattice strip (available at any home improvement store)
- Wood glue and a brad nailer or finish nails
- A miter saw for clean corner cuts (a hand saw with a miter box works too)
- Sandpaper (120 grit), wood filler for nail holes, and paintable caulk for the trim joints
- Primer and paint to finish
Material cost for a 10-cabinet kitchen typically runs under $100. The labor is time, not money.
The process: measure and cut your molding to form a rectangle inside each door panel, leaving an even border around the outside edge. Glue and nail each piece in place. Fill nail holes, caulk the joints between the molding and the door face, sand smooth, prime, and paint. The paint ties everything together and makes the trim look built-in.
Crown Molding on Top of Cabinets — Is It Worth It?
Crown molding above upper cabinets is a separate project, and whether it is worth the effort depends on your kitchen layout.
If your cabinets reach the ceiling, crown molding serves as a finished cap that closes the gap cleanly and makes the cabinets look intentional and built-in. This is a polished detail that adds real visual value.
If your cabinets do not reach the ceiling, you have a choice. Add crown molding at the top of the cabinets to create a deliberate design detail and use the space above for open display. Or run a soffit above to close the gap entirely.
Difficulty-wise: crown molding involves compound miter cuts, which take some practice. A confident DIYer can learn this over a weekend. A beginner may want to start with simpler door trim first and come back to crown molding as a second project.
Open Shelving — Replacing Some Upper Cabinets to Change the Whole Feel
Removing one or two upper cabinet doors — or replacing a full section of uppers with open shelves — opens up a kitchen like few other changes can. The ceiling feels higher, the room feels wider, and the space feels less closed-in.
This is one of the more involved options on this list, but done well, open shelving adds character and function. Done carelessly, it adds clutter.
For shelf material, you have a few solid choices:
- Solid wood: Pine, oak, or walnut cut to depth and stained or painted. Durable and looks genuinely custom.
- MDF with edge banding: Cheaper than solid wood and easy to paint. Not ideal for very heavy loads.
- Floating shelf brackets with a timber top: The easiest install. Brackets anchor into studs; the shelf sits on top. Widely available in different lengths.
For styling open shelves without them looking chaotic, stick to a limited color palette for your dishes and storage. Group items intentionally. Leave some breathing room on each shelf. Treat the shelves like a display, not a dumping ground.
When Open Shelving Is Not the Right Call
Open shelving is not for everyone, and it is worth being honest about that.
If you have young children who reach for shelves, items get knocked down. If you cook frequently with oils and spices, open shelves gather grease and dust faster than closed cabinets. And if you prefer a tidy, contained kitchen without visible clutter, open shelves may feel like constant work to maintain.
In those cases, stick with closed cabinets and focus your energy on painting, hardware, and trim instead.
Contact Paper and Peel-and-Stick Solutions for Renters and Short-Term Fixes
If you are renting, or if you want a reversible change with no long-term commitment, contact paper is worth taking seriously. It has improved significantly in recent years — the wood-grain, marble, and solid-color options available now look far more convincing than the vinyl sheets of a decade ago.
Contact paper works best on:
- Flat-panel cabinet doors (smooth, even surfaces bond better)
- Cabinet interiors and drawer liners
- Any surface where you want a quick, removable update
The limitations are real and worth knowing upfront. Contact paper tends to peel at the edges in humid environments — and kitchens generate constant steam. It is not a five-year solution. Think of it as a one-to-two-year update, particularly if your kitchen gets heavy daily use.
For a bubble-free application:
- Clean the surface thoroughly and let it dry completely.
- Cut the contact paper slightly larger than the surface.
- Peel back a few inches of backing and start from one edge, pressing down and smoothing as you go.
- Use a credit card or squeegee to push air bubbles toward the nearest edge.
- Trim the excess cleanly with a craft knife and ruler.
Bubbles that appear after application can often be worked out with a hair dryer on low heat, which softens the adhesive temporarily.
How to Update Kitchen Cabinets Without Replacing Them — Realistic Before and After Expectations
Each method in this guide delivers real results, but the degree of transformation varies. It helps to go in with clear expectations.
Here is a straightforward comparison across three effort levels:
Minimal effort (clean + new hardware): Cabinet structure and color stay the same, but the kitchen looks noticeably fresher. Good choice for cabinets in decent condition that just feel dated. Expect a subtle but pleasing improvement, not a dramatic transformation. Cost: $30 to $100.
Moderate effort (clean + paint + new hardware): This is where the real shift happens. The color change alone transforms the mood of the entire room. Adding new hardware on top of a fresh paint color delivers a result that most guests will assume costs far more than it did. Cost: $150 to $400.
Full DIY refresh (paint + hardware + trim + open shelving or refacing): This level delivers a kitchen that genuinely looks renovated. The cabinet boxes are the same, but almost nothing else is. Cost: $400 to $800, depending on kitchen size and material choices.
What these methods cannot fix: structural damage to the cabinet boxes, significant warping, rotting wood behind the veneer, or doors that no longer hang straight due to frame damage. If the boxes themselves are compromised, replacement is worth the cost. But in most kitchens, the boxes are perfectly sound — only the surface needs attention.
Combining Methods for the Best Result on a Tight Budget
If your budget is limited, here is the order that delivers the most visual return per dollar spent:
- Deep clean: Free. Sets a clean base for everything that follows.
- Paint: $100 to $300. The single highest-impact change you can make.
- Swap hardware: $30 to $80. Adds a finishing detail that makes the paint job feel intentional.
- Add trim molding: $50 to $100. Takes flat, plain doors and makes them look custom.
For a rough budget breakdown on a standard 10-cabinet kitchen:
| Task | Estimated Cost |
|---|---|
| Cleaning supplies | $10 to $20 |
| Primer and cabinet paint | $80 to $180 |
| Brushes, rollers, drop cloths | $25 to $40 |
| New hardware (10 cabinets) | $30 to $80 |
| Trim molding and supplies | $50 to $100 |
| Total | $195 to $420 |
That is the realistic range for a proper, lasting kitchen refresh. Not a patch job — a real, visible improvement.
Conclusion
There is no single right way to update kitchen cabinets without replacing them. The best approach depends on your current cabinets, your budget, and how much time you want to spend. You have genuine options — from a $30 hardware swap that takes an afternoon to a full weekend paint and trim project that transforms the entire room.
Start with whichever step fits where you are right now. Clean the cabinets properly. Pick up a set of new handles. Roll on one coat of primer and see how it feels. Small steps add up fast in a kitchen, and each one builds confidence for the next.
Try one method this weekend and see the difference for yourself. And if you want to keep going with budget-friendly home improvements, check out the full guide on which simple DIY projects add the most value to a home.