What Are the Easiest Home Repairs for Beginners to Learn First?
Moving into a new home or rental is exciting right up until something breaks. A dripping faucet, a hole in the wall, a door that screams every time you open it — small problems that feel a lot bigger when you have no idea where to start. The good news is that learning the easiest home repairs for beginners does not require a trade licence or a garage full of tools.
- Why Learning Basic Home Repairs Is Worth Your Time
- What Every Beginner Needs Before Touching Anything
- The 8 Easiest Home Repairs for Beginners to Learn First
- Repair 1 — Patching Small Holes in Drywall
- Repair 2 — Fixing a Running or Leaking Toilet
- Repair 3 — Unclogging a Slow Drain Without Chemicals
- Repair 4 — Replacing a Broken Electrical Outlet or Switch Cover
- Repair 5 — Sealing Gaps Around Windows and Doors With Caulk
- Repair 6 — Fixing a Squeaky Door Hinge
- Repair 7 — Replacing a Showerhead
- Repair 8 — Repairing a Loose Cabinet Door or Handle
- Simple DIY Repairs You Can Prevent With Regular Home Maintenance
- Building Your Skills: What to Learn After These Basics
- Start Small, Build From There
This guide walks you through eight common household fixes, each one chosen because it is low risk, requires minimal equipment, and shows up in almost every home at some point. For each repair, you will know exactly what tools to grab, how hard it actually is, what to watch out for, and when the smartest move is to put the wrench down and call someone.
No jargon. No filler. Just clear steps that work.
Why Learning Basic Home Repairs Is Worth Your Time
Calling a tradesperson for every small household problem adds up quickly. A basic plumbing callout can cost anywhere from $80 to $200 before any work is done, and minor drywall patches or squeaky door fixes often run $100 or more for labour alone. Handling those same jobs yourself takes less than an hour and costs a few dollars in materials.
Beyond the money, there is a practical benefit that is easy to underestimate: speed. When a drain clogs on a Sunday evening or a toilet starts running at midnight, you will not be waiting two days for a tradesperson. You can fix it now.
There is also a confidence factor. Each small repair you complete makes the next one less intimidating. Basic home maintenance is a skill that compounds over time, and the eight repairs in this guide are the best starting point.
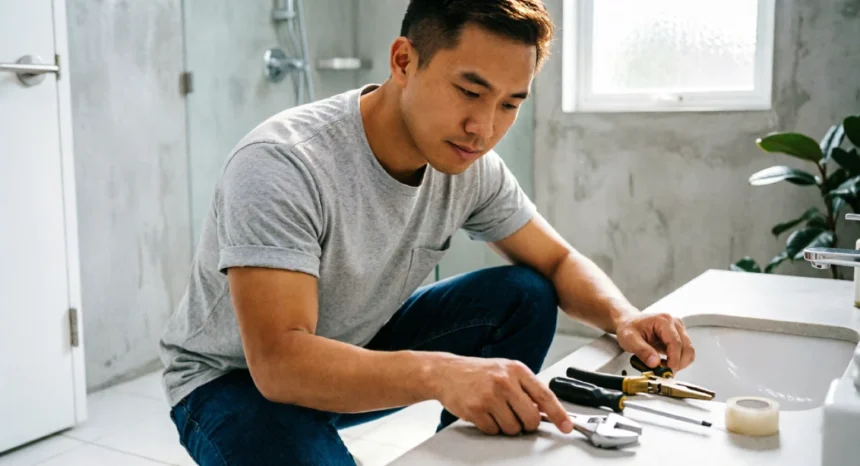
What Every Beginner Needs Before Touching Anything
You do not need a fully stocked workshop to handle the repairs in this guide. A modest starter kit covers most situations, and every item on this list is available at hardware stores or general retailers for a reasonable price.
Here is what belongs in every beginner’s toolkit:
- Hammer — for driving nails, tapping in anchors, and removing hinge pins
- Phillips and flathead screwdrivers — most household screws use one of these two heads
- Utility knife — for scoring caulk, cutting materials, and precision trimming
- Tape measure — essential for buying the right size replacement parts
- Adjustable pliers — grips fittings and pipes without needing multiple wrench sizes
- Level — keeps shelves and frames straight
- Cordless drill with basic bits — speeds up most screwdriving tasks significantly
- Putty knife — for applying filler, spackle, and scraping surfaces clean
If budget is a concern, start with the screwdrivers, utility knife, pliers, and putty knife. Add the drill and level once you are comfortable with the basics.
Safety Basics That Apply to Every Repair on This List
Before any repair, build these habits:
- Turn off the electrical circuit breaker before touching any outlet or switch cover, even for cosmetic fixes
- Shut off the water supply valve before working on any plumbing connection
- Know where your main water shutoff and electrical panel are located before you need them urgently
- Wear work gloves when handling tools, materials, or anything that may have residue from chemical products
- Put on safety glasses when sanding, drilling, or cutting anything overhead
These are not dramatic precautions. They are fast, simple steps that make every repair on this list safer and more straightforward.
The 8 Easiest Home Repairs for Beginners to Learn First
Every repair below was chosen using the same three criteria: it is common in average homes, it requires minimal tools, and it carries a low risk of making things worse if you follow the steps carefully.
Each entry includes a difficulty rating, the exact tools you need, a safety note, and a clear signal for when to stop and bring in a professional. Work through one at a time and build from there.
Repair 1 — Patching Small Holes in Drywall
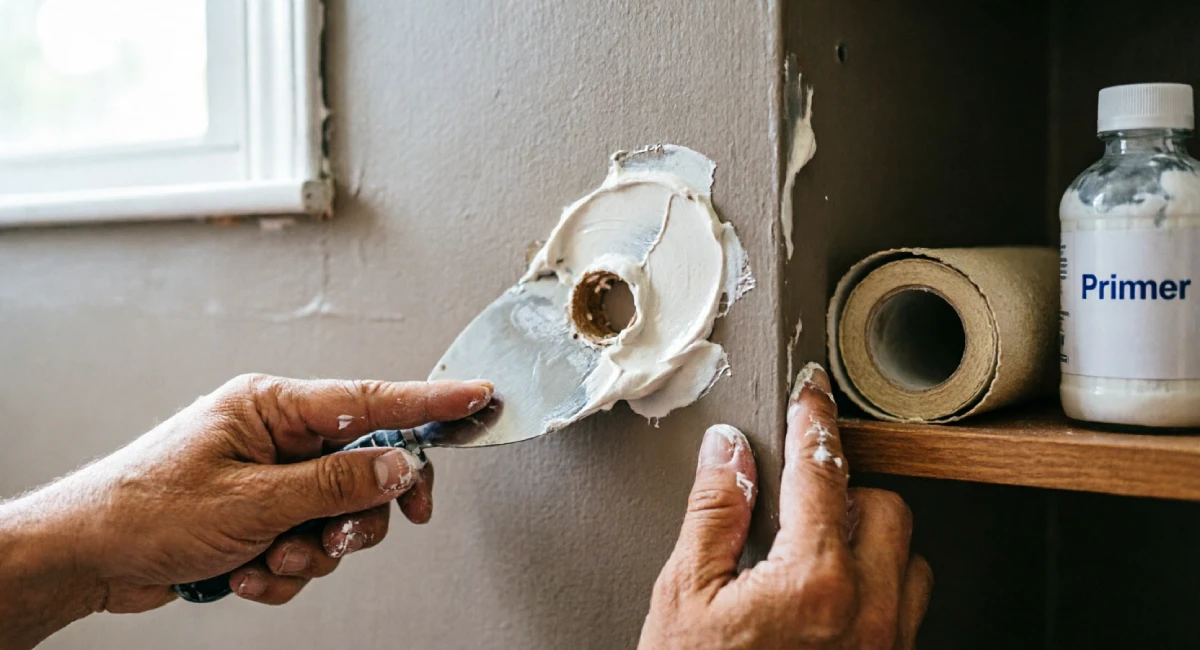
Most walls collect small holes over time from picture hooks, door handles, or minor impacts. A nail hole or dent up to about 5cm (2 inches) across is straightforward to patch with spackle or lightweight joint compound, both of which are available at any hardware store for a few dollars.
Here is the process:
- Clean the area around the hole. Remove any loose drywall paper or crumbling edges with a putty knife.
- Apply a thin layer of spackle using the putty knife, pressing it firmly into the hole and drawing it flat across the surface.
- Let it dry fully. This usually takes 30 to 60 minutes, depending on the product and humidity.
- Sand lightly with 120-grit sandpaper until the surface is flush with the surrounding wall.
- Apply a second thin coat if the patch has shrunk slightly. Sand again once dry.
- Prime the patched area before painting so the colour matches evenly.
The key mistake most beginners make is applying one thick coat. Spackle shrinks as it dries, so two thin coats give a flatter, more invisible result every time.
Difficulty Level, Tools, and Safety Notes
Difficulty: Easy
Tools needed: Putty knife, fine-grit sandpaper, pre-mixed spackle or joint compound, primer, and matching paint
Safety note: Wear a dust mask when sanding, especially in a closed room. Drywall dust is fine and irritates the respiratory system with repeated exposure. Open a window if possible.
When to Call a Professional
If the hole is larger than your fist, the wall surface feels soft or spongy, or you notice dark staining or a musty smell around the damaged area, do not patch over it. A hole that large often needs a mesh patch and proper joint compound work, and soft or discoloured drywall is frequently a sign of water damage or mould behind the wall. A drywall specialist can assess and fix it without covering up a bigger problem.
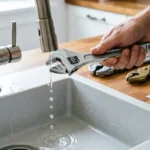
Repair 2 — Fixing a Running or Leaking Toilet
A toilet that keeps running after you flush is one of the most common small home fixes people ignore. The sound is annoying, but the real cost is water: a constantly running toilet can waste 200 litres or more per day, which shows up directly on your water bill.
The cause is almost always one of two things: a worn flapper or a float set too high.
Fixing a faulty flapper: The flapper is the rubber valve at the bottom of the tank that seals water in until you flush. If it warps or cracks, water trickles continuously into the bowl.
- Turn off the water supply valve behind the toilet at the base of the wall.
- Flush to empty the tank.
- Disconnect the old flapper from the overflow tube and the chain from the flush handle arm.
- Take the old flapper to the hardware store to match the size, or buy a universal replacement.
- Attach the new flapper, reconnect the chain (leave a small amount of slack), and turn the water back on.
- Flush and check that the flapper seats cleanly and the running stops.
Fixing a float set too high: If the water level is above the overflow tube, water drains into it constantly.
- Locate the float — it is either a large ball on an arm or a cylinder around the fill valve.
- Adjust it downward by bending the float arm slightly (ball type) or turning the adjustment screw or clip (cylinder type) until the water level sits about 2.5cm (1 inch) below the top of the overflow tube.
Difficulty Level, Tools, and Safety Notes
Difficulty: Easy to Moderate
Tools needed: Adjustable wrench (for supply valve if stiff), replacement flapper, rubber gloves
Safety note: Always shut off the supply valve before opening the tank. There is no electrical risk, but the tank water is not clean. Gloves keep the process hygienic.
When to Call a Professional
If the toilet rocks when you sit on it, the floor around the base feels soft, or water pools at the base of the toilet rather than inside the tank, the problem is likely a failed wax ring seal or damaged subfloor. Both involve removing the toilet entirely and are firmly in licensed plumber territory.
Repair 3 — Unclogging a Slow Drain Without Chemicals
Slow drains are almost always caused by a buildup of hair, grease, or soap residue in the pipe close to the drain opening. Chemical drain cleaners are widely sold, but they are corrosive and can weaken pipe joints over time. There are better methods that work just as well without the risks.
Method 1: Plunger Use a cup plunger (the flat-bottomed type) for sinks and tubs. Cover the drain opening fully, press down to form a seal, and pump firmly 8 to 10 times. Lift sharply to break the seal. Repeat two or three times. Run hot water to check the flow.
Method 2: Drain snake. Feed the snake cable into the drain opening and turn the handle clockwise as you push it in. When you feel resistance, you have hit the clog. Turn and pull back to break it up or pull it out. Run water to confirm the blockage is clear.
Method 3: Cleaning the P-tra.p Place a bucket under the curved pipe beneath the sink. Unscrew the slip nuts on each end of the P-trap by hand or with adjustable pliers. Remove the trap, empty it into the bucket, clear out any debris, and reinstall it. Run water to test.
For regular maintenance, pour a cup of baking soda followed by a cup of white vinegar down the drain monthly. Let it fizz for 15 minutes, then flush with hot water. This keeps organic buildup from accumulating.
Difficulty Level, Tools, and Safety Notes
Difficulty: Easy
Tools needed: Cup plunger, drain snake, adjustable pliers, bucket, rubber gloves
Safety note: Always wear gloves for drain work. If the drain previously had a chemical cleaner poured into it, the residual product can cause skin and eye irritation. Flush the drain with water before using a plunger or snake in that situation.
When to Call a Professional
If two or more drains in the house slow down at the same time, or if you hear gurgling from the toilet when water drains from the sink, the blockage is not at the drain level. It is in the main sewer line, and that requires a licensed plumber with specialist equipment.
Repair 4 — Replacing a Broken Electrical Outlet or Switch Cover
This repair covers the cover plate only. The wiring behind the outlet or switch is not part of this task. If the plate is cracked, yellowed, or broken, replacing it is a purely cosmetic fix that takes about five minutes.
- Go to your electrical panel and switch off the circuit breaker for that room.
- Use a non-contact voltage tester near the outlet to confirm no current is present. These testers are inexpensive and worth owning.
- Unscrew the centre screw on the old cover plate and pull it away from the wall.
- Take the old plate to the hardware store to match the style and size, or measure the opening before you go.
- Place the new cover over the outlet or switch, align the screw hole, and tighten the screw until snug. Do not overtighten — the plate will crack.
- Switch the breaker back on and test the outlet or switch.
Most standard cover plates cost under two dollars and are available in a wide range of finishes to match your existing fittings.
Difficulty Level, Tools, and Safety Notes
Difficulty: Very Easy
Tools needed: Flathead screwdriver, non-contact voltage tester
Safety note: Always switch off the circuit breaker first, even for a cover plate. Testing with a voltage tester before touching anything is a two-second step that removes all electrical risk from this task.
When to Call a Professional
If you remove the cover plate and notice scorch marks, melted plastic, a burning smell, or wiring that appears loose, frayed, or discoloured, replace the cover plate, switch the breaker back off, and contact a licensed electrician. These are signs of overheating or a wiring fault, and neither is safe to investigate without proper training.
Repair 5 — Sealing Gaps Around Windows and Doors With Caulk
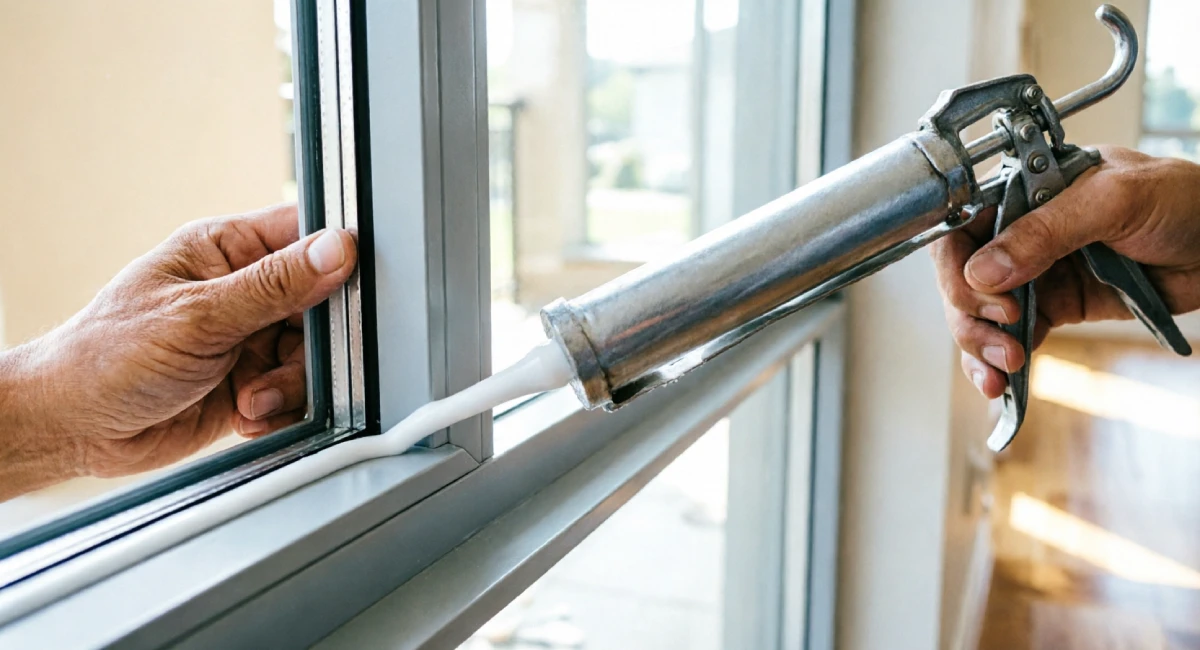
Small gaps between window frames, door surrounds, and the surrounding wall let outside air in and conditioned air out. Over a full year, that loss adds up to a measurable increase in heating and cooling costs. Sealing them with caulk is one of the highest-value small home fixes you can make for the least effort.
Step 1: Remove old cau.lk Use a utility knife or caulk removal tool to cut and peel away any existing caulk that is cracked, peeling, or pulling away from the surface. The new caulk will not bond well over the old product.
Step 2: Clean the surface. Wipe down both surfaces with a damp cloth and let them dry fully. Caulk applied to a damp or dusty surface will not adhere properly.
Step 3: Apply painter’s tape.e Run tape along both sides of the gap for a clean, straight line. This is an option, al but it makes the result look much more professional.
Step 4: Load and apply. Cut the caulk tube tip at a 45-degree angle and load it into the caulk gun. Apply steady, even pressure as you draw the gun along the gap in one continuous motion. Aim for a consistent bead — do not stop and start repeatedly.
Step 5: Smooth and finish. Run a wet finger or a caulk-smoothing tool along the bead immediately after application. Remove the painter’s tape before the caulk skins over (within a few minutes). Allow it to cure fully before painting over it — check the product label for timing.
Difficulty Level, Tools, and Safety Notes
Difficulty: Easy
Tools needed: Caulk gun, caulk (latex for interior, silicone or paintable exterior caulk for outside), utility knife, painter’s tape
Safety note: Silicone-based caulk produces fumes during application. Work with a window open and avoid prolonged skin contact with uncured product. Latex caulk is easier to work with and cleans up with water — a good choice for beginners starting indoors.
When to Call a Professional
Caulk addresses surface gaps only. If the gap is large, keeps opening back up after you seal it, or the surrounding frame is visibly warped, rotted, or pulling away from the wall, the structural cause needs attention first. A general contractor can assess whether the frame needs repair or replacement before you seal over it.
Repair 6 — Fixing a Squeaky Door Hinge
A squeaky hinge is almost always caused by friction between the hinge pin and the barrel it sits in. The fix takes less than ten minutes and costs nothing if you already have petroleum jelly, bar soap, or a general-purpose lubricant in the house.
Step 1: Try the no-removal method first. Apply a small amount of petroleum jelly, bar soap, or WD-40 directly to the top of the hinge while the door is open, then move the door back and forth to work the lubricant down into the barrel. For many squeaks, this is all it takes.
Step 2: Remove and clean the hinge pin.n If the squeak persists, tap the hinge pin upward from the bottom using a flathead screwdriver and a hammer. Pull it out fully. Wipe it clean with a cloth, apply a fresh coat of petroleum jelly along its length, and reinsert it. Tap it back down gently until seated.
Bonus fix: Tighten loose hinge screws If the hinge has pulled slightly away from the door frame, the. screws may have stripped the wood. Replace stripped screws with slightly longer ones of the same gauge, which will catch fresh wood and hold firmly. If the holes are badly worn, pack them with wooden toothpicks and a small amount of wood glue, let it dry, then reinsert the original screws.
Difficulty Level, Tools, and Safety Notes
Difficulty: Very Easy
Tools needed: Hammer, flathead screwdriver, lubricant (petroleum jelly, bar soap, or WD-40)
Safety note: Hold the door steady or use a door wedge while removing the hinge pin. An unsupported door can shift unexpectedly. There are no chemical hazards with any of the lubricants listed.
When to Call a Professional
If the door drags on the floor, the frame is visibly out of square, or the hinge screws spin freely regardless of replacement size, the frame itself may have shifted. This can happen due to settling, moisture damage, or structural movement. A carpenter should inspect and rehang the door properly rather than patching a deeper alignment problem.
Repair 7 — Replacing a Showerhead
Replacing a showerhead is one of the more satisfying beginner repairs because the result is immediately noticeable and the process is simple. Most standard showerheads use a universal threaded connection, which means no specialist knowledge is needed.
- Turn off the shower at the tap. You do not need to shut off the main water supply for this job.
- Wrap a cloth around the existing showerhead where the wrench will grip — this protects the finish from scratches.
- Use an adjustable wrench to turn the showerhead counterclockwise and unscrew it from the arm. It should come free with moderate effort.
- Remove any remaining thread tape from the arm threads using your fingers or a cloth. Inspect the threads for damage or corrosion.
- Wrap three to four layers of PTFE thread tape (also called plumber’s tape) clockwise around the arm threads. This creates a watertight seal for the new connection.
- Screw the new showerhead on by hand first, turning clockwise, until snug. Then tighten with the wrench using the cloth buffer — one quarter to half a turn past hand-tight is enough.
- Turn the shower on and check for leaks at the connection point. If water drips from the joint, tighten slightly more.
Difficulty Level, Tools, and Safety Notes
Difficulty: Easy
Tools needed: Adjustable wrench, PTFE thread tape, soft cloth
Safety note: Turn the shower off before starting. Dry your hands before testing the new showerhead. PTFE tape is non-toxic and simple to handle.
When to Call a Professional
If the shower arm inside the wall is corroded, if water leaks from the wall rather than the connection point, or if the arm threads are damaged and the new showerhead does not seat properly, stop. Wall-side plumbing repairs involve opening the structure and are not beginner territory.
Repair 8 — Repairing a Loose Cabinet Door or Handle
Loose cabinet doors and handles are among the most common small home fixes in any kitchen or bathroom. They rarely require new parts and usually take under 15 minutes to sort out properly.
Tightening loose hinges: Open the door and inspect each hinge. If the screws turn without gripping, the wood holes have stripped. Pack the hole with two or three wooden toothpicks coated in wood glue, let the glue cure for an hour, then trim the toothpicks flush and reinsert the original screws. They will grip firmly.
Re-aligning a sagging door: Many modern kitchen cabinets use European-style concealed hinges with built-in adjustment screws. There are typically three: one moves the door left or right, one moves it in and out, and one raises or lowers it. Use a Phillips screwdriver to adjust each one slightly until the door hangs evenly and closes flush with the cabinet frame.
Fixing a loose handle: Most cabinet handles are held by a single bolt running through the door from the inside. Tighten this bolt with a screwdriver from the front or back. If the bolt hole has stripped, replace the bolt with a slightly wider one that catches fresh material, or use a washer on the interior side to spread the load.
Difficulty Level, Tools, and Safety Notes
Difficulty: Very Easy to Easy
Tools needed: Phillips screwdriver or cordless drill, replacement screws (if needed), wooden toothpicks, wood glue
Safety note: Do not overtighten hinge screws on thin cabinet doors, particularly on older or lower-quality panels. Too much force can crack the material around the hinge plate.
When to Call a Professional
If the cabinet box itself has warped, the wall anchor behind the cabinet has failed (the whole unit pulls away from the wall), or the door panel is cracked through, a carpenter should assess whether the unit is worth repairing or needs to come down and be replaced entirely.
Simple DIY Repairs You Can Prevent With Regular Home Maintenance
Most of the repairs in this guide happen because small problems get missed early. A slow drain becomes a full blockage. A small caulk gap becomes a draught problem all winter. Regular basic home maintenance catches most of these before they become repairs at all.
Set aside 20 minutes once a month to walk through the following checks. It is a small investment that saves time and money across a full year.
A Practical Monthly Maintenance Checklist for Beginners
Run through these eight checks each month:
- Check all taps for drips — a slow drip can waste hundreds of litres per month and usually indicates a worn washer
- Test GFCI outlets in bathrooms and kitchens by pressing the test and reset buttons — replace any that do not trip and reset correctly.
- Inspect weatherstripping on exterior doors by running your hand along the seal while someone shines a torch from outside — light or air gaps mean it needs replacing
- Run water in unused drains in guest bathrooms or the utility room.s — P-traps can dry out and allow sewer gas to enter the home.
- Check under the kitchen and bathroom sinks for any moisture, staining, or slow drips around supply lines and drain connections.
- Listen to the toilet for 30 seconds after flushing — any continuing hissing or running is a sign the flapper or float needs attentio.n
- Lubricate door hinges that have started making any noise, before they become a full squeak.
- Visually inspect caulk lines around the bath, shower, and window frames for cracking or separation.n
Catching any of these early turns a potential repair into a two-minute fix.
Building Your Skills: What to Learn After These Basics
Once you are confident with the eight repairs above, there is a natural set of next skills that follow on without a steep jump in difficulty.
Basic tile repair is a reasonable next step — replacing a single cracked tile uses similar tools to drywall patching and the same patience for clean, careful work.
Replacing a light switch (with the breaker off and a voltage tester confirmed) builds on the confidence you already have from swapping outlet covers, and the wiring for a standard single-pole switch is one of the most straightforward electrical tasks there is.
Installing a ceiling fan requires reading a wiring diagram and working at height, but it is a manageable intermediate project once you understand basic electrical shutoff procedures.
Fixing a fence post that has shifted or rotted at the base is a practical outdoor equivalent — it involves digging, setting concrete, and basic timber work.
Free resources are widely available. YouTube tutorials from experienced tradespeople are one of the most accessible ways to see a repair done before attempting it. Many hardware store chains also run free in-store weekend workshops specifically aimed at new homeowners and beginners. Use both.
The pattern is simple: each repair you complete teaches you something the next one needs.
Start Small, Build From There
The easiest home repairs for beginners all share the same qualities. They are common, low risk, and manageable with a handful of basic tools and a clear set of steps. You do not need experience to patch a wall, fix a running toilet, or replace a showerhead. You need the right information and the willingness to try once.
Pick one repair from this list this weekend. Read through the steps before you start, gather the tools, and work through it at your own pace. The second repair will feel faster. The third will feel routine.
That is how practical home skills are built — one small fix at a time. If anything on this list goes beyond what you are comfortable handling, you now also know exactly when to step back and call a professional. That judgment is part of the skill, too.