Repair or Replace Household Fixtures: How to Make the Right Call Every Time
Something breaks. You stare at it. You wonder whether calling a tradesperson is worth it, or whether you should buy a new one and move on.
- How to Decide Whether to Repair or Replace a Household Fixture
- Taps and Faucets — Repair the Leak or Replace the Fitting?
- Common Tap Faults and What They Actually Cost to Fix
- Signs Your Faucet Has Gone Past the Point of Repair
- Door and Cabinet Handles — When a Broken Handle Is Worth Fixing
- Light Fixtures and Fittings — Repair the Wiring or Buy New?
- Fixture Faults You Can Address Without an Electrician
- When Replacing a Light Fitting Makes More Financial Sense
- Hinges — The Small Fixture That Causes Big Problems When Ignored
- Plumbing and Pipe Fittings — Repair or Replace Before a Small Leak Becomes a Big Bill
- Fixture Repair Costs for Common Plumbing Fittings
- Warning Signs That a Fitting Has Already Failed Beyond Repair
- How to Get a Fair Repair Quote and Avoid Overpaying
- Questions to Ask Before Booking a Tradesperson
- Red Flags in Repair Quotes That Signal You Should Get a Second Opinion
- Conclusion
That moment of uncertainty is exactly where most homeowners lose money, either by repairing something that was already past its best, or by replacing something that needed a $10 fix. Knowing how to repair or replace household fixtures correctly is one of the most practical skills a homeowner can have, and it does not require any technical background.
This guide walks through the most common fixtures in your home, including taps, handles, lights, hinges, and plumbing fittings, and gives you a clear, cost-based framework for making the right call each time.
How to Decide Whether to Repair or Replace a Household Fixture
Before you touch a specific fixture, it helps to have a general decision-making process in place. The same logic applies whether you are looking at a leaking tap, a squeaking hinge, or a buzzing light fitting.
Five questions are worth asking every time:
- How old is the fixture, and is it near the end of its expected lifespan?
- How much will the repair cost compared to a full replacement?
- Are parts still available for this model?
- Has this fixture failed before, or is this the first time it has failed?
- Does it meet current safety or energy standards?
A useful benchmark that tradespeople and home inspectors often apply is the 50% rule. If the cost of repairing a fixture exceeds half the cost of replacing it outright, replacement is usually the better financial choice. The repair buys you some time, but not much, and you end up spending twice.
That said, cost is not the only factor. Sentimental value, matching aesthetics across a room, and the environmental cost of throwing out a working unit all deserve a moment of consideration. Just do not let them override practical judgment when the numbers are clearly pointing one way.
The True Cost of Fixture Repair vs. Replacement
When most people think about repair costs, they think about the invoice. But the real cost includes more than that.
Repeated call-outs, wasted water from a dripping tap, higher electricity bills from an inefficient fitting, and the time you spend managing the problem all add up. A repair that seems cheap on paper can become expensive over 12 months if it does not hold.
Here is a simple comparison to illustrate the point:
| Scenario | Repair Cost | Replacement Cost | Better Option |
|---|---|---|---|
| Low (washer replacement) | $5–$20 | $80–$150 | Repair |
| Mid (cartridge + labor) | $60–$80 | $100–$180 | Borderline – compare quotes |
| High (repeated failures, old unit) | $80–$120 | $120–$200 | Replace |
The middle row is where most homeowners get stuck. When repair and replacement costs are close, factor in the age of the fixture and how many times it has already been serviced. That usually makes the decision clear.
When Age and Wear Make Replacement the Smarter Move
Every fixture has a realistic working life. Once a fitting reaches that point, repairs become a way of delaying the inevitable rather than solving anything.
Rough life expectancies for common household fixtures:
- Taps and faucets: 15–20 years
- Door and cabinet hinges: 10–15 years with normal use
- Light fittings (the fixture housing itself): 20+ years, though internal components wear sooner
- Plumbing fittings and flexi-hoses: 10–15 years, depending on water quality and pressure
If a fixture is inside that window and the fault is minor, repair is usually sensible. If it is at or beyond that range and showing its second or third fault, the fixture has done its job. Replacing it at that point is not wasteful; it is logical.
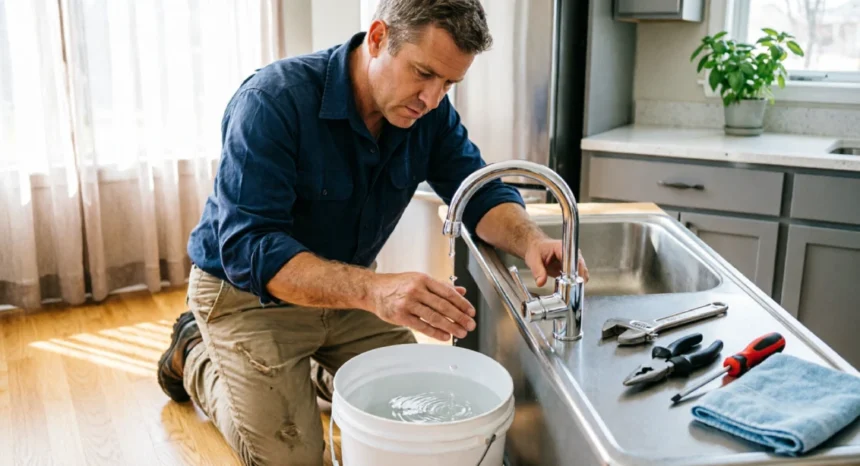
Taps and Faucets — Repair the Leak or Replace the Fitting?
A dripping tap is one of the most common household problems, and the good news is that most tap faults start as straightforward, low-cost repairs. The key is catching them before they develop into something more serious.
The most common faucet problems include:
- Dripping or constantly running water — usually a worn washer or O-ring
- Stiff or hard-to-turn handles — often a sign of mineral build-up inside the cartridge
- Corroded or pitted spout — cosmetic at first, but eventually affects water quality
- Low pressure from a single tap — can be the aerator, the cartridge, or the supply line
Worn washers and failed O-rings are worth repairing without hesitation. These parts cost almost nothing and take under an hour to replace with basic tools. A ceramic cartridge replacement is a slightly larger job, but still well within repair territory for most faucet types.
Where the calculation shifts is when the faucet body itself is cracked, when internal corrosion has spread beyond the removable parts, or when the model is old enough that replacement cartridges are no longer manufactured. At that point, you are not fixing the ta; you are prolonging a problem.
Common Tap Faults and What They Actually Cost to Fix
Putting real numbers to fixture repair costs helps you evaluate quotes quickly and avoid being overcharged.
Here is what typical tap repairs cost across a range of fault types:
- Replacing a washer (DIY): $5–$20 in parts, no labor
- Replacing a ceramic cartridge (with a plumber): $20–$80, depending on cartridge type and labor rate
- Replacing a full faucet unit (installed): $80–$30,0, depending on the style, brand, and whether any pipework needs adjusting
For a tap that is less than ten years old with a single fault, repair almost always makes financial sense. For a tap over 15 years old that needs a cartridge plus has visible corrosion on the body, the repair cost starts creeping toward replacement territory.
Always ask for the part cost and labor cost as separate line items on any quote. That tells you what you are actually paying for.
Signs Your Faucet Has Gone Past the Point of Repair
Some faults are worth fixing. Others are signals that the faucet is done.
Watch for these warning signs:
- Mineral build-up that has permanently damaged the aerator housing — if the threading is stripped or the housing has cracked from limescale pressure, a new aerator will not seat properly
- Corrosion visible inside the spout — once rust or scale is inside the water path, it affects the quality of water coming out and indicates the fitting is deteriorating from the inside.
- Discontinued parts — before booking anyone, search the make and model number online. If the manufacturer no longer lists parts for it, repair is not really an option.
When you are ready to replace a faucet, check the existing hole configuration under your sink first. Some replacement faucets require drilling additional holes. Knowing this before you buy saves an expensive surprise on installation day.
Door and Cabinet Handles — When a Broken Handle Is Worth Fixing
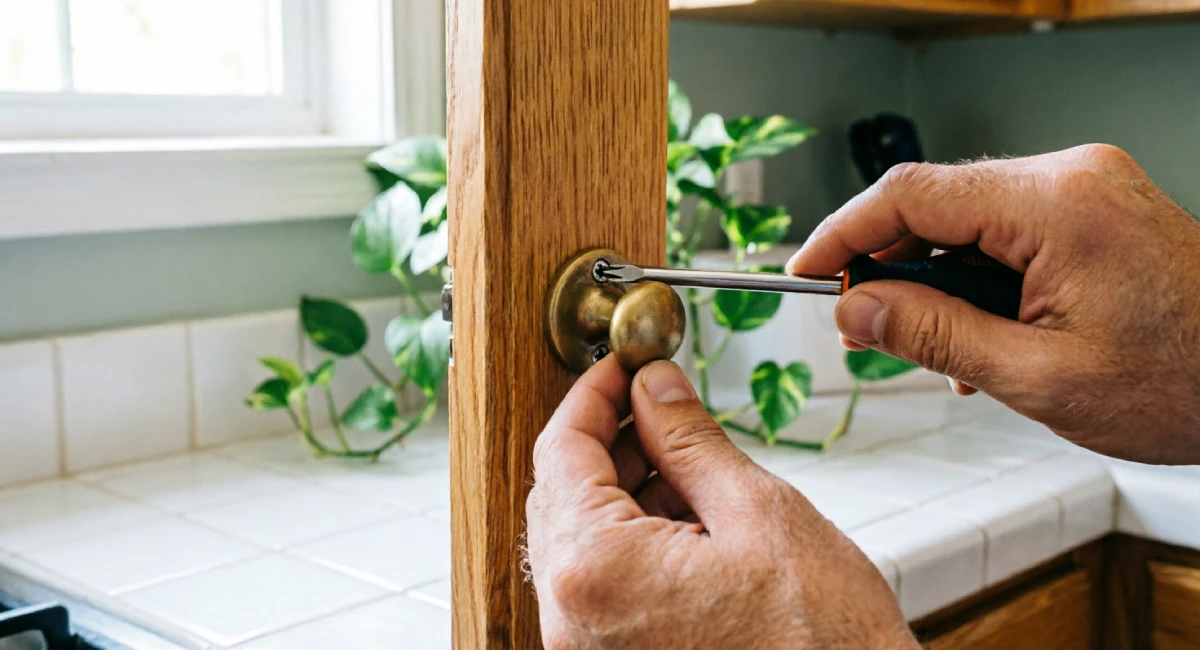
A broken handle feels more dramatic than it usually is. In most cases, what looks like a hardware failure is actually a loose screw, a worn spindle, or a small amount of accumulated wear that a ten-minute fix will sort out.
The most common handle faults include:
- Loose screws — the handle wobbles or pulls away from the door
- Stripped mounting holes — the screw turns but does not tighten because the hole has widened
- Snapped spindle — the bar connecting the handle to the latch mechanism has broken
- Misaligned strike plate — the latch no longer lines up with the plate on the door frame, making the door difficult to close
Most of these are inexpensive DIY fixes. Replacement makes more sense when the door itself has warped around the fitting, when the handle style has been discontinued, and a replacement would look obviously different from the others in the room, or when you are already updating multiple doors and want everything to match.
DIY Handle Repairs That Take Under 30 Minutes
These three repairs require no specialist tools and cost very little:
1. Re-tighten a loose spindle.e Remove the handle, locate the grub screw or through-bolt holding the spindle in place, tighten it firmly, and replace the handle. Takes about five minutes. A small drop of thread-locking fluid (available at any hardware store for under $5) will stop it from working loose again.
2. Fix a stripped screw hole. Push two or three wooden toothpicks into the hole along with a small amount of wood glue. Let it dry for an hour. Trim the excess flush, then re-drive the original screw. The wood fills the gap and gives the screw something solid to grip. Total material cost: under $2.
3. Realign a shifted door latch.h If the latch no longer meets the strike plate cleanly, the plate can usually be moved slightly by loosening its screws, repositioning it by a few millimetres, and re-tightening. If the gap is larger than about 5mm, the door frame or door itself may have moved, and a more thorough look is needed.
When to Replace the Whole Handle Set Instead
There are situations where no amount of fixing will produce a satisfactory result.
If the handle material itself has cracked, whether metal, plastic, or ceramic, the structural integrity is gone. A cracked handle will fail again, often sooner than expected.
If the internal spring-loaded return mechanism has failed and the part is sold only as part of a complete handle unit, replacement is the only real path forward. Basic replacement handles cost $8–$40 each for standard interior door fittings. Premium sets for visible or decorative doors will cost more, but the installation process is the same.
If you are refreshing multiple doors at once, this is also the right moment to standardize. Replacing one handle in a set of six with a slightly different finish looks worse over time than replacing all six together.
Light Fixtures and Fittings — Repair the Wiring or Buy New?
Lighting problems have a wider range of causes than most other fixture faults, and they also carry a higher safety risk if you get the diagnosis wrong.
The most common issues include:
- Intermittent flickering — can be the bulb, the socket contacts, or a loose connection in the ceiling rose
- Buzzing or humming — often a failing transformer in low-voltage downlights, or an incompatible dimmer switch
- A fitting that trips the circuit — almost always an internal wiring fault or a moisture problem, both of which need a licensed electrician
- Physical damage to the housing — cracking, melting, or discoloration from heat exposure
The rule here is straightforward: anything involving the wiring inside a fitting, or anything that has already tripped a circuit breaker, is not a DIY job. In most countries, electrical work beyond replacing a bulb or a plug-in fitting requires a licensed tradesperson. The cost of getting it wrong is not a repair bill; it is a fire risk.
Fixture Faults You Can Address Without an Electrician
Not every lighting problem requires calling someone out. These are safely within DIY territory:
- Replacing a broken lamp shade on a pendant or floor lamp
- Swapping a corroded bulb holder insert on a plug-in fitting (as long as the fitting itself is unplugged from the wall and not hardwired)
- Cleaning oxidized contacts in a light socket that is causing intermittent flickering — use fine-grit sandpaper or a contact cleaner spray, with the power fully off at the circuit breaker.
The dividing line is whether the fitting is plugged in or hardwired. Plug-in fittings are generally safe to work on once unplugged. Hardwired ceiling fittings and wall-mounted lights are a different matter. Always switch off at the breaker, not just at the light switch, before touching anything connected to a wall or ceiling.
When Replacing a Light Fitting Makes More Financial Sense
Sometimes a fitting is physically fine but has become technically obsolete in a way that makes keeping it unnecessarily expensive.
This is worth factoring into your home maintenance decisions:
- Outdated bulb types: If a pendant or wall light only accepts E14 candelabra bulbs and those are becoming harder to source in your area, you are one discontinued product run away from a lamp that will not work. Replacing the fitting with a standard E27 or GU10 socket costs less than the frustration of hunting down specialist bulbs.
- Non-LED-compatible transformers: Many older low-voltage downlight systems run on magnetic transformers that are incompatible with modern LED bulbs. Running halogen bulbs through them costs three to four times more in electricity than an LED equivalent. Replacing the driver and bulbs, or switching to a modern LED downlight, typically pays for itself within 12–18 months.
- Heat or moisture damage: If the housing shows discoloration, melting around the socket, or moisture ingress (a common problem in bathrooms with inadequate ventilation), do not repair. Replace the fitting and address the cause.
Hinges — The Small Fixture That Causes Big Problems When Ignored
A hinge is easy to ignore until it is not. A door that scrapes the floor, refuses to latch, or swings open by itself is almost always a hinge problem, and it is one of the cheaper fixes in the house when caught early.
Common hinge faults include:
- Loose screws — the hinge plate pulls slightly away from the door or frame under regular use
- Surface rust — cosmetic at first,t but accelerates if left, especially in humid rooms
- Worn barrel joints — the pin and barrel develop play over the years of use, allowing the door to sag sideways
- Misalignment — the door no longer sits square in the frame, often after seasonal wood movement
Most of these faults are repairs. The ones that suggest replacement are more specific, and they are covered below.
Simple Hinge Repairs Any Homeowner Can Do
1. Tighten loose hinge screws. Use a screwdriver (not a drill on maximum torque) to tighten each screw firmly. If a screw spins without gripping, the hole has stripped. Switch to a longer screw (one size up) to reach fresh wood, or use the toothpick-and-glue method described in the handle section. Cost: $0–$3.
2. Lubricate a squeaking hinge.e Apply a small amount of petroleum jelly, 3-in-1 oil, or a dedicated hinge lubricant to the barrel pin. Open and close the door several times to work it in. Wipe the excess off with a cloth. Cost: under $5 for a multi-use container that will last years.
3. Correct a slightly dragging door with a cardboard shim.ng If a door catches at one corner, the hinge on that side may be sitting too deep in its recess. Loosen the hinge screws, slide a thin piece of cardboard behind the hinge plate, and re-tighten. This brings the hinge plate slightly forward and lifts the corner of the door back into alignment. Cost: $0.
When Hinge Replacement Is the Right Call
Some hinge faults cannot be corrected without replacing the hardware itself.
If the knuckle of the hinge shows visible cracks or deformation, the metal has fatigued, and the hinge will fail at some point. If the barrel is worn to the point that the door moves laterally (side to side rather than just swinging), no amount of lubrication will fix it. And if rust has penetrated through the hinge plate and into the surrounding wood, you are dealing with a fixing problem that a new hinge will not solve without also addressing the frame.
Replacement hinges are not expensive. Standard interior door hinges cost $3–$20 each, depending on the material and finish. The job itself takes about 20 minutes per hinge if the existing recess is the right size. The only time this becomes a bigger project is when the door frame has rotted or shifted significantly, which means carpentry rather than hardware replacement.
Plumbing and Pipe Fittings — Repair or Replace Before a Small Leak Becomes a Big Bill
Plumbing fittings are the connections between your pipes and your fixtures, including the stop valves, compression joints, flexi-hoses, and isolation valves that keep everything watertight. They are not glamorous, but they are important.
Most fitting problems start small. A slow seep around a compression joint, a slight weep from an isolation valve, or a flexi-hose that looks a little discoloured. These early signs are worth taking seriously because the cost of catching them early is minimal, and the cost of ignoring them is not.
This section focuses on the fittings themselves, not on full pipe replacement, which is a separate and larger conversation.
Fixture Repair Costs for Common Plumbing Fittings
Most fitting repairs are inexpensive when addressed early. Here is a realistic cost breakdown:
| Fitting Issue | DIY Cost | With a Plumber |
|---|---|---|
| Re-tightening a compression joint | $0–$10 (PTFE tape) | $50–$80 (call-out + labor) |
| Replacing a flexi-hose | $15–$30 (parts) | $50–$100 (fitted) |
| Replacing an isolation valve | $10–$25 (parts) | $60–$120 (fitted) |
| Re-seating a stop valve | DIY possible | $80–$150 (labor-intensive) |
The pattern here is consistent with the rest of this guide. Catching the problem early means the repair is cheap. Waiting until a fitting fails means either a much larger repair bill or water damage that costs significantly more than any of the above.
Warning Signs That a Fitting Has Already Failed Beyond Repair
Some fittings reach a point where tightening or patching is not a real solution.
These are the signs to watch for:
- White or green mineral deposits around a joint — this indicates a slow, ongoing leak. Even if the area feels dry to the touch, moisture is escaping. The fitting needs to be remade or replaced.
- A flexi-hose with corroded braiding or any visible bulging — the outer braid on a flexi-hose is the structural layer. Once it corrodes, the hose can burst without warning. A burst flexi-hose under a sink can flood a room in minutes. Replace it immediately.
- An isolation valve handle that spins freely without stopping flow — the valve’s internal seal has failed. It can no longer do its job. This needs replacement before you need to shut off the water in an emergency and find that you cannot.
If you see any of these, do not add them to a to-do list. Deal with them within the week.
How to Get a Fair Repair Quote and Avoid Overpaying

Even when you know what needs fixing, you still need to trust the person doing the work and the price they are charging. Getting that part right is its own skill.
A fair repair quote is itemized, specific, and explained clearly. A quote that is vague, urgent, or verbal only is a quote worth questioning.
The starting point is to ask for parts and labor costs listed separately. This lets you look up the part price independently and understand what you are actually being charged for the work itself. Parts are often marked up by tradespeople, which is standard practice, but a 300% markup on a $15 washer is worth pushing back on.
Questions to Ask Before Booking a Tradesperson
These five questions will help you make a confident, informed decision:
- Is this repair guaranteed, and for how long? Any reputable tradesperson should stand behind their work for at least 30 days, and ideally longer for a significant job.
- Are the replacement parts still in production? If parts are discontinued, ask how they sourced them and whether the same fix could be applied again in the future.
- What happens if this fault recurs within six months? Get the answer in writing. This matters.
- Can you show me the part cost and labor cost separately? If a tradesperson refuses to itemize, that is information.
- If this were your home, would you repair or replace? An honest answer to this question is worth more than the rest of the quote put together.
Red Flags in Repair Quotes That Signal You Should Get a Second Opinion
Most tradespeople are straightforward. Some are not, and it pays to know the difference.
Watch for these warning signs:
- Vague line items such as “miscellaneous parts” or “consumables” with no further explanation
- A repair cost that approaches or exceeds replacement cost, with no clear reason given for why the repair is still being recommended.
- Pressure to make a same-day decision based on urgency that cannot be verified
- Refusal to provide anything in writing before starting work
None of these automatically means you are being misled. But any one of them is a reasonable basis for requesting a second quote before committing.
Conclusion
Most home maintenance decisions come down to three things: how old the fixture is, how much the repair costs relative to replacement, and whether the fault is likely to return. Get those three answers right and the choice usually makes itself.
The guidance in this article is designed to work as a starting checklist. Next time something in your home breaks, before you call anyone or reach for a replacement online, work through the relevant section here first. It will save you time, money, and the frustration of paying for a repair that was never going to last.
Knowing when to repair or replace household fixtures is one of those skills that keeps paying for itself over the years. Use this as your reference, and you are already ahead of most homeowners who are guessing.
If this article helped you, take a look at the main guide on the easiest home repairs for beginners, where we cover the practical skills that go hand in hand with everything you have just read.