The simple DIY projects that add the most value to a home are interior repainting, curb appeal upgrades, kitchen hardware swaps, and bathroom refreshes. Each costs under $500 and can return several times its cost at resale.
- Why DIY Home Improvements Beat Hiring Contractors for Value
- Simple DIY Projects That Add Value to a Home — Full Ranked List
- Fresh Interior Paint — The Highest-ROI Project for Almost Every Home
- Curb Appeal Upgrades That Cost Under $300 and Pay Back Fast
- Kitchen Improvements That Don’t Require a Full Renovation
- Bathroom Refreshes That Improve Perceived Value on a Budget
- Flooring Upgrades That Buyers Immediately Notice
- Lighting Upgrades — A Low-Cost DIY Improvement With Outsized Visual Impact
- Functional Fixes That Hold Up Under Inspection
- Outdoor Living Additions That Expand Perceived Square Footage
- What to Tackle Last — Projects That Hurt More Than They Help
- Conclusion
Many homeowners either skip pre-sale improvements or overspend on major renovations that never pay back. The projects below are ranked by cost, difficulty, time, and visible impact on sale price. Work through them in order, and you will be ready to list with confidence.
Why DIY Home Improvements Beat Hiring Contractors for Value
When you hire a contractor, you pay for labour, overhead, insurance, and profit margin. For many straightforward projects, that markup runs 40% to 60% above the cost of materials.
The 2024Remodellingg Cost vs. Value Report consistently shows that mid-range and upscale remodels rarely return their full investment at resale. A major kitchen remodel costing $80,000 might return around 49 cents on the dollar. A $200 weekend paint job, by contrast, can return several times its cost in buyer perception alone.
DIY work removes the labour cost entirely. That means a higher net return on every dollar you spend, as long as the finished work looks clean and professional.
There is a less obvious benefit too. Buyers and their agents notice the difference between a home that has been actively maintained and one that has been ignored. DIY improvements show care, which builds buyer confidence during walkthroughs and inspections.
How Projects Are Ranked in This Guide
Every project in this article is scored across four factors:
- Cost: Under $500 (budget), $500–$2,000 (moderate), over $2,000 (significant investment)
- Difficulty: Rated 1 to 5, where 1 is a complete beginner, and 5 requires trade experience
- Time: Measured in hours or days for one person working at a comfortable pace
- Visible Impact: How strongly the change affects curb appeal, interior presentation, or buyer perception
Projects that score highest across all four appear first. A cheap project that takes two weekends and barely shows ranks lower than one that takes an afternoon and transforms how a room reads.
Simple DIY Projects That Add Value to a Home — Full Ranked List
Use this table as a reference throughout the article. Projects appear in the recommended order of priority.
| Project | Avg. Cost | Difficulty | Time Required | Est. Value Added |
|---|---|---|---|---|
| Interior repainting | $100–$300/room | 2/5 | 4–8 hrs/room | High |
| Curb appeal upgrades | $100–$300 | 1/5 | 1–2 days | High |
| Kitchen hardware + backsplash | $200–$800 | 2/5 | 4–8 hrs | High |
| Bathroom refresh | $150–$400 | 2/5 | 1–2 days | High |
| LVP flooring installation | $2–$5/sq ft | 3/5 | 1–2 days | Medium-High |
| Lighting upgrades | $50–$300 | 2/5 | 2–4 hrs | Medium-High |
| Functional improvements | $100–$400 | 2–3/5 | 1–2 days | Medium |
| Outdoor living additions | $300–$1,500 | 3/5 | 1–3 days | Medium |
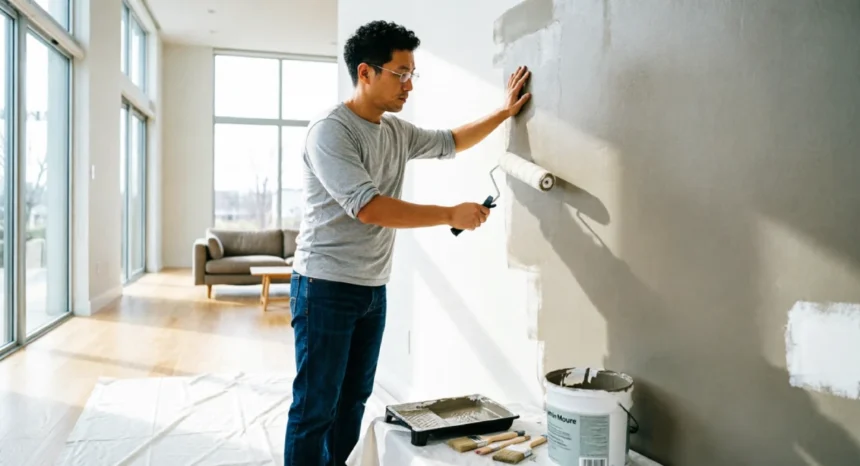
Fresh Interior Paint — The Highest-ROI Project for Almost Every Home
If you only do one thing before listing, paint the interior. No other single improvement matches its return relative to cost.
Materials for a standard bedroom run $100 to $200 in paint, primer, tape, and rollers. A professional painter charges $300 to $600 for the same room, and often more in larger cities. Do it yourself and keep that difference.
Fresh paint also solves problems nothing else can. It covers scuffs, hides smoke residue, neutralizes pet odours absorbed into walls, and makes a lived-in home feel new again.
The preparation step is what separates a professional-looking result from a sloppy one. Most DIYers skip it. Before you open a can of paint, fill nail holes and small cracks with spackle, sand them flush, and apply a coat of primer to any repaired areas. Skipping primer on patched spots leads to visible flashing once the paint dries.
For colour, stay neutral. Warm whites, soft greiges, and light taupes appeal to the widest range of buyers. Sherwin-Williams Accessible Beige, Benjamin Moore Pale Oak, and similar tones appear in listing photos without distracting from the home itself.
Which Rooms to Paint First for Maximum Buyer Impact
If time or budget limits you to a few rooms, prioritize in this order: living room, kitchen, and primary bedroom.
These are the three spaces buyers evaluate most closely. Dated yellow walls or a bold feature colour in a living room triggers a mental renovation cost that buyers subtract from their offer price. A consistent neutral palette across these rooms makes the home feel larger, cleaner, and ready to move into.
Secondary bedrooms and hallways matter too, but they rarely affect offers the way the main living spaces do. Paint those if you have time, but do not delay listing because of them.
Curb Appeal Upgrades That Cost Under $300 and Pay Back Fast
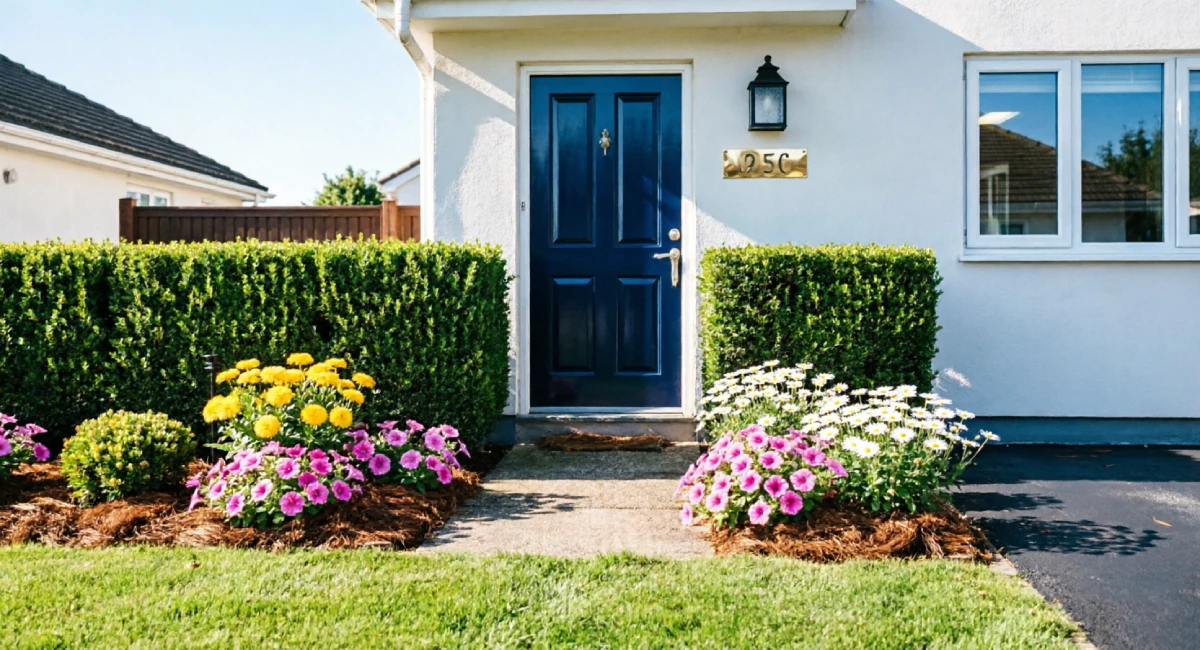
Buyers decide how they feel about a home before they step inside. Research from the National Association of Realtors suggests that strong curb appeal can add up to 7% to a home’s sale price. That is a meaningful return on a few hundred dollars of work.
The four most cost-effective curb appeal projects are:
- Power-washing the driveway, pathways, and exterior walls ($0–$50 if rented, free if you own a washer)
- Repainting or replacing the front door ($30–$150 in materials)
- Replacing house numbers ($20–$60)
- Adding fresh mulch and trimming garden beds ($50–$150)
Together, these four projects take one full day and rarely exceed $300 total. The visual difference is striking, especially in listing photographs — where most buyers form their first impression before ever scheduling a visit.
Front Door Updates — Colour, Hardware, and First Impressions
The front door is the focal point of your home’s exterior. A faded, peeling, or forgettable door tells buyers the home has not been maintained. A crisp, freshly painted door in a confident colour tells the opposite story.
Choose a colour that contrasts cleanly with your exterior walls. Navy, charcoal, deep green, and classic black perform consistently well across a wide range of architectural styles. These photograph well and appeal broadly.
Use exterior-grade paint formulated for the door material. Wood doors need primer and two coats of oil-based or latex exterior paint. Fibreglass doors take paint well but require light sanding beforehand for adhesion.
Once the door is painted, replace the hardware. Outdated brass knobs paired with a freshly painted door look mismatched. A new handle set and deadbolt in a consistent finish (matte black, brushed nickel, or oil-rubbed bronze) costs $40–$120 and completes the look.
Low-Maintenance Landscaping Anyone Can Do in a Weekend
You do not need a landscape designer. You need to tidy.
Buyers are not looking for elaborate garden arrangements. They want to see that the exterior is manageable and well-kept. That means edged garden beds, no dead plants, and a clean layer of mulch across all planting areas.
A bag of dark hardwood mulch costs around $5. A full front yard typically uses 10 to 15 bags. Spread it two to three inches deep, keep it away from the base of plants, and the whole front area reads as intentional and maintained.
Remove cracked or mismatched pots, dead annuals, and any overgrown shrubs blocking windows or the front door. If you want to add plants, choose drought-tolerant varieties native to your climate. They photograph well, need minimal upkeep, and tell buyers the yard will not become a burden.
Total cost: $100–$250 in materials. Time: one weekend.
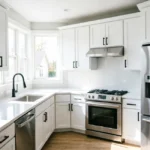
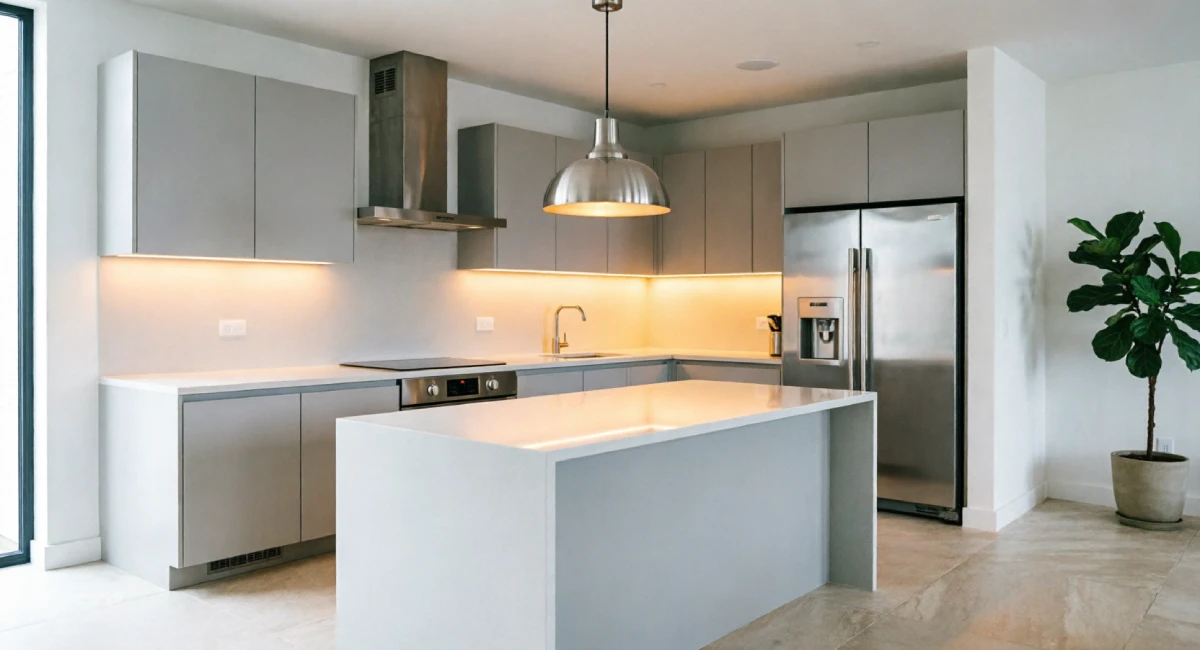
Kitchen Improvements That Don’t Require a Full Renovation
The kitchen is the room buyers remember. It is also the room most homeowners over-invest in before selling.
A full kitchen remodel costs an average of $15,000 to $50,000 and returns less than 60 cents for every dollar spent, according to Remodelling Magazine’s cost-vs-value data. That is a significant loss if your primary goal is resale value.
Targeted DIY kitchen improvements, by contrast, can cost $200 to $800 and create nearly the same buyer impression. Buyers respond to kitchens that look clean, current, and well-maintained. You can hit all three without touching a single cabinet box or countertop.
The four highest-impact kitchen DIY projects are: replacing cabinet hardware, painting or refinishing cabinet doors, installing a new faucet, and adding a peel-and-stick backsplash.
Cabinet Hardware Swaps — Small Change, Big Visual Difference
Cabinet hardware is the most overlooked detail in older kitchens. Builder-grade gold pulls from 15 years ago make an otherwise functional kitchen feel dated in an instant.
Replacing handles and knobs is a beginner-level project. The main consideration is spacing. Most standard pulls are drilled at 3-inch or 3.75-inch centre-to-centre spacing. Measure your existing holes before buying replacements to avoid unnecessary drilling.
When choosing a finish, match your faucet and light fixtures. Matte black and brushed nickel are both strong choices right now. Avoid mixing finishes in the same space.
Budget: $50 to $200, depending on the number of cabinets. Time: two to four hours with a screwdriver or power drill.
Peel-and-Stick Backsplash — An Afternoon Project With Real Impact
A peel-and-stick backsplash transforms the area behind the cooktop and counters without tiling experience or adhesive work.
Product options include:
- Vinyl tile sheets in subway or mosaic patterns (most beginner-friendly)
- Faux stone panels for a more textured, premium look
- Printed peel-and-stick tiles that mimic ceramic or marble
These products adhere best to smooth, clean, painted drywall or existing ceramic tile. They do not bond well to textured walls, raw drywall, or surfaces with grease buildup. Clean the surface thoroughly before application.
Measure the area, cut panels with a sharp utility knife and straight edge, and work from the centre outward. Use a credit card or squeegee to press out air bubbles. Around outlets, score and snap rather than forcing the panel.
Average cost: $50–$150 for a standard backsplash area. Difficulty: 1/5. Time: two to four hours.
Bathroom Refreshes That Improve Perceived Value on a Budget
Bathrooms and kitchens are evaluated together by most buyers. A clean, updated bathroom signals the same careful maintenance as a tidy kitchen. A neglected one creates doubt about the whole home.
You do not need to renovate. You need to refresh.
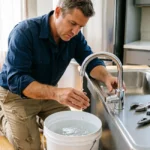
The highest-impact bathroom DIY improvements include re-caulking the tub and shower, replacing the toilet seat and flush handle, updating light fixtures, repainting the vanity, and replacing the mirror.
Before spending a dollar on any of these, start with grout. Mix a grout cleaner or apply a paste of baking soda and white vinegar to grout lines, scrub with a stiff brush, and rinse. In many bathrooms, this single step — which costs nothing beyond cleaning products you already own — takes the space from neglected to noticeably cleaner.
Re-Caulking and Grout Restoration — The Detail Buyers Always Notice
Old, grey, cracked caulk around a tub or shower is one of the first things buyers notice, and it never leaves a good impression. It suggests moisture damage, deferred maintenance, and potential mould beneath the surface.
Remove old caulk using a plastic scraper or a dedicated caulk removal tool. Cut along both edges of the existing bead first with a utility knife. Once removed, clean the surface with isopropyl alcohol and let it dry fully before applying new caulk.
For wet areas, use 100% silicone caulk or a siliconized latex formula rated for kitchens and bathrooms. These resist moisture and mould far better than standard acrylic caulk.
For grout restoration without full re-grouting, use a grout pen in a matching or slightly lighter shade. It takes 20 minutes and makes old grout look freshly installed. For severely cracked or missing grout, a full re-grout is worth the two to three hours it takes.
Total cost: $20–$60. Time: two to three hours.
Vanity and Fixture Updates That Look More Expensive Than They Are
A dated bathroom vanity does not need to be replaced. In most cases, it needs to be repainted.
Use a cabinet-grade alkyd or water-based enamel paint in a soft white, light grey, or muted navy. Sand the existing surface lightly with 120-grit paper, apply a bonding primer, and follow with two thin coats of your chosen colour. Allow full cure time before reattaching hardware.
Replace the mirror at the same time. Builder-grade frameless mirrors look cheap on their own. A framed mirror in a coordinating finish (wood, metal, or painted MDF) costs $40–$120 and makes the entire vanity area feel intentional.
For the vanity light bar, swap out a dated strip fixture for a modern bar in matte black or brushed nickel. This is a beginner-level electrical job: turn off the circuit breaker, remove the old fixture, connect the matching wire colours, and mount the new one. If the wiring in your home is older or you are unsure about any step, hire a licensed electrician for this one task.
Combined cost for all three updates: $150–$400. Difficulty: 2/5 overall.
Flooring Upgrades That Buyers Immediately Notice
Flooring condition is among the top three factors buyers use to judge whether a home is move-in ready. Worn carpet, stained vinyl, or scratched hardwood raises the question of what else has been neglected.
Three realistic DIY flooring options for pre-sale preparation:
- Refinishing existing hardwood (cost: $1–$3/sq ft in materials, requires a rented floor sander)
- Replacing carpet in key rooms (cost: $2–$4/sq ft for budget carpet with DIY installation)
- Installing luxury vinyl plank (LVP) (cost: $2–$5/sq ft in materials)
Hardwood floors consistently increase home value by 3–5%, according to the National Wood Flooring Association and supported by multiple NAR surveys. If you have hardwood under old carpet, removing the carpet and refinishing the floors is often the single most valuable flooring decision you can make.
LVP is the most accessible option for beginners and works across a wider variety of spaces.
Luxury Vinyl Plank — The Beginner-Friendly Flooring Upgrade
LVP has become the dominant choice for DIY flooring, and for good reason. It is waterproof, highly durable, and installs without adhesive using a click-lock floating system.
Before installation, check your subfloor. LVP requires a flat, clean surface with no more than 3/16-inch variation per 10 feet. High spots can be sanded down. Low spots and gaps should be filled with floor levelling compound and allowed to cure.
Measure the room, add 10% for waste, and plan your layout so that the cut pieces at both ends of the room are roughly equal in width. This avoids the visual imbalance of a full plank on one side and a two-inch sliver on the other.
At doorways, use transition strips to create a clean edge between LVP and adjoining flooring materials. These come in multiple finishes and snap into a track that is screwed to the subfloor.
Average cost: $2–$5 per square foot in materials. A 200-square-foot room can be completed in one full day, including subfloor preparation.
Lighting Upgrades — A Low-Cost DIY Improvement With Outsized Visual Impact
Lighting shapes how every other improvement in your home is perceived. A freshly painted room with poor lighting still feels dim and unwelcoming. The same room with layered, warm-toned lighting photographs beautifully and feels inviting.
Three accessible lighting upgrades that make a measurable difference:
- Replacing builder-grade ceiling fixtures with modern flush-mount or semi-flush options ($40–$120 per fixture)
- Adding under-cabinet LED strips in the kitchen ($25–$80 for a standard kitchen run)
- Swapping bathroom vanity light bars for a current-style fixture ($50–$150)
For listing photography, bulb temperature matters. Warm white bulbs in the 2700K–3000K range make rooms feel welcoming and livable. Cool white bulbs above 4000K can make spaces feel clinical and cold.
Most ceiling fixture swaps require no special electrical experience beyond turning off the circuit breaker, confirming the power is off with a non-contact voltage tester, and matching wire connections. Always confirm the breaker is off before touching any wiring.
Smart Dimmer Switches — A $30 Upgrade That Signals Modern Living
Dimmer switches are a small detail that buyers notice and appreciate. They show a home that has been updated thoughtfully, and they make every room more photographable.
Replacing a standard switch with a dimmer takes 20 to 30 minutes per switch. Turn off the circuit breaker for that room, remove the switch plate, disconnect the existing switch, and connect the dimmer’s wires to match the existing configuration. Most residential dimmers have clear colour-coded instructions included.
One important check: make sure your bulbs are dimmer-compatible. Most modern LED bulbs are, but some budget LEDs are not. Look for “dimmable” on the packaging before purchasing.
Cost per switch: $15–$40. The whole house can typically be done in a single afternoon.
Functional Fixes That Hold Up Under Inspection
Buyers and home inspectors both look beyond surfaces. A home that looks polished but has stiff doors, draughty windows, and creaking stairs loses buyer confidence during the walkthrough.
Functional fixes are the most underrated pre-sale upgrades. They rarely make a listing headline, but they consistently influence offers.
The highest-priority functional projects:
- Weatherstripping all exterior doors ($15–$40 per door, one hour per door)
- Adding attic insulation if current levels are below recommended R-values (ROI: approximately 116%, Remodelling Magazine)
- Fixing sticky doors, squeaky hinges, and loose handrails ($0–$20 in materials, a few hours total)
- Installing a smart or programmable thermostat ($130–$250)
These are the kind of improvements that make a home inspector’s report look clean. A clean report means fewer negotiation points for the buyer and fewer concessions for the seller.
Smart Thermostat Installation — One of the Few Tech Upgrades That Pays Back
Most smart home upgrades do not return their cost at resale. A smart thermostat is the exception.
Buyers increasingly expect energy efficiency as standard. A Nest or Ecobee thermostat on the wall signals a home updated to modern standards, and the energy savings talking point fits easily into the listing description.
Installation is intermediate-level. Before purchasing, photograph your existing thermostat wiring and check compatibility using the manufacturer’s app. Both Nest and Ecobee have online compatibility checkers. Homes without a C-wire (common wire) may need a simple adapter or a small additional wire run.
If the existing wiring is compatible, installation takes 30 to 60 minutes. Follow the included instructions step by step. The apps walk you through every wire connection clearly.
Cost: $130–$250. Difficulty: 3/5 if wiring is straightforward.
Outdoor Living Additions That Expand Perceived Square Footage
Since 2020, outdoor living spaces have become a genuine selling point rather than a bonus feature. Buyers now compare usable outdoor areas when evaluating homes in the same price range.
DIY outdoor additions that perform well at resale:
- Refinishing or building a timber deck (refinishing: $100–$300; building from scratch: $1,500–$4,000)
- Installing a paver patio ($300–$1,000 in materials for a standard 12×12 area)
- Adding solar or low-voltage pathway lighting ($50–$200)
Deck additions return approximately 65–70 cents per dollar spent, according to Remodelling Magazine, making them one of the stronger structural DIY investments. Refinishing an existing deck costs a fraction of that and delivers nearly the same listing impact.
Outdoor spaces also photograph exceptionally well when styled simply. String lights, two outdoor chairs, and a clean surface can make a modest backyard look appealing in listing images.
Paver Patios — A Weekend Project That Adds Usable Living Space
A defined patio area makes a backyard feel intentional and usable, even if the yard itself is small. Buyers respond to spaces that feel finished.
The process for a basic paver patio:
- Mark the area with stakes and string
- Excavate 6–8 inches down across the entire area
- Lay and compact a 4-inch base of crushed gravel
- Add a 1-inch layer of coarse sand and screed it flat
- Place pavers in your chosen pattern, leaving consistent gaps
- Fill joints with polymeric sand and compact lightly
The most common beginner mistake is a poor drainage slope. The patio surface should slope away from the house at approximately 1/8 inch per foot. Without this, water pools against the foundation after rain.
Tools required: a plate compactor (rent for $60–$80/day), rubber mallet, level, screed board, and a circular saw with a diamond blade for cutting pavers.
Average cost in materials: $3–$10 per square foot, depending on paver type.
What to Tackle Last — Projects That Hurt More Than They Help
Not every DIY improvement adds value. Some reduce buyer confidence or create problems that need to be undone before a sale can close.
Avoid these before listing:
- Over-personalized feature walls in bold patterns or highly specific colours. What you love, most buyers see as work they will have to redo.
- DIY electrical work done without permits. If an inspector flags unpermitted electrical changes, it becomes a negotiation problem and a disclosure issue. Hire a licensed electrician for anything beyond basic fixture swaps.
- Mismatched flooring across open-plan spaces. Installing LVP in the living room that does not match the adjoining dining area creates a visual break that makes both areas feel smaller. Either commit to a consistent floor across the whole space or leave the existing floor in place.
- Low-quality fixture swaps that look cheap. A $12 ceiling rose from a discount store does not impress anyone. If the budget does not allow for a quality replacement, leave the existing fitting in place and clean it thoroughly instead.
The guiding principle is simple: if the improvement makes a buyer think “I will need to fix that,” it has not added value.
Conclusion
The best simple DIY projects that add value to a home are not the most complex or expensive ones. They are the ones that make the home feel clean, current, and well cared for.
Start with interior paint. Move to curb appeal. Work through the kitchen and bathrooms. Then tackle lighting, flooring, and the functional details that hold up under inspection.
Each project in this guide was selected because it returns more in buyer perception and sale price than it costs in materials and time. None requires trade experience. All can be completed by a homeowner with a clear weekend and a willingness to follow instructions carefully.
Pick the highest-ROI project from the ranked list above and start there. You do not need to complete every item before listing. A focused effort on three or four of these projects puts you in a much stronger position than doing nothing at all.