Most rental apartments come with the same setup: one ceiling fixture per room, a bulb that casts flat light in every direction, and zero flexibility. If you have ever sat in a living room that felt more like a waiting room, you already know the problem.
- Why Most Homes Have a Lighting Problem Worth Solving
- Can You Actually Upgrade Lighting Without Rewiring?
- Start With Smart Bulbs: The Easiest Swap You Can Make
- Plug-In Lights: Fixture-Style Lighting With No Wiring Required
- Battery-Powered Lights for Spaces With No Outlet Nearby
- Floor Lamps and Table Lamps: Underrated Brighter Room Ideas
- Renter-Friendly Fixture Alternatives That Require No Electrician
- Mirrors, Paint, and Surfaces That Make Lighting Work Harder
- What to Avoid: Common Mistakes When Upgrading Lighting Without Rewiring
- How This Fits Into a Broader Budget Home Refresh
- Conclusion
You can fix this without rewiring a single thing. No electrician. No permit. No landlord approval needed in most cases. Whether you rent, own an older home, or want to avoid anything complicated, there are practical solutions you can put in place over a weekend.
This guide covers every approach worth knowing: smart bulbs, plug-in fixtures, battery-powered lights, floor lamps, and renter-safe fixture alternatives. By the end, you will know exactly where to start.
Why Most Homes Have a Lighting Problem Worth Solving
Rental properties and older homes were built for function, not comfort. The standard setup is a single junction box in the center of the ceiling, wired to a wall switch, fitted with whatever bulb was cheapest at the time.
That single overhead source creates what lighting designers call “flat light.” It hits the room from one angle, casts shadows in corners, washes out faces, and makes even good furniture look dull. There is no warmth, no depth, and no way to adjust it for different times of day or activities.
Poor lighting also changes how a room feels. Harsh or dim light makes a space harder to relax in, harder to work in, and harder to enjoy. Most renters assume the only fix involves an electrician, so they never try anything at all.
Can You Actually Upgrade Lighting Without Rewiring?
Yes. And the options available today are better than they were even five years ago.
The methods fall into five categories:
- Smart bulbs that fit into your existing sockets and give you full control over brightness and color
- Plug-in lights, including pendants, sconces, and swing-arm lamps that look like hardwired fixtures
- Battery-powered lights for areas with no outlet nearby
- Floor lamps and table lamps that add depth and warmth without touching the ceiling
- Renter-safe fixture alternatives that replicate the look of ceiling lights without an electrical box
None of these require tools beyond a screwdriver in some cases. None will void your lease. And most are easy to take with you when you move.
Start With Smart Bulbs: The Easiest Swap You Can Make
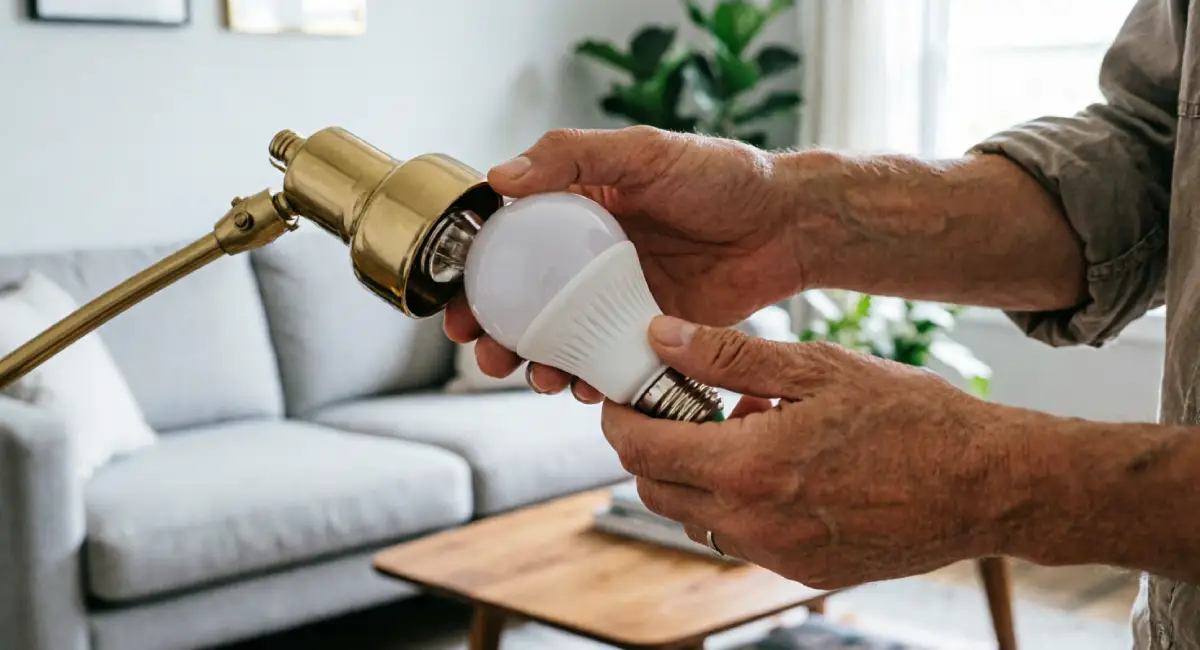
If you have a working socket, you are already halfway to better lighting. Swapping a standard bulb for a smart LED is the fastest change you can make, and it costs very little.
Smart LED bulbs use far less energy than older incandescent bulbs and produce more usable light. The key number to understand is lumens, not watts. Watts measure energy use; lumens measure actual brightness. A 10-watt LED bulb produces the same 800 lumens as a 60-watt incandescent. Look at lumens when you shop.
Color rendering also matters. A bulb with a high Color Rendering Index (CRI of 90 or above) makes colors in your room look natural and accurate. Cheaper bulbs with a lower CRI are why some rooms feel washed out even when the light is technically bright enough.
No rewiring is involved. If the socket works, the bulb fits.
How to Choose the Right Color Temperature for Each Room
Color temperature is measured in Kelvin (K) and changes how a room feels completely.
| Color Temperature | Light Quality | Best Rooms |
|---|---|---|
| 2700K–3000K | Warm, amber-toned | Bedroom, living room, dining room |
| 3500K–4000K | Neutral white | Bathroom, home office |
| 5000K–6500K | Cool, daylight-style | Kitchen, studio, workshop |
Warm light (2700K) makes a bedroom feel relaxing. The same bulb in a kitchen makes the space feel dim and slightly yellow. Cooler light (5000K) helps you focus in a home office but feels harsh in a bedroom at night.
The simplest rule: use warm bulbs where you rest and cool-to-neutral bulbs where you work or need to see clearly.
Dimmable Bulbs and App-Controlled Options
Many smart LED bulbs pair with a phone app or a voice assistant, letting you adjust brightness and color temperature without touching a switch.
Being able to dim lights in the evening or shift from cool white to warm white as the day winds down affects sleep quality and how comfortable a room feels.
One thing to check: if your wall switch is a dimmer switch, not all smart bulbs are compatible with all dimmer types. The simplest fix is to set the dimmer to full power and control everything through the app. If you have a standard on/off switch, there is nothing to worry about.
Plug-In Lights: Fixture-Style Lighting With No Wiring Required
Plug-in lights are one of the most underused tools for renters. They look like proper hardwired fixtures. They hang, mount, or position exactly like the real thing. And they run from a standard wall outlet.
The category includes plug-in pendant lights, plug-in wall sconces, and plug-in swing-arm lamps. Each one gives you the visual weight of a fixture without touching an electrical box.
The key to making them work is cord management. A plug-in pendant with a cord running straight down the wall to an outlet looks improvised. The same pendant with the cord routed along the ceiling using adhesive clips or a cord cover looks considered and deliberate.
How to Style Plug-In Pendants So They Look Intentional
The difference between a plug-in pendant that looks cheap and one that looks planned comes down to three things: the hook, the cord path, and the shade.
Start with a proper ceiling hook rated for the weight of your fixture. Adhesive ceiling hooks hold well for lighter pendants (under 500g). For heavier shades, a small toggle bolt hook is more reliable and leaves minimal damage.
Route the cord along the ceiling using adhesive cord clips spaced every 20–30 cm. Pair them with a flat cord cover or raceway strip in a colour that matches your ceiling. From a few steps away, the cord effectively disappears.
Place the pendant in relation to furniture, not the center of the room. A pendant above a dining table or reading chair creates a sense of purpose. One hanging in the middle of a room with nothing beneath it just looks odd.
Renter note: adhesive cord clips and raceways leave little to no wall damage and come off cleanly with most adhesive removers.
Plug-In Wall Sconces as Bedside or Accent Lighting
A plug-in wall sconce on either side of a bed does two things: it frees up the nightstand, and it makes the room look finished in a way that a floor lamp cannot.
For lighter sconce models (under 1kg), adhesive mounting strips work well on painted drywall. For anything heavier, a single small screw into a wall stud is enough and leaves a hole no larger than a thumbtack when removed.
Before buying, measure the distance from your intended mounting point to the nearest outlet. Cords on plug-in sconces typically run 150–180 cm. If your outlet is further away, a short extension cable hidden behind the headboard solves the problem cleanly.
Sconces also work well in hallways and reading nooks where a table lamp would take up too much floor space.
Battery-Powered Lights for Spaces With No Outlet Nearby
Not every space has a conveniently placed outlet. Closets, pantries, the space under kitchen cabinets, staircases, and built-in shelving often have none at all. Battery-powered lights solve this directly.
There are two types worth knowing. Disposable battery models are inexpensive and widely available, but ongoing battery costs add up, and output fades as the batteries drain. Rechargeable USB models cost more upfront but deliver more consistent brightness and lower long-term cost. For anything used daily, rechargeable is the better choice.
Battery life varies by product and usage. A motion-sensor closet light used a few times a day will last several months on a charge. A light left on continuously may need charging every few days. Check the specs before buying.
Under-Cabinet and Closet Lighting Using Adhesive LED Strips
LED strip lights with adhesive backing are among the most flexible options available. They come in reels that you cut to length, stick to almost any clean, dry surface, and connect to a USB power source or a small battery pack.
For under-cabinet kitchen lighting, measure the full length of the cabinet underside and buy a strip 10–15% longer than that length to account for cutting. Stick the strip along the back edge of the cabinet underside so the strip itself is hidden and only the light pool is visible on the countertop.
For closets, look for battery-powered strips or puck lights with a motion sensor. These turn on automatically when you open the door and off again after a short delay. They typically output 200–400 lumens, enough for clear visibility in a standard wardrobe.
Adhesive strips bond best to smooth, clean surfaces. Rough concrete, unfinished wood, and textured plaster all reduce adhesion over time. On those surfaces, use mounting clips instead of relying on the tape alone.
Rechargeable Puck Lights and Portable Fixtures
Puck lights are small, disc-shaped LED units that sit flat against a surface or hang from a small mount. They are ideal for spots where a strip would be impractical: the inside of a bookshelf, the underside of a staircase, inside a display cabinet, or on a bedside shelf.
Better rechargeable puck lights now produce 300–600 lumens, comparable to a medium-brightness bulb. Enough for task lighting in a small area or accent lighting across a shelf.
Charge them on a set schedule, the way you would a phone. Charging every two to three days during regular use keeps them at full brightness and prevents the gradual dimming that comes with a low battery.
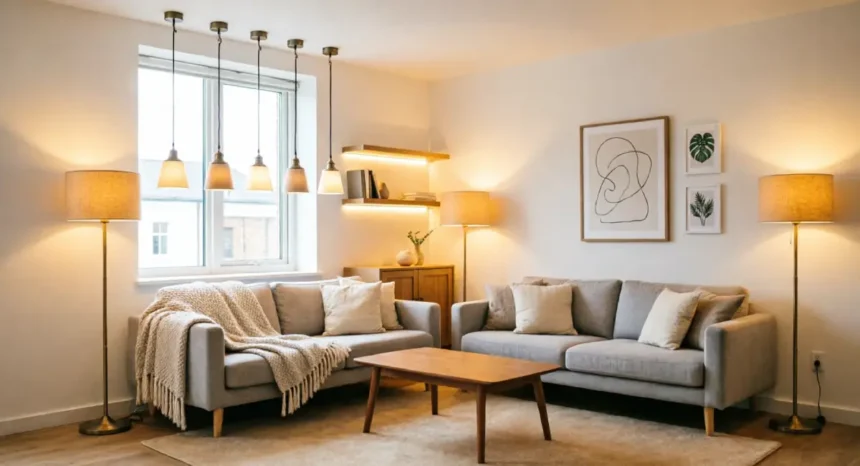
Floor Lamps and Table Lamps: Underrated Brighter Room Ideas
Layered lighting works because instead of one light source doing everything, you use several sources at different heights and angles. The result is a room that feels alive rather than flat.
For renters and DIY beginners, floor lamps and table lamps are the most accessible way to build those layers. They plug into any outlet, require no installation, and move with you when you leave.
Ambient light fills the room. Task light focuses on a specific area — a reading chair, a desk, a kitchen counter. Accent light draws attention to something specific — a shelf, a piece of art, an architectural feature. You do not need all three in every room, but two sources in a room almost always look better than one.
Where to Place Floor Lamps for Maximum Brightness
Corners are your best friend. A floor lamp placed in a room corner bounces light off two walls at once, spreading illumination further than a lamp positioned in the open. This is one of the easiest ways to make a room feel brighter without adding another outlet or fixture.
Arc floor lamps work especially well behind sofas and over dining tables. The arm extends the light source out over the center of a seating area, creating the effect of overhead lighting without needing a ceiling fixture at all.
For room size guidance:
- Small rooms (under 12 sqm): one floor lamp at 600–800 lumens is usually enough when combined with other sources
- Medium rooms (12–25 sqm): aim for 1000–1500 lumens from a floor lamp, or supplement with a table lamp
- Large rooms (over 25 sqm): plan for at least two floor lamps or a combination of lamp types
Tripod lamps and arc lamps are the most widely available styles, and both are practical for renters because they require no wall mounting.
Using Multiple Light Sources Instead of One Overhead Fixture
A room lit by a single overhead bulb looks like a storage unit. The light comes from above, shadows fall downward, and everything looks flat. This is the default in most rentals, and it is easy to change.
Try this: turn off the overhead light and switch on a floor lamp in one corner and a table lamp on a side table. The difference in how the room feels is immediate. Shadows become softer, the room looks larger, and the overall atmosphere shifts from functional to comfortable.
Three mid-brightness sources placed strategically will almost always outperform one high-wattage overhead fixture in how pleasant the room feels.
Renter-Friendly Fixture Alternatives That Require No Electrician
Some renters want the look of a proper ceiling fixture, not just lamps. Three approaches deliver that look without touching an electrical box.
The first is swag pendant kits. The second is battery-operated flush-mount fixtures. The third is plug-in track lighting powered by a single outlet. Each one suits a slightly different situation.
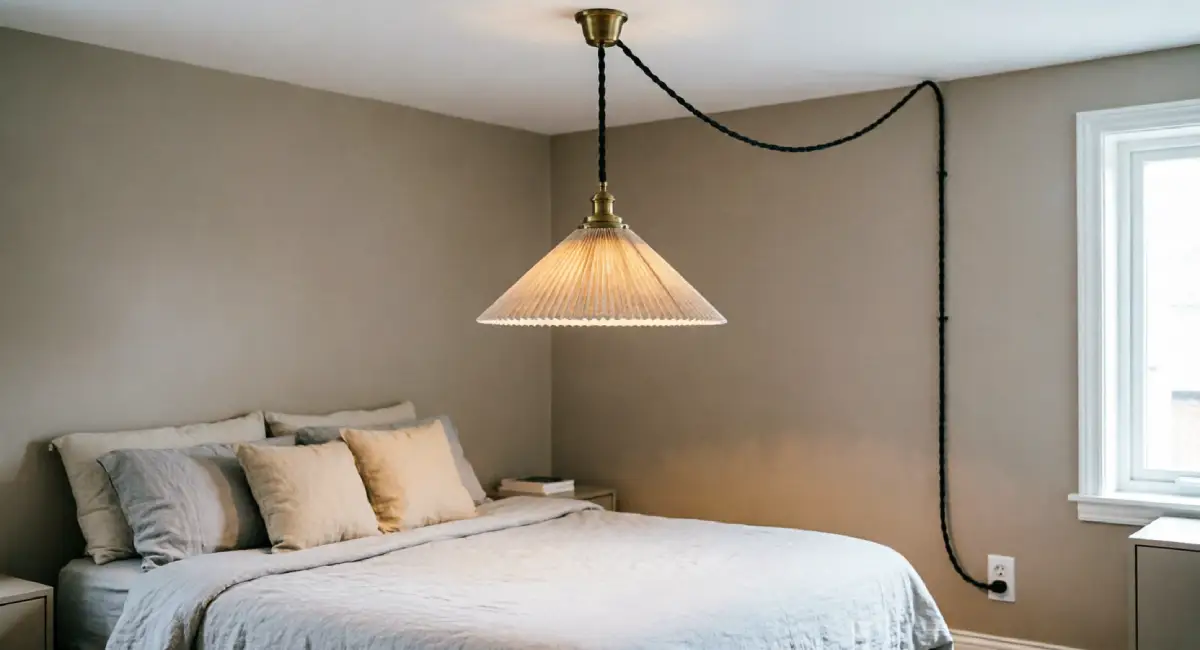
Swag Pendant Kits: How They Work and What to Know
A swag pendant is a pendant light designed to hang from a ceiling hook and plug into a wall outlet. The cord drapes from the hook to the outlet, either along the ceiling using clips or down the wall behind furniture.
They are widely available, come in a broad range of styles, and are one of the most popular renter lighting solutions: they look like a proper hanging light from across the room.
What to know before buying:
- Check the weight rating of your ceiling hook against the weight of the shade and fixture
- Adhesive ceiling hooks are suitable for pendants up to approximately 500g
- For heavier fixtures, use a toggle bolt hook rated for your ceiling material
- Position the plug end near an existing outlet rather than running a long extension cord across a visible wall
- Route the cord along the ceiling with adhesive clips for the cleanest result
The cord is visible, so choose a cord color that works with your room. Black cords read as intentional in modern spaces. Fabric-covered cords in natural tones work well in warmer, more relaxed interiors.
Battery-Operated Ceiling Fixture Replacements
Newer battery-powered flush-mount LED panels are designed to replace the look of a ceiling light. They sit flat against the ceiling, are held in place by three screws or strong adhesive mounts, and are powered entirely by batteries or a rechargeable internal cell.
Output varies by model, but better units produce 800–1200 lumens, comparable to a standard ceiling fixture in a small room. Many include a motion sensor or a remote control.
One honest limitation: they are not suitable for large rooms or high-use areas where a light stays on for several hours continuously. The battery life in constant use is simply not there. For a guest bedroom, a hallway, a closet, or a utility room used in short sessions, they are a strong and practical choice.
Installation is straightforward. Most units come with all required hardware and take under ten minutes to fit.
Mirrors, Paint, and Surfaces That Make Lighting Work Harder
Better light sources matter. So does the room around them. A room with dark walls and heavy furniture absorbs light rather than reflecting it. Two simple changes can multiply the effect of every lamp and bulb you add.
Which Paint Colors Reflect the Most Light
Every paint color has a Light Reflectance Value (LRV) measured on a scale from 0 (black, absorbs all light) to 100 (pure white, reflects all light). Most livable wall colors fall between 50 and 90.
Colors that reflect well:
- Off-whites and warm whites (LRV 80–90): the most reflective practical option
- Pale grays with warm undertones (LRV 65–80): reflect well without feeling stark
- Soft creams and light beiges (LRV 70–85): warm and highly reflective
Pure white is not always the best choice. Many pure whites have cool blue undertones that make a room feel clinical rather than bright. An off-white or warm white in the same LRV range will feel brighter in practice because it works with warm light sources rather than against them.
For renters who cannot repaint: peel-and-stick wallpaper panels in light tones or large, light-framed artwork can reflect enough light to make a noticeable difference in small areas. Glossy or satin-finish furniture and surfaces also reflect more light than matte finishes.
Mirror Placement to Amplify Natural and Artificial Light
A mirror opposite or adjacent to a window reflects natural light into the room, effectively acting as a second light source during daylight hours. The larger the mirror, the greater the effect.
For artificial light, place a mirror near a floor lamp or table lamp rather than across the room from it. The lamp’s light bounces off the mirror and redistributes into parts of the room that the lamp cannot reach directly.
Frame style matters less than size and placement. A large, unframed mirror or one with a thin metal frame reflects more light than a heavily framed piece of the same size. Gallery walls of small mirrors achieve a similar effect with more visual interest.
What to Avoid: Common Mistakes When Upgrading Lighting Without Rewiring
Getting this right is straightforward if you avoid a few common missteps.
Overloading a single outlet. Plug-in lights draw power like any other device. Running multiple plug-in pendants, a floor lamp, and a phone charger from one outlet using a power strip is fine as long as the total wattage stays within the strip’s rated capacity. Check the label. LED lights draw very little power, but calculate before you build a setup around one outlet.
Buying the wrong bulb base. Bulbs come in different base types (E27, E14, GU10, and others, depending on your region). Check the base type of your existing socket before ordering online. A bulb that does not fit is a return trip to the shop.
Choosing battery lights with too few lumens. A battery puck light rated at 50 lumens will not brighten a room. It will create a dim glow that does little. For task lighting, look for a minimum of 200 lumens per unit. For a space you want to feel genuinely lit, 400 lumens or more.
Underestimating cord length. Plug-in fixtures come with cords of fixed length, typically 150–200 cm. Measure from your planned mounting point to the nearest outlet before buying. Running an extension cord across an open floor is a trip hazard and looks messy. Either choose a fixture with a longer cord or position the fixture closer to the outlet.
How This Fits Into a Broader Budget Home Refresh
Lighting is one of the most cost-effective changes you can make to a home because it affects how everything else looks.
New cushions, a fresh rug, rearranged furniture — all of these improvements are more visible in a well-lit room. The same sofa under a harsh overhead bulb and under warm layered lamp light looks like it belongs to two different homes.
This is why lighting belongs near the top of any budget home refresh plan, not at the end. It is not the finishing touch. It is the foundation that makes every other change work better.
The methods in this article cost a fraction of what a single piece of furniture costs. A smart bulb swap runs under $15 per socket. A plug-in floor lamp can be found for $30–60. A rechargeable LED strip for under-cabinet use is typically $20–35. None of these requires a professional. None of them require a lease amendment.
Start with one room, make the changes that match your situation, and see how different the space feels before you spend money on anything else.
Conclusion
You do not need an electrician, a permit, or a landlord’s blessing to have a well-lit home. The options are practical, affordable, and widely available.
Smart bulbs improve the quality of light in any existing socket instantly. Plug-in lights give you fixture-style results from a standard outlet. Battery-powered lights solve the problem in spaces without convenient outlets. Floor lamps and table lamps create the layered lighting that makes a room feel finished. And small changes to surfaces and mirrors multiply the effect of everything else.
Pick the one method that fits your situation right now and put it in place this week. You will notice the difference the same day.
If this helped, take a look at the rest of the budget home refresh series for more ideas that work within the limits of a rental or a tight budget.