How to Start a Small Backyard Garden with No Experience
Growing your own food or flowers sounds wonderful until you actually try to figure out where to begin. What kind of soil do you need? How much sun is enough? Which plants won’t die on you in the first week? If those questions have been holding you back, you are in exactly the right place.
- Why a Small Backyard Garden Is the Best Place to Start
- How to Choose the Right Spot in Your Backyard
- How Much Sun Does a Beginner Garden Actually Need?
- Drainage, Slope, and Ground Conditions to Watch For
- Beginner Garden Plan: How to Layout Your Space
- Raised Beds vs. Ground-Level Plots: Which Is Better for Beginners?
- How to Size Your First Garden So It Doesn’t Overwhelm You
- Understanding Soil Prep: The Step Most Beginners Skip
- Easy Plants to Grow for Beginners in a Small Garden
- Best Vegetables for a First-Time Backyard Garden
- Herbs That Grow Fast and Practically Take Care of Themselves
- Should Beginners Start from Seed or Buy Transplants?
- How to Set Up a Simple Watering Routine That Actually Works
- Morning vs. Evening Watering: What Makes a Real Difference
- Simple Irrigation Options for Small Gardens on Any Budget
- Small Garden Ideas to Get More from Every Square Foot
- Companion Planting Basics: Which Plants Grow Better Together
- Vertical Growing: How to Double Your Yield in a Small Space
- Basic Maintenance Tasks Every New Gardener Needs to Know
- How to Weed Without Damaging Your Plants
- Feeding Your Garden: When and What to Use as a Beginner
- How to Spot and Handle Common Beginner Garden Pests
- What to Expect in Your First Garden Season: Honest Advice
- Keeping a Simple Garden Journal to Track What Works
- How to Prep Your Garden at the End of the Season for Next Year
- Conclusion
This guide is built specifically for people who want to start a small backyard garden with no experience and no prior knowledge. Not a vague overview — a real, step-by-step roadmap from picking your spot all the way to harvesting your first crop.
You do not need a large yard, expensive tools, or a green thumb. What you need is a clear plan and a willingness to learn as you go. By the end of this article, you will have both.
Why a Small Backyard Garden Is the Best Place to Start
A lot of first-time gardeners make the same mistake: they go big. They clear out half the yard, buy a cartload of supplies, and then get buried under the workload by week three. Starting small is not a compromise. It is the smarter choice.
A compact garden plot, even just 4×4 feet, is easier to water, easier to weed, and easier to watch closely. When something goes wrong, and something always does in year one, it is much simpler to fix on a small scale. You lose a few plants, not an entire season’s investment.
A small space also teaches you gardening skills faster. You see cause and effect up close. You notice when a plant is struggling early enough to do something about it. And you build confidence with each small success, which makes expanding in year two feel natural rather than overwhelming.
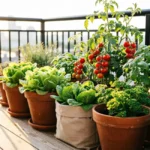
That 4×4-foot patch can produce more than you might expect. A well-planned small bed can yield fresh lettuce every week, a steady supply of herbs, and enough cherry tomatoes to share with your neighbours.
How to Choose the Right Spot in Your Backyard
Before you buy a single seed or bag of soil, spend one day watching your backyard. Where does the sun fall? Where does water pool after rain? Which areas are easy to reach from your back door?
Three things matter most when choosing a garden location: sunlight, water access, and proximity to your house. Get these right and everything else becomes easier. Get them wrong, and even the best soil and seeds will underdeliver.
Most vegetables need at least six hours of direct sunlight per day. Herbs generally agree. Leafy greens like lettuce and spinach can manage with four hours, but fruiting plants like tomatoes and peppers need the full six, and ideally more.
Water access is often overlooked. If dragging a hose across the yard feels like a chore, you will start watering less often than your plants need. Place your garden where reaching it with a hose or watering can takes under two minutes.
Proximity to the house matters for the same reason. Gardens you can see from the kitchen window get tended more often. Out of sight often means out of mind, especially during a busy week.
How Much Sun Does a Beginner Garden Actually Need?
Sun requirements in gardening fall into three categories: full sun (six or more hours of direct sun), partial shade (three to six hours), and full shade (less than three hours). Most beginner-friendly vegetables fall into the first two categories.
Tomatoes are the classic full-sun crop. They need six to eight hours to produce well. Lettuce, on the other hand, actually prefers partial shade in warmer months and bolts quickly when it gets too much direct heat.
To map your yard’s sun zones, go outside at 9am, note where sunlight falls, and check again at noon and 3 pm. Three observations across one day give you a reliable picture. No tools required.
Drainage, Slope, and Ground Conditions to Watch For
Poor drainage is one of the most common and least discussed causes of beginner garden failure. Plant roots need both water and air. Soil that stays waterlogged after rain suffocates roots and invites rot.
Try this simple test: dig a hole about 30cm (12 inches) deep, fill it with water, and time how long it takes to drain completely. If the water is gone within an hour, your drainage is fine. If it is still sitting there four hours later, you have a drainage problem.
The practical fix is a raised bed. By gardening above the existing soil level, you control the drainage from the start. This is the single best reason beginners with heavy clay or compacted ground should skip in-ground planting and go straight to raised beds.
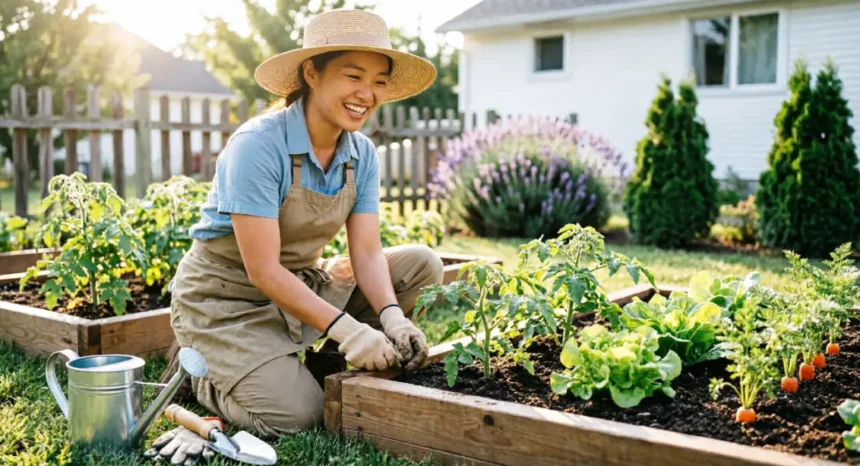
Beginner Garden Plan: How to Layout Your Space
Before a single seed goes into the ground, sketch your garden on paper. This step takes twenty minutes and saves hours of rearranging later.
A beginner garden plan does not need to be precise or beautiful. A rough rectangle with zones marked out is enough. Decide how many plants you want, how large your bed will be, and how you will move around it to tend each plant without stepping on the soil.
The classic beginner setup is a 4×8 foot bed divided into sections. For example, one quarter is planted with cherry tomatoes, one quarter with bush beans, one quarter with lettuce, and the final quarter with herbs like basil and parsley. That single bed gives you variety, covers multiple meal uses, and stays completely manageable.
Plan for access paths between beds if you have more than one. You should be able to reach any plant from the edge of the bed without stretching more than two feet.
Raised Beds vs. Ground-Level Plots: Which Is Better for Beginners?
Both approaches work, but they suit different situations. Ground-level planting costs less upfront. You work with the existing soil, add amendments, and plant directly. The downside is that native soil often needs significant improvement, weeds are more persistent, and drainage is harder to control.
Raised beds solve most beginner problems in one step. You fill them with a custom soil mix, they drain well by design, and the defined edges make weeding much faster. The upfront cost, typically £30 to £80 for a basic timber frame, pays back in reduced effort across the entire season.
If your budget is tight, start with one ground-level bed, improve the soil well before planting, and consider a raised bed as your first upgrade in year two.
How to Size Your First Garden So It Doesn’t Overwhelm You
The most common sizing mistake is going too large. A 4×4-foot bed is the ideal starting point for most beginners. A 4×8-foot bed is a reasonable stretch if you are confident about committing time each week.
To put it in practical terms: a 4×4 foot plot takes about 15 to 20 minutes of attention per week during the growing season. A 4×8-foot plot doubles that. A 10×10-foot plot easily becomes a part-time job for someone who has never gardened before.
Start smaller than you think you need. A successful small garden in year one teaches you far more than a struggling large one.
Understanding Soil Prep: The Step Most Beginners Skip
If you do one thing right in your first garden, make it the soil. More beginner gardens fail because of poor soil than for any other reason. Seeds sprout. Seedlings establish. Then growth stalls, and plants look weak and yellowed. Nine times out of ten, the soil is the cause.
Healthy garden soil looks dark and crumbly, feels loose and slightly damp when squeezed, and smells faintly earthy. It holds moisture without becoming soggy and drains freely without drying out in hours. Most native backyard soil is far from this ideal. It is often too sandy, too compacted, or too heavy with clay.
Think of good soil as a well-stocked kitchen for plants. Everything a plant needs to grow is already available, in the right form, in the right amounts. Your job in soil prep is to stock that kitchen properly before the growing season begins.
The three components every beginner should understand are topsoil (the base layer), compost (the nutrient source and structure improver), and a drainage amendment like perlite or coarse sand. These three, combined correctly, give your plants a genuine advantage from day one.
How to Test Your Soil Without Sending It to a Lab
You can learn a lot about your soil with three simple tests that cost nothing.
The jar test separates your soil into layers. Fill a jar two-thirds with soil, top it up with water, shake it well, and leave it to settle for 24 hours. Sand sinks first, then silt, then clay floats on top. This tells you your soil’s basic composition at a glance.
The squeeze test checks clay content. Take a handful of moist soil and squeeze it tightly in your palm. If it holds its shape and feels sticky, you have high clay content. If it crumbles immediately, your soil is sandy. Ideal soil holds together briefly, then breaks apart when poked.
The pH strip test checks soil acidity. Most vegetables grow best in a pH range of 6.0 to 7.0, which is slightly acidic to neutral. pH strips are available at garden centres for a few pounds and give you a result in seconds.
What to Add to Your Soil Before You Plant Anything
The single best addition to any beginner garden bed is compost. It improves sandy soil by helping it retain moisture. It loosens clay soil by improving its structure. It adds slow-release nutrients that feed plants across the whole season. There is no better all-purpose soil improver.
A simple beginner soil mix for a raised bed: 60% quality topsoil, 30% compost, and 10% perlite for drainage. Mix thoroughly before filling your bed.
Aged manure (not fresh) is a useful secondary amendment that adds nutrients and organic matter. Perlite improves drainage in heavy soils. If you have heavy clay ground, add both compost and perlite generously.
Avoid fresh manure, which can burn plant roots and carry pathogens. Avoid non-composted wood chips mixed directly into planting soil, as they temporarily tie up nitrogen while breaking down.
Easy Plants to Grow for Beginners in a Small Garden
The plants you choose in your first season have a direct impact on your confidence and enjoyment. Some plants are forgiving, fast-growing, and reward minimal effort. Others demand specific conditions, regular attention, and experience to get right.
As a beginner, choose plants that forgive mistakes, produce quickly, and suit your available space and sunlight. The curated list below covers the best vegetables, herbs, and one flowering option that every new gardener should know.
Best Vegetables for a First-Time Backyard Garden
Lettuce is the ideal beginner vegetable. It grows fast (harvest in 30 to 45 days), tolerates partial shade, and can be harvested leaf by leaf so the plant keeps producing. Space plants 20 to 30cm apart.
Radishes are the quickest crop in the garden, ready in as little as 25 days. They are great for filling gaps between slower-growing plants. Sow directly into the soil, 5cm apart.
Bush beans are reliable and productive. They need no staking, tolerate average soil, and produce steadily once they start. Sow directly 10cm apart after the last frost. Harvest in about 55 days.
Zucchini is generous to a fault. One or two plants produce more than most families can eat. Give each plant 60cm of space and expect fruit within 50 to 60 days. The most common mistake: planting too many.
Cherry tomatoes are far easier than large varieties. They are less prone to splitting, produce heavily, and handle occasional watering irregularity better than beefsteak types. Space 45 to 60cm apart; plan a support cage from day one.
Kale is tough, cold-tolerant, and grows through conditions that would knock out softer plants. Space 40cm apart. Harvest outer leaves from the bottom, and the plant keeps growing for months.
Herbs That Grow Fast and Practically Take Care of Themselves
Herbs are the beginner’s best friend. They grow quickly, use very little space, and go directly from garden to kitchen in minutes.
Basil grows fast in warm weather and pairs naturally with tomatoes in both the garden and the kitchen. It prefers full sun and regular watering. Pinch off flower heads to keep production going.
Chives are nearly indestructible. They come back year after year, tolerate partial shade, and need almost no attention once established.
Mint grows so aggressively that it should be planted in a container or a buried pot to stop it spreading across the bed. Given that boundary, it is one of the easiest plants to grow.
Parsley takes two to three weeks to germinate, but is low-maintenance from that point forward. It tolerates partial shade and can be harvested continuously through the season.
Should Beginners Start from Seed or Buy Transplants?
Seeds are cheaper and give you access to far more variety. Transplants cost more but skip the most failure-prone stage of plant growth and give you a head start of several weeks.
The honest recommendation: do both. Buy transplants for crops that are harder to germinate at home, particularly tomatoes and peppers. Direct sow crops that are easy and fast from seed: beans, lettuce, radishes, and zucchini all germinate reliably in warm soil with minimal fuss.
This hybrid approach gives you early wins (transplants in the ground, growing immediately) while building your seed-starting confidence on forgiving crops.
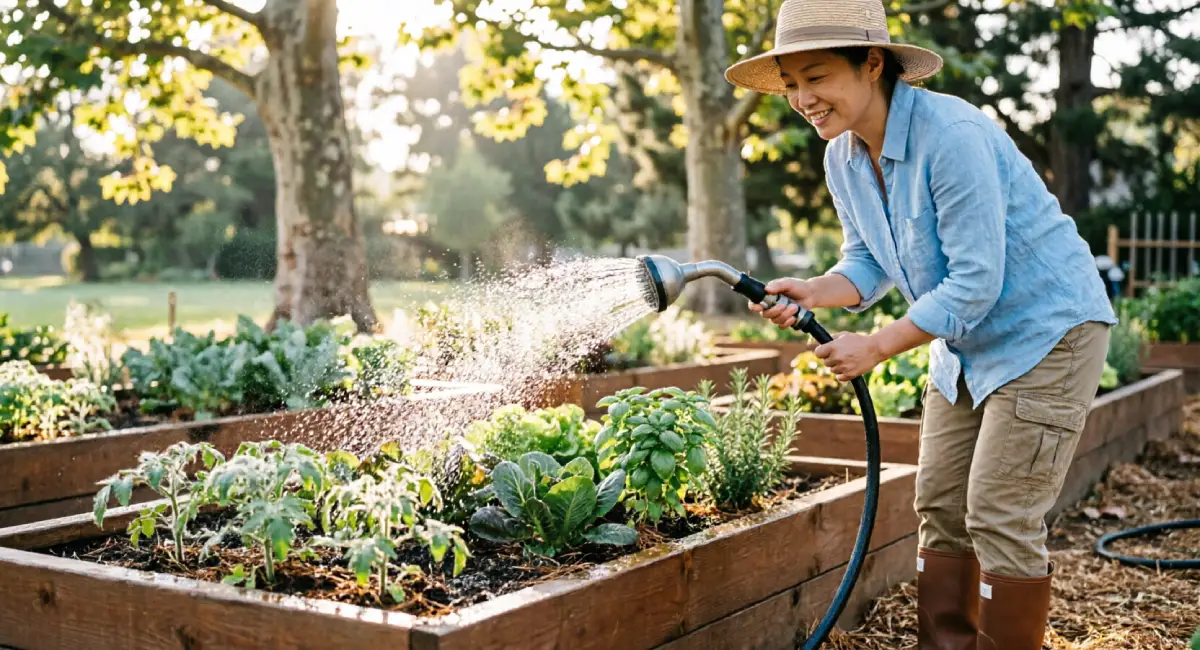
How to Set Up a Simple Watering Routine That Actually Works
Watering is where most beginners go wrong, and in two opposite directions. Some water too little and let plants dry out. Others water too often and drown the roots. Both cause problems that look similar from the outside: wilting, yellowing leaves, and stunted growth.
The rule that solves both mistakes is simple: water deeply and less often, rather than shallowly every day. Deep watering encourages roots to grow downward into the soil, which makes plants more resilient to dry spells. Shallow daily watering keeps roots near the surface, where they are vulnerable to heat and drying wind.
Before watering, push your finger into the soil up to the second knuckle. If it feels moist, wait another day. If it feels dry, water thoroughly until the soil is damp to a depth of 15 to 20cm. This finger test takes five seconds and removes all guesswork.
During the peak of summer, most vegetable gardens need deep watering every two to three days. In cooler weather or after rain, that interval extends. In extreme heat, you may need to water daily, but always check the soil first.
Morning vs. Evening Watering: What Makes a Real Difference
Morning is the best time to water a vegetable garden. When you water early, the foliage and soil surface dry out during the warmer part of the day. Wet foliage left overnight creates ideal conditions for fungal diseases like powdery mildew and leaf spot.
Evening watering is acceptable in very hot, dry climates where morning temperatures are already extreme and water evaporates before plants can absorb it. In that case, water at the base of the plant rather than overhead, and try to avoid wetting the leaves.
If your only window to water is midday, water at the base of each plant with a slow, steady flow. Avoid splashing soil onto leaves, which can spread disease.
Simple Irrigation Options for Small Gardens on Any Budget
Hand watering with a watering can or hose and a gentle spray attachment costs nothing extra if you already have a hose. It works well for very small beds and gives you daily contact with each plant, which is useful for spotting problems early.
Soaker hoses are the best first upgrade for a beginner. They run along the base of your plants and deliver water directly to the root zone, reducing water waste and keeping foliage dry. A basic soaker hose setup costs under £20 and connects directly to any standard tap.
Drip irrigation is a step up from soaker hoses and works well for larger beds or anyone who wants to automate watering with a timer. It costs more (typically £40 to £100 for a basic kit) but significantly reduces hands-on watering time once installed.
Small Garden Ideas to Get More from Every Square Foot
Limited space does not have to mean limited output. Three simple techniques, none of them advanced, can dramatically increase what a small garden produces without adding more ground space.
These approaches, companion planting, vertical growing, and succession planting, are not tricks for experienced gardeners. They are practical strategies that beginners can apply in their very first season.
Succession planting means sowing a new batch of seeds every two to three weeks rather than all at once. Instead of 30 lettuces ready at the same time, you get steady harvests across two months. Simply sow a small row or section, wait three weeks, sow another.
Companion Planting Basics: Which Plants Grow Better Together
Companion planting is the practice of placing certain plants near each other because they benefit one another in some way.
Tomatoes and basil are the most well-known pairing. Basil is thought to improve tomato flavour and deter certain insects. Marigolds planted along the edges of a vegetable bed deter aphids and other common garden pests. Beans fix nitrogen from the air into the soil, which benefits neighbouring plants like carrots.
You do not need to follow a complicated companion planting chart as a beginner. Start with these three pairings and observe what happens. That observation becomes valuable knowledge for year two.
Vertical Growing: How to Double Your Yield in a Small Space
Plants that grow up take far less ground space than plants that sprawl outward. Beans, cucumbers, and peas are natural climbers and thrive on even a simple trellis made from bamboo canes and garden twine.
A basic DIY trellis costs under £10 in materials and takes about thirty minutes to build. Push two canes into each end of the bed, run horizontal strings between them at 20cm intervals, and your climbers will find their way up with minimal guidance.
Tomato cages perform the same function for tomatoes, keeping the plant upright, improving airflow around the leaves, and preventing fruit from sitting on the soil.
Basic Maintenance Tasks Every New Gardener Needs to Know
A garden that looks after itself is a myth, but one that only needs an hour or two of attention per week is entirely real, especially at the small scale. The key is consistency. Small, regular tasks prevent large, time-consuming problems.
The four maintenance tasks every beginner should understand are weeding, feeding, pruning dead or damaged growth, and pest checks. None of these requires specialist knowledge. After one full season, they will feel as natural as making a cup of tea.
Think of maintenance as a rhythm. Monday morning walk-through, fifteen minutes of weeding mid-week, a quick water check every other day. Once that rhythm is established, keeping a small garden healthy is genuinely enjoyable rather than a chore.
How to Weed Without Damaging Your Plants
Weeding is easier when the soil is moist, either after watering or after rain. Dry, hard soil grips weed roots tightly and makes complete removal difficult. A weed left with its root intact will regrow.
Work close to the soil surface and pull firmly from the base of the weed stem rather than grabbing at the top, which often snaps the plant off and leaves the root behind. For stubborn weeds, use a hand fork to loosen the soil around the root before pulling.
The single best weed prevention tool is mulch. A 5 to 8cm layer of straw or wood chip mulch around your plants suppresses weed germination, retains soil moisture, and moderates soil temperature. Lay it down after planting and refresh it once or twice during the season.
Feeding Your Garden: When and What to Use as a Beginner
Plants growing in compost-rich soil often need little supplementary feeding, especially in the first half of the season. As the season progresses and nutrients are used up, a boost from fertiliser helps maintain productivity.
Slow-release granular fertiliser is the beginner’s best option. You apply it once (or occasionally twice) per season by scattering it around the base of plants and watering it in. A balanced formulation (labelled 10-10-10 or similar) covers the three main nutrients plants need: nitrogen, phosphorus, and potassium.
If you prefer an organic approach, a thick layer of compost worked gently into the top few centimetres of soil achieves a similar result more slowly. Liquid fertilisers work faster but require more frequent application and more attention to avoid over-feeding.
How to Spot and Handle Common Beginner Garden Pests
Aphids cluster on new growth and leaf undersides, sucking plant sap and causing curling, yellowed leaves. A strong spray of water knocks them off. Repeat daily for a few days and the population collapses.
Slugs target seedlings and young growth, leaving irregular holes and a slime trail. Remove them by hand in the early morning or evening when they are most active. A ring of coarse sand or crushed eggshell around vulnerable plants creates an uncomfortable barrier.
Caterpillars (often from cabbage white butterflies) chew holes in brassica leaves. Check the undersides of leaves for small yellow egg clusters and remove them. Covering plants with fine mesh netting is the most effective long-term solution.
Whitefly rise in clouds when disturbed and leave sticky deposits on leaves. Yellow sticky traps catch adults. Neem oil spray, applied in the evening, disrupts their life cycle over one to two weeks.
Spider mites leave fine webbing and tiny speckled marks on leaves, usually appearing during hot, dry weather. Increase humidity around affected plants and use neem oil or insecticidal soap spray if needed.
Always start with the least invasive approach. Hand removal and water sprays first. Neem oil, if the problem persists. Chemical treatments as a last resort and only for severe infestations.
What to Expect in Your First Garden Season: Honest Advice
Year one in the garden is a learning season. Some things will grow brilliantly. Some will not. A few plants will probably die before you figure out why. All of this is normal, expected, and actually useful.
The three most common beginner mistakes are overwatering (which causes root rot and yellowing), planting too deep (which slows or prevents germination), and overcrowding (which restricts airflow and invites disease). Knowing these in advance means you are already ahead of where most first-time gardeners start.
Treat your first season as a data-gathering exercise. Your goal is not a perfect harvest. Your goal is to finish the season knowing more than you did when you started, with a clear picture of what to do differently next time.
Keeping a Simple Garden Journal to Track What Works
A garden journal does not need to be a fancy notebook. A phone notes app works just as well. The habit of recording what you do and what happens is what matters, not the format.
Five things worth recording in your first season:
- Planting dates for each crop (so you know what to expect when)
- Germination rates (which seeds came up well, which did not)
- Problems you noticed (yellowing, pests, wilting) and what you did about them
- Weather conditions during key growth stages
- Harvest dates and approximate quantities
By the end of the season, this simple log becomes a personalised reference guide. In year two, you will know exactly when to plant, what to avoid, and which varieties performed best in your specific garden.
How to Prep Your Garden at the End of the Season for Next Year
Closing your garden well at the end of the season sets up a stronger start the following spring. It takes one afternoon and is some of the most valuable work you will do all year.
Clear out all spent plants, including roots where possible. Diseased material should go in the bin rather than the compost. Add a generous layer of compost across the top of your beds and work it lightly into the surface. Cover bare soil with a mulch layer to protect the soil structure and suppress weed growth over winter.
If any of your plants produced well and you want to grow the same variety next year, save seeds from the healthiest specimens. Let the seeds dry fully before storing them in a labelled paper envelope in a cool, dry place.
Conclusion
Starting a small backyard garden with no experience is not a complicated undertaking. It is a series of small, practical decisions made in the right order: choose a sunny, accessible spot, prepare your soil properly, plant easy crops that forgive beginner mistakes, water consistently and deeply, and tend your garden a little each week.
The biggest shift that new gardeners need to make is from thinking about gardening as a skill you either have or you do not, to seeing it as something you build gradually through direct experience. Every season teaches you something the last one could not.
Your first step does not need to be big. Mark out a 4×4 foot space this weekend. Test your soil. Order a bag of compost. Pick three or four plants from the list in this guide. The garden will teach you the rest.
If you found this guide useful, share it with someone who has been thinking about starting their first garden. And when your first harvest comes in, come back and tell us what grew.