You found the perfect spot for a shelf. Maybe it’s above your desk, beside the bed, or in that empty corner of the kitchen. The hesitation is real: drill into the wall and risk losing your security deposit, crack the plaster, or violate your lease.
- Why Wall Damage Is a Real Concern for Renters and Homeowners
- How to Install Floating Shelves Without Damaging the Wall — Your Method Options
- Adhesive Strips and Hanging Solutions — What They Can Actually Hold
- Using a Stud Finder to Mount Shelves the Right Way
- Wall Anchors — Choosing the Right Type for Your Wall
- Shelf Brackets and Rail Systems That Reduce Wall Impact
- How Much Weight Can a Floating Shelf Safely Hold
- Rental Wall Storage Solutions That Require No Permanent Fixtures
- How to Repair Wall Holes Before Moving Out
- The Shelf Is Possible — Here Is Where to Start
You can install floating shelves without damaging the wall — or at least without causing damage you cannot fix before moving out. The method you choose depends on your wall type, how much weight you need to hold, and how long you plan to keep the shelf up.
This guide walks through every option: from fully hole-free adhesive systems to minimal-impact mounting with anchors. By the end, you will know which approach fits your situation, what weight each method handles, and how to leave your walls looking untouched when it matters.
Why Wall Damage Is a Real Concern for Renters and Homeowners
Most shelf installation guides assume you own the walls and that a few screw holes are no big deal. For renters, that assumption creates a real problem.
Security deposits are not trivial. In most major rental markets, a deposit covers one to three months of rent. Landlords routinely deduct repair costs for wall damage, and “damage” is often defined more broadly in a lease than renters expect. There is also the practical issue of working with walls you do not fully understand — old plaster that cracks unpredictably, drywall that crumbles around oversized anchors, or paint that peels when adhesive is removed carelessly.
The result is that many renters either skip wall shelving entirely or install it badly, using the wrong anchors on the wrong surfaces and creating exactly the kind of damage they were trying to avoid.
Every method in this guide sits on a spectrum from zero wall contact to low-impact, repairable installation. The goal is to match you to the right spot on that spectrum based on your actual situation.
What Counts as Wall Damage in a Rental Agreement
Most leases distinguish between normal wear and tear and actual damage. A single small nail hole from a picture hook usually falls under normal wear. A cluster of large anchor holes, torn drywall paper, adhesive residue that stained the paint, or cracked plaster is a different matter.
The specific wording varies by landlord and jurisdiction. A useful working rule: if a hole requires more than basic spackling to repair, it is likely to be considered damage. Holes larger than 6mm (roughly a quarter-inch) in diameter, or multiple holes within a small area, tend to cross that line.
Adhesive residue is trickier. Some adhesive products remove cleanly; others lift paint or leave a ghosted mark. Always test on a hidden area first.
When Floating Shelves Are Worth the Risk
Not every rental situation demands a zero-damage approach. If you are in a long-term lease, have a cooperative landlord, or plan to repaint before leaving, minor mounting is often a reasonable choice.
Ask yourself three questions before picking a method:
- How long are you staying? Short-term (under a year) favors adhesive or freestanding solutions. Longer stays make repairable mounting more practical.
- What does your lease actually say? Some leases explicitly permit small nail holes. Read the clause before assuming the worst.
- Are you willing to repair the wall before you leave? If so, a wider range of methods becomes available. The repair process is covered later in this article and is simpler than most people expect.
How to Install Floating Shelves Without Damaging the Wall — Your Method Options
The right method depends on what “damage” means in your context and what the shelf needs to do. The options fall into two broad categories, each with different weight limits, wall compatibility, and cleanup requirements.
Think of it as a dial rather than a binary choice. At one end, fully damage-free methods leave nothing behind. At the other, minimal-impact methods use small fixings that are straightforward to repair. Most readers will find their best solution somewhere between the two.
Damage-Free Methods (No Holes at All)
These approaches use no drilling, nails, or screws. They rely on adhesive bonding, mechanical tension, or freestanding weight.
Adhesive strip systems (like Command Strips or adhesive shelf brackets) bond directly to painted drywall and most smooth surfaces. They suit shelves holding decorative items, small plants, or lightweight objects under roughly 5 kg total.
Tension pole systems use pressure between the floor and ceiling to hold a vertical column of shelves. No wall contact needed.
Leaning and freestanding shelf units stand on their own or rest against the wall without being fixed to it. These are ideal for furnished rentals or anyone who moves frequently.
The trade-off: damage-free methods have real weight limits. They are not suitable for heavy books, kitchen crockery, or anything that shifts or vibrates.
Minimal-Impact Methods (Small, Repairable Holes)
If your shelf needs to hold more weight, or if adhesive will not bond to your wall surface, minimal-impact mounting is a strong middle ground.
Picture-rail hooks work in older homes that have a picture rail molding near the ceiling. The hook hangs from the rail, and a wire or rod suspends the shelf below — no wall penetration at all.
Small finish nails (under 2mm diameter) create holes that are simple to fill with a dab of lightweight spackling. These suit thin shelves holding light decorative items.
Thin screws with plastic expansion anchors leave holes in the 4–6mm range. These are repairable with standard spackling paste and touch-up paint, and they open up a much wider weight range (up to 25 lbs or about 11 kg per anchor). Most renters are surprised by how easy this repair is — it costs under $10 and takes about 20 minutes.
Adhesive Strips and Hanging Solutions — What They Can Actually Hold
Adhesive-based shelf systems have improved a lot in recent years. Products like Command Strips, Gorilla Mounting Tape, and purpose-built adhesive shelf brackets are now reliable options for light loads — provided you use them correctly and on the right surfaces.
The mechanism is a foam-backed adhesive layer that bonds with smooth, clean, painted surfaces. The bond builds over time: most manufacturers recommend pressing the adhesive firmly for 30 seconds, then waiting 24 to 72 hours before loading the shelf.
Removal should be clean. Command-style strips have a pull-tab that stretches the adhesive, releasing it without tearing paint. This only works if you follow the removal instructions exactly: pull the tab slowly at a low angle, parallel to the wall, rather than yanking it outward.
Weight Limits for Adhesive Shelf Systems
Weight limits vary by product, but here are realistic figures to work from:
- A single large Command Strip pair holds approximately 1.8 kg (4 lbs).
- Four pairs used together on a single shelf raise that to roughly 7 kg (15 lbs) if the surface allows it.
- Gorilla Mounting Tape (25mm width) holds up to 3.6 kg per 10 cm of tape length under ideal conditions.
- Purpose-built adhesive shelf brackets are often rated to 5–7 kg per bracket by the manufacturer.
These figures assume a clean, smooth, properly primed painted surface, ambient temperature between 15–35°C, and static loads — meaning the items on the shelf do not shift or vibrate.
Suitable items: small succulents and air plants, a handful of paperback books (weigh them first), framed photos, candles, and decorative objects. Not suitable: hardback book collections, jars of food, heavy ceramics, or anything a child might pull on.
Use more strips than you think you need. The weight limit stacks with each additional adhesive point — four strips carry roughly four times what one strip carries.
Surface Compatibility — Where Adhesives Work and Where They Fail
Adhesives perform well on surfaces that are smooth, clean, and non-porous. Surfaces where they typically work:
- Smooth painted drywall (the most common wall surface in modern homes)
- Painted concrete or cinder block, if the surface has been primed
- Ceramic tile and glass
- Finished wood paneling
Surfaces where adhesives regularly fail:
- Textured walls (orange peel, knockdown, or popcorn finishes): the adhesive only contacts the peaks of the texture, cutting bond strength dramatically
- Wallpaper: the adhesive bonds to the paper, not the wall; the paper peels away under load
- Bare brick or unprimed concrete: too porous for consistent adhesion
- Surfaces with a fresh coat of paint under 7 days old: the paint has not fully cured, and the adhesive can lift it
A quick compatibility test: press a piece of mounting tape firmly to your wall, wait 24 hours, and pull it away. If it lifts cleanly, the surface is compatible. If paint or texture comes with it, use a different method.
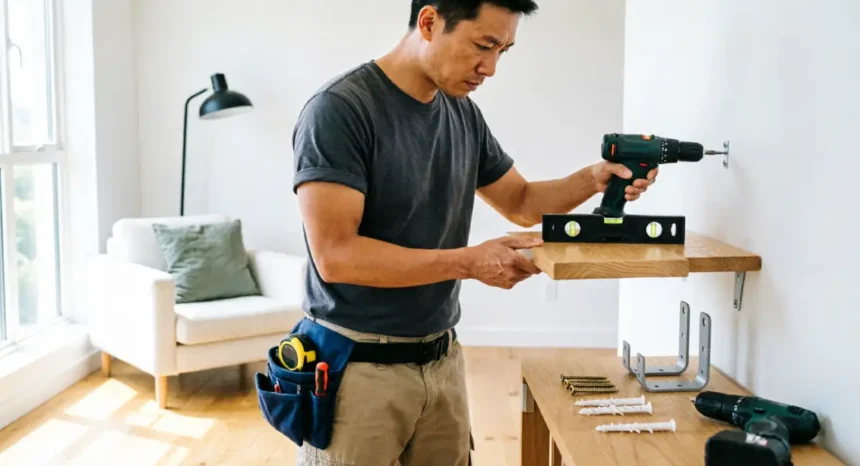
Using a Stud Finder to Mount Shelves the Right Way
If you are going to mount a shelf with screws, knowing where to put them matters more than anything else. Studs are the vertical timber or steel framing members inside your wall. In most wood-framed homes, they run floor to ceiling and are spaced 40 cm (16 inches) or 60 cm (24 inches) apart, center to center.
Mounting a shelf screw directly into a stud gives you a connection far stronger than any anchor in open drywall. It also means you need fewer screws for a given load capacity, which reduces the number of holes in your wall. Fewer holes means less to repair at move-out.
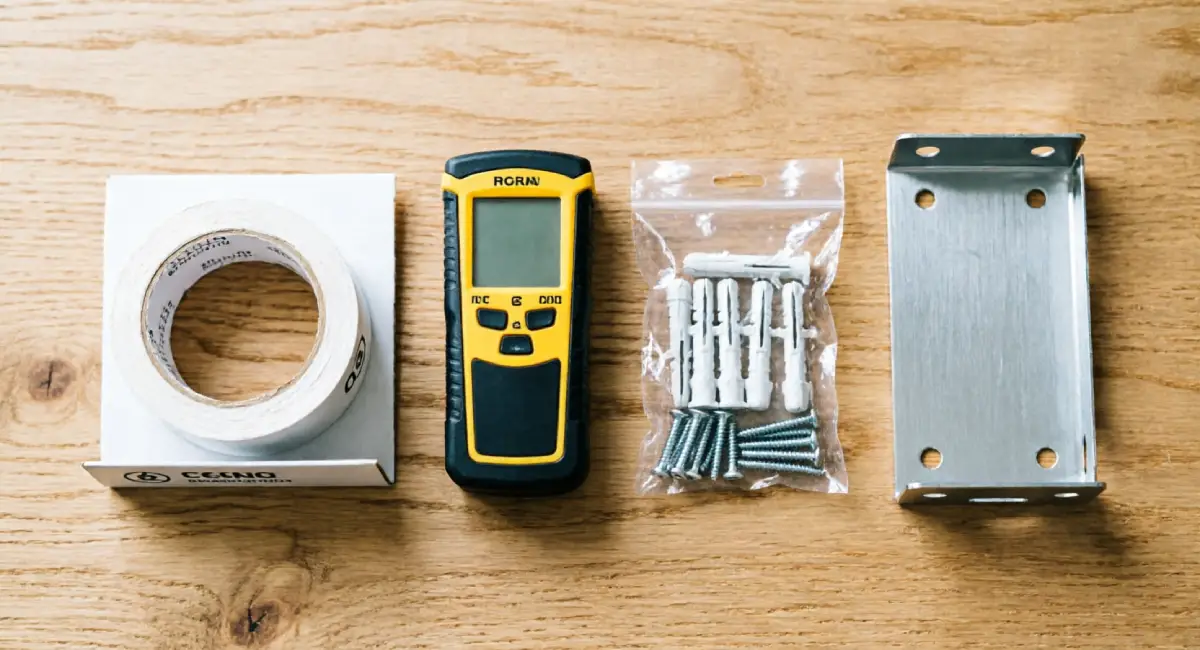
A stud finder is a small electronic device, typically $15–$50, that detects the density change inside the wall where a stud sits.
How to Use a Stud Finder Correctly
Follow these steps in order:
- Hold the stud finder flat against the wall, starting in an area you are confident has no stud underneath (the center of a large empty section of wall is usually safe).
- Press and hold the power button. The device calibrates to the baseline density of your wall at that point.
- Slide the stud finder slowly and steadily in one direction — slower than you think necessary. Most models beep or light up when they detect an edge.
- Mark that edge with a light pencil mark.
- Continue past the stud, then slide back from the other direction to find the other edge.
- The center of the stud is the midpoint between your two marks.
Common mistakes that lead to incorrect readings:
- Starting the calibration on top of a stud: the device calibrates to a high-density baseline and fails to detect it.
- Moving too quickly: the sensor misses the density change entirely.
- Working near metal pipes or conduit: these produce false positives.
If you do not own a stud finder, a strong rare-earth magnet (taped to a piece of dental floss so you can drag it across the wall) will detect the drywall screws used to attach the board to the stud. It is slower, but it works.
What to Do When Studs Are Not Where You Need Them
You find the studs, and they are 5 cm away from where the shelf needs to go. This is one of the most common frustrations in shelf installation.
Three practical options:
Option 1 — Reposition the shelf. Even a small shift of 5–10 cm often makes a shelf work just as well visually. This is the simplest, least invasive solution.
Option 2 — Use wall anchors in open drywall. If repositioning is not possible, choose the right anchor for your wall material and load. The next section covers this in detail.
Option 3 — Use a horizontal mounting rail. A rail long enough to span two studs can be screwed into both, and the shelf brackets attach to the rail at whatever horizontal position you need. This is the cleanest solution for adjustable or multi-shelf setups.
Wall Anchors — Choosing the Right Type for Your Wall
When studs are not available — or when you are mounting into plaster, brick, or masonry — wall anchors make a shelf secure. Choosing the wrong anchor for your wall material is one of the most common DIY shelf mistakes. It leads to shelves that pull out, walls that crumble, and holes far harder to repair than necessary.
The principle behind all anchors is the same: they expand or toggle inside the wall cavity to create a grip larger than the hole they entered through. The key variable is how much material they have to grip, and whether that material holds under load.
Drywall Anchors — Plastic Expansion, Toggle Bolt, and Snap-Toggle
Standard drywall is typically 12mm (half-inch) thick with an air gap behind it. That means anchors are gripping a relatively thin layer of gypsum board rather than solid material. Matching the anchor to the load is critical.
Plastic expansion anchors are the most common type sold in basic hardware kits. They are inserted into a pre-drilled hole and expand as the screw is driven in. They are rated for light loads, generally up to 11 kg (25 lbs) each, and leave a hole in the 6–8mm range when removed. Suitable for light shelves with decorative items.
Toggle bolts use a spring-loaded wing that opens inside the wall cavity. They are stronger — rated up to 22 kg (50 lbs) or more per bolt in standard drywall — and distribute load across a wider area of the panel. The trade-off: they require a larger entry hole (typically 10–12mm), and when removed, the bolt falls inside the wall. The hole left behind is larger and more involved to repair — an important consideration for renters.
Snap-toggle anchors are the best drywall anchor option for heavier loads without studs. They use a plastic toggle channel that locks behind the drywall permanently, with a bolt that can be removed and reinserted without the toggle dropping. Load ratings reach 45 kg (100 lbs) per anchor in thick drywall. The entry hole is around 12mm, but the repair path is cleaner than a toggle bolt because the channel stays in place.
Anchors for Plaster, Brick, and Tile Walls
Older homes often have plaster walls, which behave differently from drywall. Plaster is harder and heavier, but also more brittle — it can crack if an anchor expands too aggressively.
For plaster, use molly bolts or plaster-specific anchors rated for the material. Drill carefully at low speed without hammer action. The hole should be clean, not crumbled. Screws in plaster often need to be longer than those used in drywall because the substrate is thicker. Finding a lath (the wooden backing strips inside old plaster walls) provides a much stronger mounting point.
Brick and concrete require masonry drill bits (typically carbide-tipped) and concrete-specific sleeve anchors or wedge anchors. This is a more permanent installation category. If you are renting and your walls are exposed brick, check with your landlord before drilling — brick is not patchable in any practical sense.
Tile walls should generally be avoided for shelf mounting unless the shelf is very light and the tile is in excellent condition. Drilling through tile risks cracking it, and grout lines are too weak to anchor into reliably. If you must mount on tile, use a diamond-tipped drill bit, drill through the tile at low speed with no hammer action, and anchor into the substrate behind it.
Shelf Brackets and Rail Systems That Reduce Wall Impact
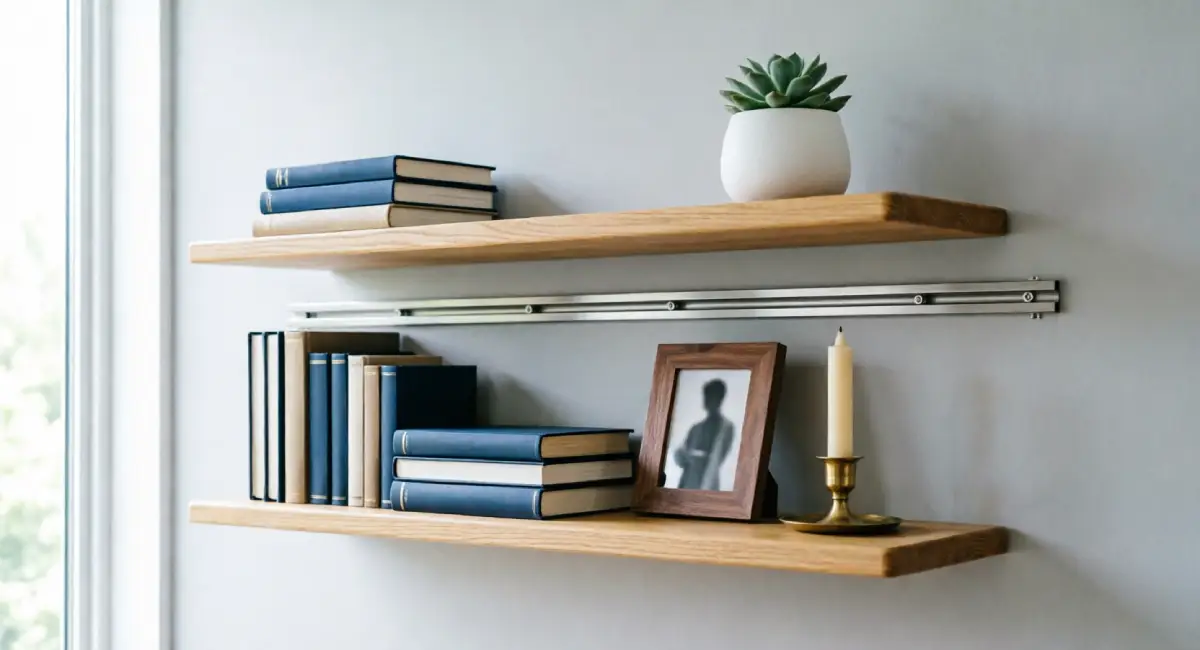
The bracket you choose affects more than looks. It determines how many holes you need, how the load is distributed across the wall, and how hard the shelf is to adjust or remove later.
Two bracket systems are worth understanding in detail: adjustable track rail systems and floating shelf brackets with hidden fixings.
Adjustable Track Rail Systems
A track rail system consists of two vertical metal channels screwed into the wall (ideally into studs) and a set of brackets that slot into the channels at whatever height you choose. The channels are typically 90–180 cm long and 2–3 cm wide.
The key advantage: only the rails require permanent fixing. Once the two rails are in place using four to six screws, you can add, remove, or reposition as many shelves as you like without making any additional holes. This cuts total wall penetrations to the minimum.
Standard rail systems are available in a range of finishes at most hardware stores. Look for systems where the brackets lock positively into the rail channel rather than simply resting on teeth — these hold better under dynamic load.
Weight capacity per bracket pair ranges from 20 kg to over 50 kg, depending on the rail gauge and screw-to-stud connection. For holding books, kitchen items, or a collection of plants, this is one of the most practical wall-mounted options available.
Floating Shelf Brackets With Invisible Fixings
Floating shelves — the kind with no visible bracket — achieve their look through one of three mechanisms: keyhole brackets recessed into the back of the shelf that hook onto screws in the wall; blind shelf supports (metal rods or dowels) that project from the wall and slide into pre-drilled holes in the shelf; or a backing plate screwed to the wall with the shelf clipped over it.
All three methods hide the fixing hardware inside the shelf, creating a clean, seamless look. They rely on two to four wall fixings per shelf — fewer total holes than a multi-bracket system.
The weight limits are real but not unlimited. A rod-style blind support system with two 10mm steel rods mounted into studs can hold 20–30 kg per shelf. A keyhole bracket system mounted into drywall anchors is better suited to 10–15 kg.
The main limitation of invisible fixings is that they are less forgiving of errors. If the mounting points are even slightly misaligned, the shelf will not sit level,l and you may need to enlarge a hole or reposition a fixing. Get the measurements right before drilling.
How Much Weight Can a Floating Shelf Safely Hold
This is the question most people skip — and it is one of the most important. A shelf that looks secure can still fail under the wrong load, and a failed shelf causes exactly the kind of wall damage you are trying to avoid.
Weight limits for floating shelves depend on four variables working together: the installation method, the wall material, the bracket type, and the shelf material itself.
Weight Limits by Mounting Method
A practical side-by-side comparison:
- Adhesive strips (4 strip pairs): 5–7 kg (11–15 lbs) total. Best for decorative items only.
- Plastic expansion anchor in drywall (per anchor): up to 11 kg (25 lbs). Two anchors give you a 20–22 kg theoretical maximum, but use 60–70% of the rated capacity in practice.
- Toggle bolt in drywall (per bolt): 20–25 kg (45–55 lbs). Strong, but leaves a larger hole.
- Snap-toggle anchor in drywall (per anchor): up to 45 kg (100 lbs). The strongest drywall-only option.
- Screw directly into stud (per screw): 35–40 kg (75–90 lbs). The most reliable connection available in a wood-framed wall.
Total shelf capacity is the sum of its mounting points — but only if each point is equally loaded. In practice, load is rarely even. Use 70% of the combined theoretical limit as your working maximum.
For context: a standard row of paperback books weighs roughly 10–12 kg per meter of shelf. A small pot plant in a ceramic planter can weigh 2–5 kg on its own. A lidded glass jar of pasta holds approximately 1–1.5 kg. Add those up before loading a shelf, not after.
How to Avoid Overloading a Shelf
A few practical habits that prevent the most common overloading mistakes:
Place the heaviest items directly above or near the bracket mounting points, not at the outer edges. Loading at the edges creates leverage that multiplies the effective force on the bracket.
Weigh items on a kitchen scale before placing them. A small collection of hardback books, a ceramic vase, and a trailing plant in a terracotta pot can easily hit 15 kg on a shelf that was installed assuming light decorative loads.
Avoid dynamic loads. A shelf rated for 15 kg of static weight is not rated for 15 kg of items you regularly pick up, pull books from, or lean on. Dynamic loading applies different forces than static weight.
Check the shelf material. An MDF shelf that is 90 cm long and 20 cm deep will flex noticeably at 10 kg in the center. Solid hardwood of the same dimensions handles the same load without deflection. Glass shelves have manufacturer load ratings that must not be exceeded.
Rental Wall Storage Solutions That Require No Permanent Fixtures
For renters who want zero wall contact, there is more choice than most people realize. Freestanding and tension-based systems can look intentional and styled without touching a single wall surface with a drill.
Tension Pole Shelving Systems
Tension pole shelving works by pressing a vertical pole firmly between the floor and ceiling using a threaded adjustment mechanism or spring tension. Shelves attach to the pole at whatever height you choose. The system stays in place through outward pressure, not wall anchors.
These are most commonly used in closets and bathrooms, but are increasingly available in living-room and kitchen configurations with wood or metal shelf surfaces.
Weight capacity varies by product. Most domestic tension poles support 10–30 kg total distributed across all shelves, with individual shelf ratings of 5–10 kg each. Load the lower shelves more heavily than the upper ones to keep the center of gravity low.
Stability on hard floors (wood, tile, laminate) is generally good. On carpet, the base can shift or tilt over time, especially with thick carpet. Look for systems with a wide-diameter base plate or place a thin hardboard sheet under the base to spread the load.
Cost ranges from around $40 for a basic bathroom pole to $150–250 for a well-built floor-to-ceiling unit with multiple adjustable shelves.
Furniture-Integrated Storage and Leaning Shelves
Ladder shelves are among the most popular rental-friendly storage solutions. They lean against the wall at a slight angle, held in place by their own weight and the friction of the feet against the floor. No wall contact. They come in wood, metal, and hybrid finishes and are widely available for $60–$200.
A well-made ladder shelf with five tiers can hold 15–25 kg of books, plants, and display items. Place heavier items on the lower shelves rather than the upper ones for stability.
Modular cube shelving (stackable individual cube units) offers flexibility in configuration and portability. Each cube stands independently, and multiple cubes can be stacked or arranged side by side. These work well as room dividers in open-plan layouts.
Furniture with built-in shelving — bookcases, sideboards with open shelves, TV units with display slots — is the most stable option and doubles as actual furniture. In a furnished rental, this often makes the most practical sense. You bring the piece with you when you move.
How to Repair Wall Holes Before Moving Out
If you used minimal-impact mounting and need to restore the wall before handing back the keys, the repair is more straightforward than most people expect. The goal is not a perfect wall — it is a wall that looks undisturbed. With the right materials and a little patience, small to medium holes disappear entirely.
Filling Small Nail and Screw Holes
For holes up to about 6mm in diameter (the kind left by small nails or thin plastic expansion anchors), lightweight spackling compound is all you need. The repair costs under $10 and takes about 20 minutes of work, plus drying time.
Here is the process:
- Clean the hole. Remove any loose drywall dust or paper with a dry finger or a small pick. The hole should be clean and dry.
- Apply spackling. Load a small amount of lightweight spackling onto a flexible putty knife and press it firmly into the hole. Overfill slightly — the compound shrinks as it dries.
- Smooth the surface. Draw the putty knife flat across the wall to remove the excess, leaving the spackling flush with the surface.
- Let it dry completely. Most lightweight spackling dries in 30–60 minutes for small holes.
- Sand lightly. Use 120 or 150 grit sandpaper to sand the dried patch until it is smooth and level with the surrounding wall.
- Paint to match. Apply touch-up paint using a small foam roller for a smoother finish than a brush. For color matching, take a paint chip from an inconspicuous area (inside a closet or behind a door) to a hardware store for a computer-matched blend.
Repairing Larger Anchor Holes in Drywall
Holes left by toggle bolts, large molly bolts, or snap-toggle anchors typically measure 10–12mm in diameter. Lightweight spackling still works for these if the edges of the hole are intact and the surrounding drywall is solid.
For holes in this range:
- Follow the same spackling process above, but apply it in two thin layers rather than one. Allow the first coat to dry fully before applying the second. This reduces shrinkage and produces a flatter finish.
- Sand gently and check the surface in raking light (a flashlight held at a low angle to the wall). Any depression or ridge will show up clearly. Apply a third thin skim coat if needed.
For holes larger than 12mm, or where the drywall edges have crumbled, use a drywall patch kit. These kits include a self-adhesive mesh patch and joint compound. Press the mesh over the hole, apply joint compound in thin coats, let each dry fully, sand, and paint. The whole process takes a day end-to-end (mostly waiting for the compound to dry) and costs $10–$15.
A smooth, painted surface with no visible texture difference is accepted as a proper repair in virtually all rental contexts.
The Shelf Is Possible — Here Is Where to Start
You can install floating shelves without damaging the wall. Match the method to the situation, and it works.
Start by identifying your wall type and deciding how much weight your shelf needs to hold. If a small adhesive system covers your needs, begin there. If you need a stronger connection, a few small screws with the right anchors will do the job, and the repair at move-out is a morning’s work. If you want zero wall contact, freestanding and tension-based options have come a long way and can look just as intentional as anything mounted to the wall.
The most common mistake is either over-engineering a light shelf (drilling into studs for a display of three candles) or under-engineering a heavy one (two adhesive strips holding a full row of hardbacks). Avoid both by doing the weight math before you commit to a method.
Pick your approach, take the right tools, and start with the shelf that matters most to you. Once you see how straightforward it is, the rest of the empty wall space tends to fill itself.