The Cheapest Ways to Make Your Home Look Better (Without a Big Budget)
You do not need to spend thousands to make your home look noticeably better. The cheapest ways to make your home look better are often the fastest ones — and most of them can be done in a weekend, an afternoon, or even an hour. The problem is that most people skip straight to shopping when the real answer is already inside the home.
- Why Small, Cheap Changes Often Make the Biggest Visual Difference
- Declutter First — It Costs Nothing and Changes Everything
- Cheapest Ways to Make Your Home Look Better With Paint
- Painting a Feature Wall Without Repainting the Whole Room
- Touch-Up Painting on Trim, Doors, and Skirting Boards
- Cabinet Painting in Kitchens and Bathrooms
- Affordable Decor Swaps That Create a Clean Home Look
- Replacing or Washing Soft Furnishings
- Mirrors as a Cheap Tool for Light and Space
- Rearranging Furniture for a Fresh Layout
- Low-Cost Curb Appeal Fixes That Make a Real Difference Outside
- Cleaning Driveways, Paths, and Front Doors
- Adding Inexpensive Plants and Potted Greenery
- Replacing or Updating House Numbers and Door Hardware
- Quick Home Improvements Using Lighting
- Swapping Bulbs for Warm White LEDs
- Adding Lamps to Dark Corners
- Using Battery-Powered LED Strips or Puck Lights
- Cleaning as a Home Improvement Strategy — Not Just a Chore
- Affordable Styling Tricks That Make Any Room Look More Intentional
- Grouping Objects in Odd Numbers on Shelves and Tables
- Using Trays to Organise and Style Flat Surfaces
- Hanging Art and Photos at the Right Height
- The Cheapest Home Improvements Are the Ones You Do Today
This guide is for renters and homeowners who want visible change without financial pressure. No contractors, no major purchases, no wishful thinking. Just practical steps that actually work — starting today.
Why Small, Cheap Changes Often Make the Biggest Visual Difference
Here is something most home improvement content gets wrong: the things that make a room feel good are rarely the most expensive in it.
When someone walks into a space, their brain processes surfaces, light, and order before it registers furniture quality or finishes. A room with clean countertops, consistent lighting, and clear floor space reads as well-kept and considered — even if nothing in it costs more than $20.
Contrast that with a room that has a brand-new sofa surrounded by clutter, dim bulbs, and dusty shelves. The sofa disappears. What visitors notice is the mess.
This is the psychology of visual noise. Too many unrelated objects, inconsistent colours, and poor lighting overload the eye and make spaces feel smaller and less appealing. Removing that noise — through decluttering, cleaning, and simple styling choices — has a bigger impact than most furniture upgrades.
Colour also plays a significant role. A single painted wall, a set of matching cushion covers, or even consistent picture frames create a sense of intention that makes a room feel designed rather than assembled over time.
The point is this: effort and placement consistently beat spend. Knowing where to focus your time is what separates a room that looks refreshed from one that just looks busy.
Declutter First — It Costs Nothing and Changes Everything
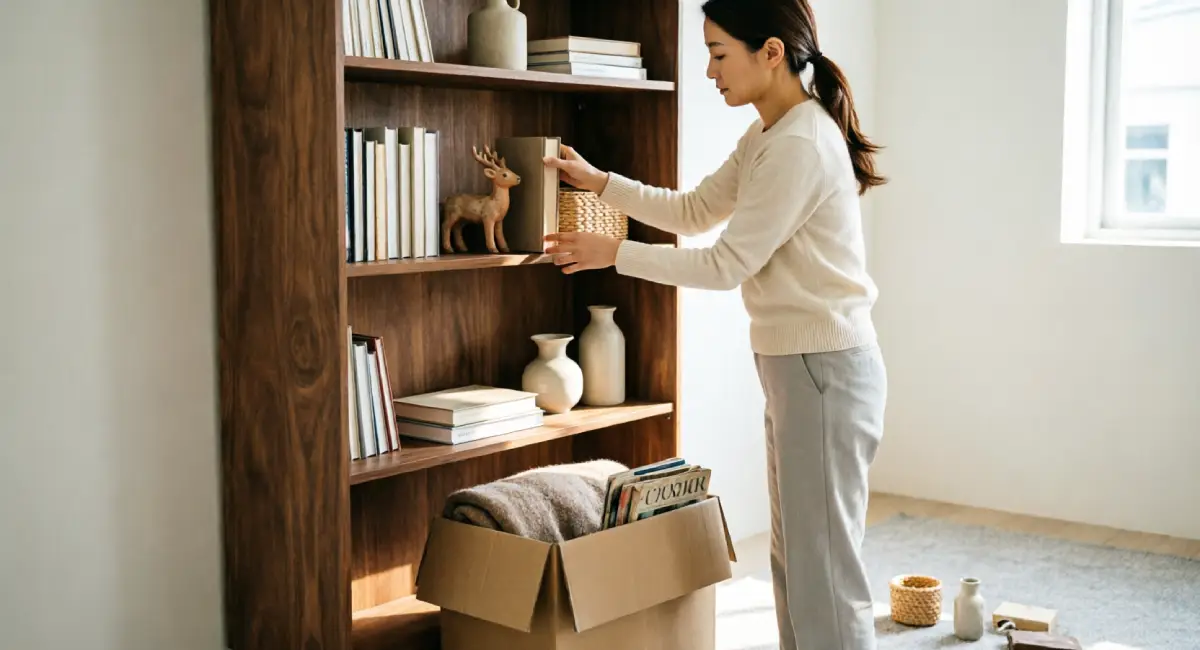
Before you buy a single thing, declutter. It is the highest-return action available to any renter or homeowner, and it costs nothing except time.
Visual noise is the enemy of a good-looking home. When surfaces are crowded, floors are broken up by random objects, and walls have too many competing points of interest, rooms feel chaotic and compressed. Clearing that noise immediately makes a space feel larger, calmer, and cleaner without changing a single fixture.
Start with a simple three-step framework:
- Surfaces first — clear every flat surface in the room down to zero, then only return what earns its place
- Floors next — remove anything that does not have a permanent, intentional reason to be on the floor
- Walls last — take down anything that feels random or is hanging out of habit rather than choice
As you work through a room, create two piles: one to sell or donate, one to store out of sight. The goal is not to hide clutter in another room. It is to reduce the total volume of objects competing for visual attention.
This process alone can transform a room so significantly that people assume something structural has changed. Nothing has. The room is just breathing.
Which Rooms to Tackle First for Maximum Visual Impact
Not every room delivers the same return on decluttering effort. Prioritise in this order:
Entrance and hallway — this is the first thing anyone sees, including you every time you come home. A clear, intentional entrance sets the tone for the rest of the house.
Living room — it is the most used and most visible shared space. Clearing surfaces and flooring here has an immediate effect on how the whole home feels.
Kitchen countertops — visible counters with only the essentials make a kitchen look significantly larger and more functional. Move appliances that are used less than once a week into a cabinet.
Bathroom — a clear counter with a small number of intentionally placed items reads as a premium space regardless of the fixtures.
Bedrooms matter for personal well-being, but they tend to have less impact on overall first impressions unless guests regularly see them.
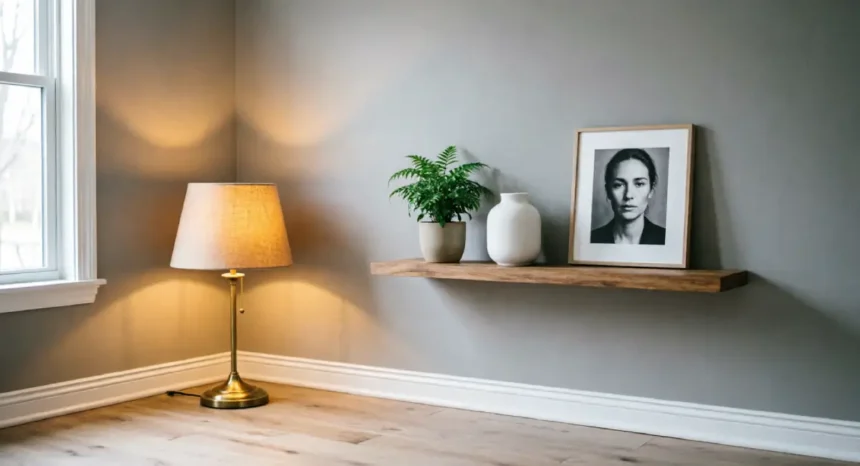
The 15-Minute Shelf and Surface Reset
Pick any shelf, windowsill, or countertop in your home. Set a 15-minute timer and do the following:
Remove everything from the surface completely. Wipe it down. Now look at what you removed and ask: does this item have a visual reason to be here, or just a habit reason?
Return only items that pass that test, and arrange them in groups of three using objects of different heights. A small plant, a candle, and a book are a classic example. Place the tallest item at the back or side, the shortest at the front, and the mid-height item between them.
The before and after difference is often striking. The same shelf that looked cluttered and forgotten now looks like someone styled it on purpose. Nothing was purchased. Two things changed: the quantity of objects and their arrangement.
Repeat this across every surface in a room, and the cumulative effect is significant.
Cheapest Ways to Make Your Home Look Better With Paint
Paint is one of the most cost-effective tools for changing how a space feels. A single tin of interior paint typically costs $15 to $30 in most markets. That is enough to change the mood of an entire room when applied in the right places.
The key insight here is that you rarely need to paint everything. Targeted paint applications deliver dramatic change at a fraction of the cost and effort of a full repaint.
Painting a Feature Wall Without Repainting the Whole Room
A feature wall works by giving the eye a clear focal point. Instead of a uniform room that feels flat, one darker or differently coloured wall creates depth and makes the space feel more considered.
Choose the wall that faces the entrance to the room, or the wall behind the main sofa or the bed headboard. These are the walls the eye lands on first.
Select a colour that complements rather than clashes with your existing furniture. Warm terracotta, soft sage, deep navy, and warm grey tones work across a wide range of interior styles. If in doubt, go one to two shades deeper than your current wall colour.
Use painter’s tape along the edges before you start. Clean lines are what separate a professional result from a messy one.
A standard feature wall in an average-sized room requires roughly one litre of paint. At $15 to $30 per tin, this is genuinely one of the cheapest visible transformations available.
Touch-Up Painting on Trim, Doors, and Skirting Boards
Yellowed or scuffed door frames and skirting boards quietly age a room in a way most people do not consciously notice until they are gone. A fresh coat of white or off-white trim paint restores a crisp, clean look without touching the walls at all.
Pick up a small tin of water-based gloss or satin trim paint. Lightly sand any rough areas first, wipe the surface clean, and apply two thin coats with a small brush.
This is particularly useful for renters. Many landlords are comfortable with tenants repainting trim back to its original white, as it is classified as maintenance rather than alteration. Check your lease, but this is often a grey area that works in your favour.
Cabinet Painting in Kitchens and Bathrooms
Replacing kitchen or bathroom cabinets is expensive. Painting the cabinet fronts is not.
Use a furniture-specific or cabinet paint rather than standard interior emulsion. These are designed to cure harder and resist moisture, which matters in kitchens and bathrooms. Popular options include chalk-finish paints with a wax topcoat or water-based satinwood.
The process: lightly sand the cabinet fronts with 120-grit sandpaper, wipe clean, apply a primer coat, leave to dry fully, then apply two topcoats. Remove handles before you start and replace them afterwards.
For a small kitchen with six to eight cabinet fronts, this project can cost under $30 to $50 in materials if you already own a brush and sandpaper. Allow a full weekend for proper drying time between coats. The result looks like a new kitchen to most people who see it.
Affordable Decor Swaps That Create a Clean Home Look
You do not need new furniture to change how a room feels. Affordable decor improvements work by refreshing what you already have and making deliberate choices about what stays, what goes, and what gets repositioned.
Replacing or Washing Soft Furnishings
Cushion covers, throw blankets, and curtains carry significant visual weight. They are also among the easiest and cheapest things to refresh.
Start by washing every soft furnishing in the room. Cushion covers that have yellowed, flattened, or picked up household odours will look dramatically better after a hot wash and a proper dry. This costs nothing.
If the covers are genuinely past their best, replacement covers for standard cushion inserts typically cost $5 to $15 each, depending on the source. Discount home stores, online marketplaces, and end-of-season sales are all reliable options.
The key styling principle here is colour consistency. Choose two or three tones and stick to them across all soft furnishings in the room. One neutral base, one deeper accent, and one lighter contrast tone is a reliable formula. When cushions, throws, and curtains share a palette, the room looks styled rather than collected.
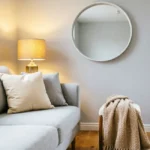
Mirrors as a Cheap Tool for Light and Space
A well-placed mirror does two things simultaneously: it reflects light and creates the visual impression of more space. Neither of those things requires spending much.
Placement matters more than size. A mirror positioned opposite a window bounces natural light across the room, which makes the space feel brighter and more open at any time of day. In a narrow hallway, a mirror on the end wall creates the impression of depth where there is none.
Above a console table, fireplace, or sideboard, a mirror anchors the wall and makes the space feel finished. Affordable mirrors in simple frames are widely available at discount home stores for $20 to $30. Second-hand shops and online marketplaces often have them for less.
Rearranging Furniture for a Fresh Layout
This costs nothing and is often underestimated.
The goal of good furniture arrangement is to create a clear focal point, maintain an easy flow of movement through the space, and make the room feel intentional rather than default.
A common mistake is pushing all furniture against the walls. Pulling a sofa 30 to 40 centimetres away from the wall and floating it in the space creates a more considered layout that feels more like a room and less like a waiting area.
Try this method: photograph the room from the doorway on your phone. Sketch two or three alternative layouts on paper. Pick the most promising one and try it. The photograph helps you see the room the way a visitor does, which makes making better decisions easier.
Low-Cost Curb Appeal Fixes That Make a Real Difference Outside

The outside of your home is the first thing anyone sees. Low-cost curb appeal improvements are frequently overlooked, especially by renters who assume the exterior is not their concern. In most cases, small changes to the front of a property are permitted and make a meaningful difference to how the whole home feels.
Cleaning Driveways, Paths, and Front Doors
Grime-covered driveways and paths make a home look neglected, regardless of what the interior looks like. Pressure washing a driveway removes years of algae and dirt for the cost of a bottle of cleaning solution, typically under $10. If you do not own a pressure washer, borrowing one from a neighbour or renting one for a day is often free or very cheap.
A freshly cleaned front door has a similar effect. If the door is still in good structural condition, a tin of exterior gloss paint in a strong, considered colour changes the entire face of the property. Classic options include deep navy, forest green, black, and warm red. A 750ml tin of exterior gloss typically costs $15 to $25 and is enough for a standard front door with one undercoat and two topcoats.
Adding Inexpensive Plants and Potted Greenery
Two matching planters placed either side of a front door create an immediate sense of care and visual symmetry. The matching part is important. Mismatched pots in different materials and sizes look accidental. Identical or closely paired planters look considered.
For low-maintenance options that work across a range of climates, consider lavender, ornamental grasses, small boxwood shrubs, or hardy ferns. Most small pot plants cost $5 to $15 at a garden centre or supermarket.
If budget is a concern, many plants can be propagated from cuttings taken from an existing plant. Lavender, rosemary, and many ferns grow well from cuttings placed in water until they root, which costs nothing.
Replacing or Updating House Numbers and Door Hardware
This is a detail that is easy to overlook and disproportionately noticeable when it is updated.
Corroded, mismatched, or outdated house numbers in a faded plastic font quietly lower the perceived quality of an entire property. A new set of house numbers in a clean, modern typeface in brushed brass or matte black costs $10 to $20 and installs with a screwdriver in under ten minutes.
Replacing a worn door handle with one in a matching modern finish adds another layer of visual consistency. A decent-quality door lever or knob in brushed brass or matte black typically costs $15 to $30.
Together, these two updates cost $25 to $50 and create a front entrance that looks like someone has paid attention to it. That is precisely the impression a well-kept home projects.
Quick Home Improvements Using Lighting
Lighting is one of the most underused tools available for quick home improvements. You do not need to rewire anything or spend significant money. A few targeted changes to the type and placement of light sources in your home will change how every room feels, especially in the evening.
Swapping Bulbs for Warm White LEDs
The colour of light matters enormously. Cold, blue-toned bulbs sit in the 5000K to 6500K range on the colour temperature scale and make rooms feel sterile and unwelcoming. Warm white LEDs in the 2700K to 3000K range produce a softer, more inviting light that flatters both people and interiors.
Replacing every bulb in a room with warm white LEDs costs $2 to $5 per bulb, takes two minutes per fitting, and makes an immediate, noticeable difference to how the space feels after dark. The energy saving is a secondary benefit.
The one rule: be consistent. Every bulb in a room should be the same colour temperature. A mix of warm and cool bulbs in a single space creates a patchy, unfinished feel that undermines everything else you have done.
Adding Lamps to Dark Corners
A room lit only by overhead fixtures tends to feel flat. The light is even but uninspiring, and darker corners make the room feel smaller than it is.
Adding a floor lamp or table lamp to a dark corner introduces depth and warmth. Layered lighting, which means combining ambient (overhead), task (directed), and accent (decorative) light sources, is what makes a room feel both functional and welcoming.
You do not need to spend much. Second-hand shops, discount home stores, and online marketplaces regularly have floor lamps and table lamps for $15 to $40. Start with one additional lamp per main room, positioned in the corner that currently receives the least light.
Using Battery-Powered LED Strips or Puck Lights
Battery-powered LED strips and stick-on puck lights are available for $10 to $20 and require no wiring, no drilling, and no landlord approval.
They work particularly well in these locations:
- Under kitchen cabinets to illuminate countertops
- Inside wardrobes or cupboards for practical visibility
- Along the back of a bookshelf to create a backlit glow behind objects
- Behind a headboard for soft ambient light in a bedroom
The key to avoiding a cheap-looking result is to hide the strip itself and show only the light. If the LED strip is visible, the effect falls flat. If only the light is visible, the effect looks intentional and considered.
This makes battery-powered lighting one of the most renter-friendly quick home improvements available.
Cleaning as a Home Improvement Strategy — Not Just a Chore
A genuinely clean home looks better than a well-furnished dirty one. Every time. This is not about basic maintenance. This is about treating deep cleaning as a legitimate, high-impact home improvement activity with a clear visual return.
For renters or homeowners who cannot currently afford to buy or replace anything, cleaning is the most available tool. And most people underuse it.
The High-Return Areas Most People Underclean
Some areas accumulate grime slowly enough that they become invisible to the people who live there. Visitors notice them immediately. Addressing these specific areas produces a visible result that makes a room look significantly newer and better maintained:
- Grout lines — use a grout pen to whiten discoloured grout, or apply a bleach solution and scrub with an old toothbrush. White grout that has greyed makes an entire bathroom or kitchen look worn.
- Skirting boards — run a damp cloth along the top edge of every skirting board in a room. The line of dust that accumulates there is surprisingly visible against light-coloured floors and walls.
- Window tracks — use a dry brush or old toothbrush to loosen debris, then wipe with a damp cloth. Clean window tracks make windows look newer without touching the glass.
- Light switch plates — a damp cloth with a small amount of white vinegar removes the finger grime that builds up around switches and makes wall plates look grey rather than white.
- Door handles — wipe with a damp cloth and dry immediately. Handles touched dozens of times a day collect oils that dull their finish visibly.
Steam Cleaning Soft Surfaces Without Buying Equipment
Sofas, mattresses, and carpets hold odours and stains that add visual age to a room. Even a sofa in good structural condition can look tired and worn if it smells of absorbed household odours.
Hiring a steam cleaner for a day costs $20 to $40 in most markets. The result on a fabric sofa or carpet is significant. Stains lift, odours are neutralised, and the surface looks noticeably refreshed.
If hiring equipment is not practical, a fabric refresher spray combined with a stiff brush works well for maintenance between deeper cleans. Spray lightly, brush the fabric in one direction, and allow it to dry fully before use.
A clean-smelling room reads as a cleaner-looking room to anyone who enters it. That connection between smell and visual perception is well established, and addressing it costs very little.
Affordable Styling Tricks That Make Any Room Look More Intentional
Styling is the difference between a room that looks furnished and one that looks finished. These techniques require little to no spending. They require only a few decisions about placement, proportion, and grouping.
Grouping Objects in Odd Numbers on Shelves and Tables
Interior stylists consistently group objects in threes and fives rather than twos and fours. The reason is visual rhythm. Even numbers create symmetry, which can feel static. Odd numbers create movement and feel more natural to the eye.
Apply this using objects you already own. A candle, a small plant, and a paperback book are a reliable starting group. Vary the heights so the eye moves up and down slightly across the group rather than sitting on a flat line. The tallest item typically goes at the back or to one side. The shortest sits closest to the viewer.
This takes five minutes and costs nothing. The shelf goes from looking accidental to looking arranged.
Using Trays to Organise and Style Flat Surfaces
A tray changes how a flat surface reads. Without a tray, a collection of objects on a coffee table or bathroom counter looks like scattered items. With a tray, the same objects become a contained, curated arrangement.
Affordable trays are available at discount stores for $5 to $15. Alternatively, repurpose what you already own. A wooden cutting board, a flat wicker basket, or the lid of a storage box all function as styling trays.
The principle is to treat the tray as its own small scene. Every item inside it should have a reason to be there. Remove anything that does not belong, even if it is small. The constraint of the tray is what creates the curated effect.
Hanging Art and Photos at the Right Height
Artwork hung too high is the most common hanging mistake in home interiors. It disconnects the image from the furniture below it and makes walls feel awkward.
The widely used guideline is to hang the centre of the artwork at approximately eye level, which is around 145 to 150 centimetres from the floor in most spaces. When hanging above furniture, the bottom of the frame should sit 15 to 20 centimetres above the piece below it.
For a gallery wall, print existing digital photos at home or through an inexpensive online print service, then frame them using matching or closely complementary frames. Second-hand shops are a reliable source of frames that can be painted a single consistent colour to unify a mixed collection. The result looks considered and personal without requiring significant spending.
The Cheapest Home Improvements Are the Ones You Do Today
Making your home look better does not start with a shopping list. It starts with looking at what you already have and deciding to treat it with more intention.
The cheapest ways to make your home look better all share a common thread: they are about removing what is not working, cleaning what has been neglected, and arranging what remains with purpose. Paint a wall. Wash the cushion covers. Move the sofa. Replace a bulb. These are not compromises. They are genuinely effective.
Pick one section from this article. Set aside 30 minutes today and apply it to one room. The visible difference that comes from that single focused session is often enough to motivate the next one.
When you are ready to think more broadly about refreshing your space on a small budget, the parent guide on how to refresh your home on a small budget covers the bigger picture in detail.