You picked up a roller for the first time, put in a full afternoon of work, and stepped back expecting something close to a professional finish. Instead, you see roller marks running across the wall, thin patches where the color looks uneven, and edges that dried before you could blend them.
- Why Streaks and Patchy Spots Happen in the First Place
- How to Prepare the Room Before You Pick Up a Brush
- Choosing the Right Primer for an Even Paint Finish
- Selecting the Best Tools to Avoid Roller Marks
- How to Apply Paint With a Roller Without Leaving Streaks
- Cutting In Along Edges Without Visible Brush Lines
- Understanding Drying Time Between Coats
- How Many Coats Do You Actually Need?
- Touch-Ups After the Final Coat: Doing Them Right
- Conclusion
Almost all of it comes down to skipped steps, not a lack of skill. If you want to paint a room without streaks, the process matters more than talent.
Here is everything you need — from setting up the room correctly to applying the final coat — so you finish with walls that look clean, even, and consistent from corner to corner.
Why Streaks and Patchy Spots Happen in the First Place
Most people assume streaks happen because they bought the wrong paint or used a cheap brush. The real causes are almost always about process.
The most common reason for streaking is dried edges. When you paint one section and let it dry before connecting it to the next, the overlap creates a visible line. Paint dries faster than most people expect, especially in warm or dry rooms.
Overworked paint is another frequent cause. Going back over a section that has started to set pulls the surface film and leaves drag marks. Once paint begins to dry, leave it alone.
Low-quality rollers cause more problems than people realize. Cheap foam or poorly made woven rollers skip across the surface instead of distributing paint evenly. They also shed small fibers that end up stuck in your finish.
Skipping primer is the root cause of patchy spots. On bare drywall, repaired areas, or walls with existing stains, an unprepared surface absorbs paint at different rates. One spot looks full and even, while the area next to it looks thin, even after two coats.
Poor technique rounds out the list. Without a consistent rolling direction and a clear system for working across the wall, you end up with overlapping patches at different thicknesses.
The Most Common Mistakes First-Time Painters Make
Understanding what goes wrong makes it easier to avoid. These five mistakes account for most of the streaking and patchy coverage that first-time painters run into:
- Rolling in random directions: Changing direction mid-section leaves criss-crossing marks that show once the paint dries.
- Painting over dried edges: Once a section dries, rolling into it creates a lap mark that is hard to fix without repainting the whole wall.
- Using too little paint: An underloaded roller skips and drags instead of laying down an even coat.
- Applying only one coat: A single coat rarely gives full, even coverage. Two coats are standard, and sometimes three thin ones work better than two thick ones.
- Skipping wall prep: Dust, grease, and unrepaired holes all affect how paint sits on the surface. Paint does not hide problems — it makes them more visible.
How to Prepare the Room Before You Pick Up a Brush
Prep is where most first-time painters lose the job before they even start. It takes time, and it can feel like a delay, but a well-prepped room is the difference between a clean result and one you will want to repaint six months later.
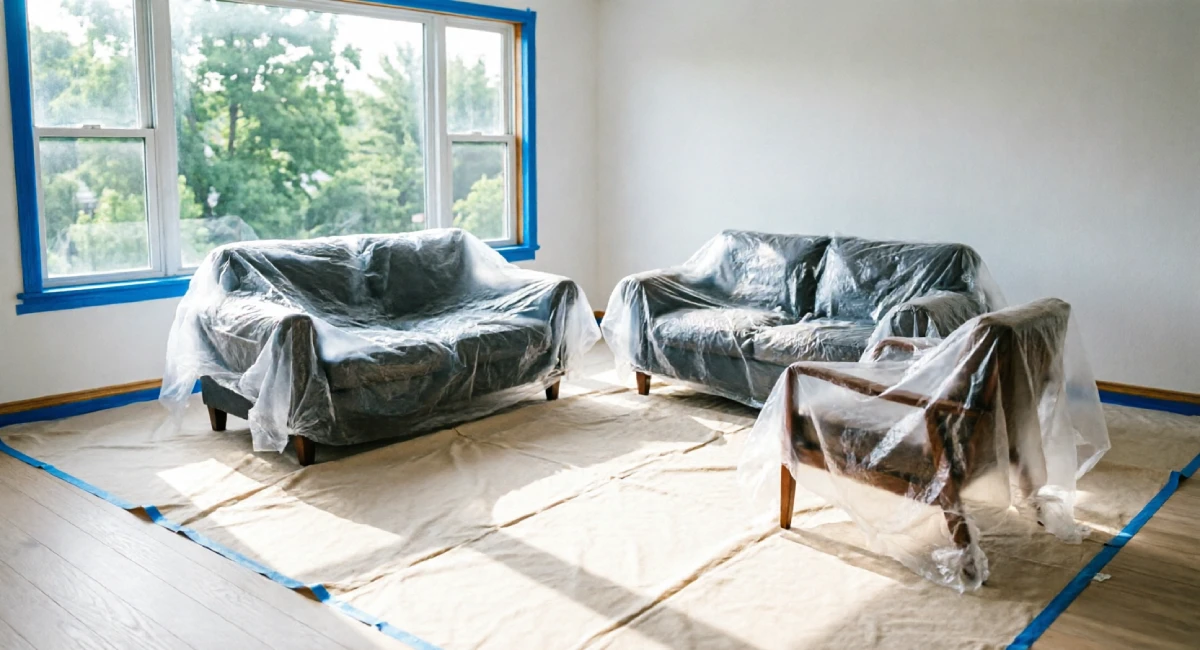
Start by moving all furniture out of the room or pushing it to the center and covering it with plastic sheeting. Lighter furniture should leave the room entirely. Anything left inside will get in the way and increase the chance of an accidental drip or spill.
Remove outlet covers, switch plates, and vent covers. Painting around them with a brush takes longer, looks messier, and leaves gaps. Take them off, store the screws in a small bag, and paint the wall cleanly before replacing them.
Cover the entire floor with drop cloths. Canvas cloths are better than plastic because they stay in place and absorb drips instead of letting them spread. Secure the edges with tape so they do not shift while you move around.
How to Clean and Repair Walls Properly
Dirty walls are one of the least obvious but most damaging problems for paint coverage. Grease, fingerprints, and dust create a barrier between the surface and the paint. The coat looks thin or peels later, not because the paint was bad, but because it never properly bonded.
Wash the walls with a mild detergent mixed with warm water. A sponge works well for flat areas. Pay extra attention to areas around light switches, door handles, and kitchens if you are painting adjacent rooms. Rinse with clean water and let the walls dry fully.
Once the walls are clean, check for nail holes, dents, and cracks. Fill these with lightweight spackling paste using a putty knife. Apply slightly more than the hole needs, let it dry completely, then sand it flush with the surrounding surface using fine-grit sandpaper.
After sanding, wipe down the repaired areas with a slightly damp cloth to remove all dust. Dust settles into wet paint and creates a gritty, uneven texture that shows in the finished coat.
Taping, Protecting, and Setting Up Your Work Area
Painter’s tape gives you clean lines at edges and protects surfaces you do not want painted. Apply it along ceiling lines, baseboards, door trim, and window frames. Press the tape firmly along the edge with a putty knife or your fingernail, so paint cannot bleed underneath.
Remove the tape while the paint is still slightly tacky, not fully dry. Pulling tape off cured paint can lift the edge and chip the finish.
Cover door handles and hinges with tape or small plastic bags. Place a drop cloth over the top of the doors if you are painting nearby walls.
Open windows and run a fan to keep air moving through the room. Good ventilation helps paint dry at the right rate and reduces fume buildup, which matters especially with oil-based paints.
Choosing the Right Primer for an Even Paint Finish
Primer is not an upsell — it is the layer that makes your topcoat work correctly.
Without primer, paint soaks in unevenly. Repaired spots, bare drywall, and areas with old stains all absorb at different rates. The topcoat goes on and looks fine while wet, but as it dries, the variations underneath show through. You end up with dull patches next to shinier areas, and extra coats do not fully correct it.
Primer seals the surface so it absorbs paint at a consistent rate across the whole wall. It also gives the topcoat something to grip, which means better adhesion and longer-lasting results.
Water-based primer dries quickly, cleans up easily, and works well for most interior walls. Use a stain-blocking primer (usually oil-based or shellac-based) for walls with water damage, smoke stains, crayon marks, or tannin bleed from wood. These stains push through water-based primer no matter how many topcoats you apply.
One coat of the right primer usually reduces the number of topcoats needed from three to two, saving time and material cost.
Do You Always Need to Prime Before Painting?
Not every situation requires a dedicated primer coat, but most first-time painters are in situations where it is necessary.
Prime the wall when:
- You are painting new or freshly drywalled surfaces
- You have filled holes or made repairs
- You are going from a dark color to a lighter one
- The wall has visible stains, marks, or water damage
- The current surface is glossy and needs a key for the new paint to grip
A paint-and-primer product can work when you are repainting a wall that is already in good condition, the existing color is similar to the new one, and the surface is clean and undamaged. In those cases, a combined product saves a step. In any other situation, a separate primer coat gives better results.
Selecting the Best Tools to Avoid Roller Marks
The tools you choose have a direct effect on whether your walls streak. Good technique with a poor roller still leaves marks. Average technique with the right tools gives you much better coverage.
The most important tool choice is the roller cover. The material, thickness, and quality all affect how paint transfers to the wall. A high-quality woven roller from a reputable brand costs a few dollars more and makes a noticeable difference.
Avoid foam rollers for large wall surfaces. They can leave a stippled texture and do not hold enough paint to cover efficiently. They work better for smooth trim and cabinet work.
An extension pole is worth using even in rooms with standard ceiling heights. It lets you reach the upper wall and ceiling line without a ladder, keeps your arm at a more natural angle, and gives you better control over roller pressure across the full stroke.
Roller Nap Guide: Which Thickness for Which Wall
Nap thickness refers to the length of the fibers on the roller cover. The right nap depends on how smooth or textured the surface is.
- 3/8 inch nap: Best for smooth walls and ceilings with minimal texture. Gives a fine, even finish without excess stippling.
- 1/2 inch nap: A solid general-purpose choice for walls with light to moderate texture. This is the most common option for interior rooms.
- 3/4 inch nap: Use this for heavily textured walls, such as orange peel or skip trowel. The longer fibers push paint into the recesses.
Using a nap that is too short on a textured wall leaves the valleys unpainted. Using one that is too thick on a smooth wall creates unnecessary texture. Match the nap to the wall, and you get more consistent coverage in fewer passes.
Paint Trays, Edging Brushes, and Other Must-Have Supplies
A proper paint tray with a ribbed loading area matters more than it looks. The ribs let you roll excess paint off the roller before it hits the wall, which prevents overloading and reduces drips.
For cutting in along edges, use a 2 to 2.5-inch angled sash brush. The angled bristles give you better control along ceiling lines and trim than a straight brush. Do not try to cut in with a roller or a large flat brush.
Keep a stir stick handy and mix your paint thoroughly before starting and every time you refill the tray. Paint separates in the can, and unmixed paint gives uneven color and sheen, especially with deeper tones.
Avoid loading your edging brush too heavily. Dip just the bottom third of the bristles, tap off the excess against the inside of the can, and work in short, controlled strokes. An overloaded brush drips and leaves thick blobs along trim lines.
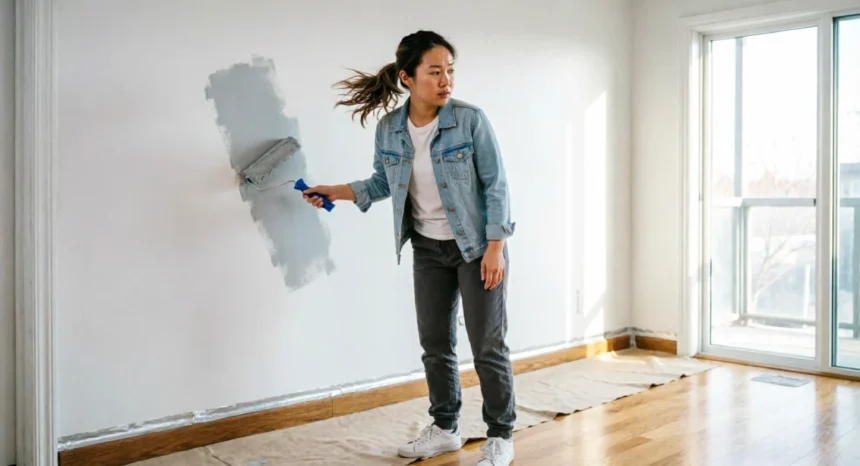
How to Apply Paint With a Roller Without Leaving Streaks
This is where the whole job either comes together or falls apart. You can do everything else right and still end up with streaky walls if the rolling technique is off.
The goal is to lay paint down evenly across the wall with no ridges, no dry spots, and no visible overlap lines. That takes a consistent method, the right amount of paint on the roller, and enough speed to keep edges wet while you work.
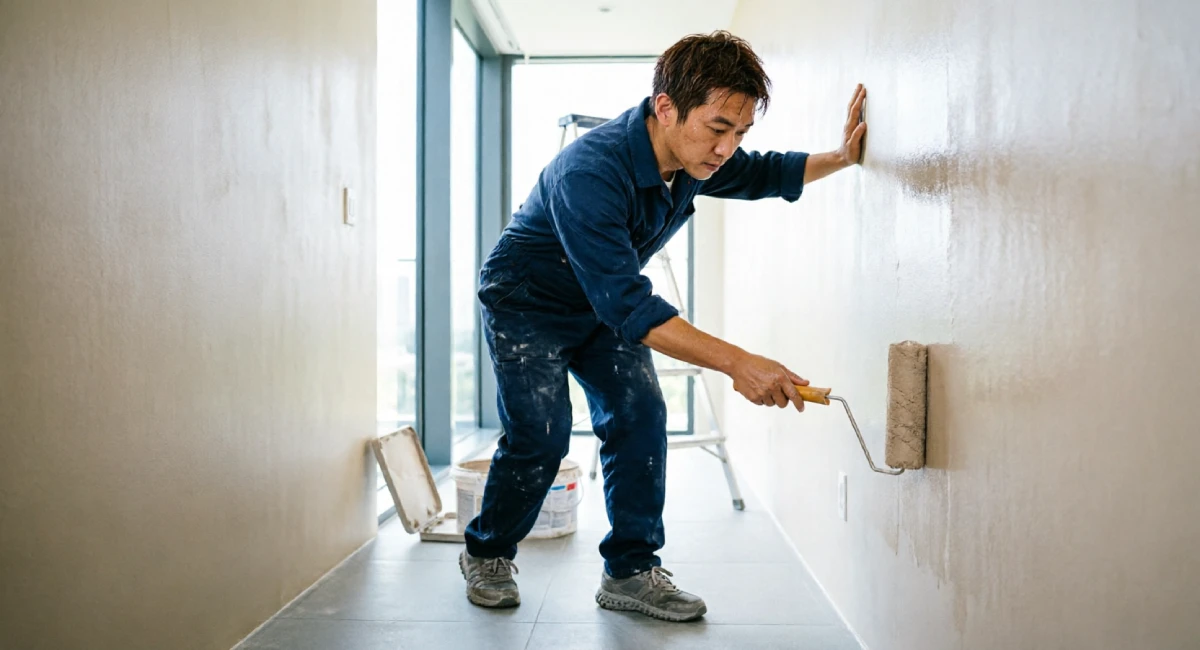
Work one wall at a time. Start at the top and work down, keeping the roller moving and the loaded sections connected to wet paint before they have a chance to dry.
The W-Pattern Technique Explained
The W-pattern is the standard method professional painters use to get consistent coverage without roller marks.
Load the roller correctly (more on that below), then place it against the wall near the top of your working section. Roll a large W shape onto the wall in one fluid motion. The W should span roughly two to three feet wide and cover a section from about 12 inches below the ceiling to 12 inches above the baseboard.
Once the W is down, fill it in with smooth, parallel strokes moving in the same direction, without lifting the roller off the wall. Overlap each stroke slightly as you fill to keep the paint layer even.
This works because the W spreads the heavier concentration of paint from the roller across a wide area first. The fill strokes then blend it into an even coat instead of pushing the bulk of the paint into a single strip. Rolling in a straight vertical or horizontal line stacks paint along one edge and leaves thin areas on the other.
How to Keep a Wet Edge While Painting
A wet edge is the unpainted section immediately ahead of where you are working. Keeping it wet means always connecting your next section to paint that has not yet dried.
When you finish one section and move to the next, overlap your new W slightly into the previous section while it is still wet. The two sections blend, and the seam disappears as both dry.
If you let a section dry before connecting the next one, you will see a lap mark where the two meet. That line is almost impossible to remove without repainting.
Work in vertical sections from ceiling to floor, moving steadily across the wall. Do not stop in the middle of a wall if you can avoid it. If you need a break, stop at a natural boundary such as a corner rather than mid-wall.
How Much Paint to Load on a Roller
Both overloading and underloading cause problems, and both are easy mistakes to make.
An overloaded roller drips, creates ridges along the edges of each stroke, and pushes paint into thick blobs that take much longer to dry. An underloaded roller drags, skips, and leaves thin, streaky lines instead of solid coverage.
The correct method: dip the roller into the paint in the deep end of the tray, then roll it back and forth over the ribbed section several times. The roller should be evenly coated with no wet, dripping areas. When you lift it, it should look saturated but not beading.
A properly loaded roller makes a soft, even sound when it contacts the wall. A dragging, squeaking sound means it needs more paint. A heavy, wet slapping sound means it has too much.
Reload the roller when coverage starts looking thin or when you hear it beginning to drag. Do not wait until it is completely dry.
Cutting In Along Edges Without Visible Brush Lines
Cutting in means painting the narrow band along ceilings, corners, baseboards, and trim where a roller cannot reach. It requires a steady hand and the right brush, but it is a learnable skill that gets easier with practice.
Use your angled sash brush to paint a band roughly two to three inches wide along every edge before you bring in the roller. Work in sections of about 12 to 18 inches at a time. Do not try to cut in a full wall before rolling it.
Feather the outer edge of your cut-in stroke by reducing pressure as you move away from the trim. This thins the paint layer gradually so the roller can blend into it without a visible line.
The most important rule: blend while the cut-in is still wet. Roll the adjacent wall section immediately after cutting in, and overlap the roller slightly into the brushed area. The roller smooths the texture difference between brush and roller strokes, and both sections dry as one even layer.
Should You Cut In the Whole Room Before Rolling?
This is a common point of confusion, and the answer matters for avoiding visible brush lines.
Some painters cut in the entire room first, then go back and roll everything. The problem is that by the time you finish cutting in the fourth wall and return to the first, the cut-in there has already dried. The roller cannot blend into dry paint, so the brush texture remains visible as a border around every edge.
The better approach is to cut in one wall, then roll that wall immediately before moving to the next. Wet-into-wet blending is what makes edges disappear. Dry-into-dry blending is what leaves borders.
If you are working with a partner, one person can cut in while the other rolls, staying no more than one wall apart. This keeps both surfaces wet at the same time and speeds up the job without sacrificing finish quality.
Understanding Drying Time Between Coats
One of the most common reasons second coats streak or lift is applying them too soon. Paint has two stages: dry-to-touch and recoat-ready. These are not the same thing.
Dry-to-touch means the surface has skinned over enough that it does not leave marks when you lightly press it. Recoat-ready means the layer has cured enough underneath that a new coat can bond without disturbing the one below.
For most water-based latex paints, dry-to-touch time is one to two hours under normal conditions. Recoat time is typically two to four hours. Always check the label on your specific paint, as times vary between brands and formulas.
Oil-based paints take significantly longer. Dry-to-touch can be six to eight hours, with a recoat window of 24 hours or more. Rushing this causes the second coat to pull the first one up, leaving streaks and torn patches that cannot be blended out.
If you apply a second coat too early and see the surface tearing or dragging, stop immediately. Let it dry fully, sand lightly, and start the second coat again.
How Temperature and Humidity Affect Paint Coverage
The conditions in the room while you paint affect how the paint behaves and how the finish turns out.
High humidity slows drying. Paint stays wet longer, which sounds helpful but actually increases the chance of sagging, dripping, and streaking because gravity has more time to act on the wet surface. Aim for relative humidity below 70 percent while painting and during the drying period.
Very dry or hot conditions cause the opposite problem. Paint dries too fast at the edges, meaning by the time you roll the next section, the previous one has already started setting. The overlap creates a hard lap mark.
The ideal painting conditions are a room temperature between 50 and 70 degrees Fahrenheit (10 to 21 degrees Celsius) with moderate humidity. If the room is too hot, avoid painting during the warmest part of the day. If it is too humid, run a dehumidifier before and during the job.
Cold temperatures below 50 degrees Fahrenheit slow drying significantly and can prevent water-based paints from forming a proper film, leading to a weak finish that chips and peels.
How Many Coats Do You Actually Need?
Most first-time painters underestimate the number of coats required and try to fix thin coverage by applying paint too thickly in one pass. This causes more problems than it solves.
Two full coats of topcoat are standard for most interior wall repaints. One coat rarely gives complete, even coverage, especially over repairs, patched areas, or any wall going from a darker to a lighter color.
Three thin coats are sometimes better than two thick ones. A thick coat takes longer to dry, is more likely to sag or drip, and can trap air bubbles that leave a rough texture. Thin, even coats dry faster, bond better, and build up to a more consistent finish.
If you used a separate primer coat, two topcoats are usually enough. If you skipped primer on a wall with variations in absorbency, you may need three topcoats to get even color saturation.
How to Spot Thin or Missed Areas Between Coats
After the first coat dries and before you apply the second, inspect the wall for thin spots, missed patches, and uneven texture. These areas look lighter in color or slightly translucent compared to the sections around them.
The best way to find them is with raking light. Hold a torch or a portable lamp at a low angle to the wall surface and move it slowly across. Thin areas and roller texture both show clearly in the shadows created by angled light. Overhead lighting or daylight from a window does not show these as well because the light falls directly on the surface rather than across it.
Mark any problem areas lightly with a piece of tape or a pencil so you can give them extra attention during the second coat. Do not sand or try to fix them between coats unless there is a raised drip or a piece of debris stuck in the paint. Just make sure the second coat covers those areas with slightly more deliberate passes.
Touch-Ups After the Final Coat: Doing Them Right
Touch-ups done wrong can end up more visible than the original mark. A small patch of paint applied with the wrong tool, in the wrong conditions, or from a different batch will often stand out against the surrounding wall rather than blend in.
For wall touch-ups, use a small roller the same way you painted the original coat. Roll a section slightly larger than the damaged area, feathering out toward the edges. This blends the new layer into the existing finish without a sharp boundary.
Avoid using a brush to touch up a wall that was originally rolled. Brush strokes have a different texture than rolled surfaces, and even with the same paint, the sheen and texture difference is visible — especially in natural light at an angle.
Always touch up under the same lighting conditions as the original paint job. A patch that looks perfect under artificial light in the evening can look completely different in morning daylight.
Why Touch-Ups Sometimes Look Different From the Rest of the Wall
There are three main reasons a touch-up patch shows instead of disappearing.
The first is a sheen mismatch. If you use a brush on a surface that was rolled, the bristle texture reflects light differently than the roller texture. The fix: always use a small roller for wall touch-ups.
The second is paint from a different batch. Even the same color from the same brand can have slight variations between production batches. If you saved some of the original paint in a sealed container, use that for touch-ups rather than buying a new can. If you do need a new can, bring the original to the hardware store for a color match.
The third is touching up over fully cured paint without feathering. Once paint has completely cured (typically two to four weeks after application), it is harder for a new layer to blend into the edges of the existing coat. Apply the touch-up paint slightly larger than the damaged area, use very light roller pressure at the outer edges, and let it dry before evaluating. Often, a second thin pass over the same area blends it better than one thick one.
Conclusion
Getting walls that look clean and even is a process, not a guess. The finish you end up with is almost entirely determined by the steps you take before the roller touches the wall and the discipline you apply while working.
Prep the room fully. Repair and clean the walls. Prime before your topcoats. Use the right roller for your wall texture. Work in the W-pattern. Keep edges wet. Wait for each coat to dry properly before adding the next one. Touch-ups are easier when you save a small amount of original paint and use the right tool to apply it.
None of these steps is difficult. They just need to happen in the right order. Follow this process, and you can paint a room without streaks and end up with walls that look far better than the typical first attempt.
If you run into a specific issue, leave a comment below. Paint problems are easier to troubleshoot with a bit of context, and a small detail usually makes all the difference.