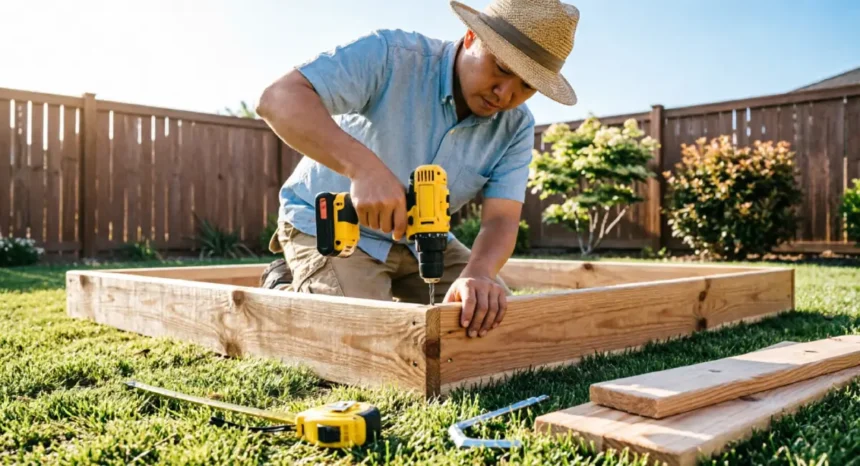
Yes — you can build a raised garden bed in a single afternoon with a drill, a saw, and a measuring tape. No carpentry experience required. Most people already have these tools at home.
- What Is a Raised Garden Bed and Why Should Beginners Build One?
- How Much Does It Cost to Build a Raised Garden Bed?
- Which Materials Work Best for a DIY Raised Bed?
- What Basic Tools Do You Need to Build a Raised Garden Bed?
- Step-by-Step Instructions to Build a Raised Garden Bed with Basic Tools
- How Much Soil Do You Need and What Should Go Inside?
- Common Beginner Mistakes to Avoid When Building a Raised Garden Bed
- How to Make Your Raised Bed Last Longer
- What Can You Grow in a Raised Garden Bed for Beginners?
- Conclusion
The idea that this is a complicated build stops a lot of people before they start. It shouldn’t. The frame is four boards connected at the corners. That’s the core of it. Everything else comes down to measuring carefully and pre-drilling your holes.
This guide walks you through the full process — from choosing materials and calculating costs, to cutting your first board and filling the bed with a proper soil mix. If you’ve never built anything before, this is a good place to start.
What Is a Raised Garden Bed and Why Should Beginners Build One?
A raised garden bed is a freestanding growing area built above ground level, framed with wood and filled with a soil mix. It sits on top of your existing ground rather than being dug into it.
For beginners, this setup has practical advantages over in-ground gardening.
The soil inside a raised bed drains faster, so plant roots don’t sit in waterlogged ground after rain. You control exactly what goes into the soil, which means you’re not fighting clay, compacted dirt, or poor native soil. Weeds have a harder time getting established in a contained growing area, and the soil mix doesn’t carry weed seeds.
There’s a physical benefit too. A bed that sits 10 to 12 inches above the ground means less bending and kneeling, which matters if you plan to spend real time tending your plants.
A raised bed gives you a defined space to manage, a controlled environment to grow in, and a project you can finish in a day.
How Much Does It Cost to Build a Raised Garden Bed?
The cost depends mostly on the wood you choose and whether you already own the basic tools.
For a standard 4×8 ft raised bed:
- Low-end build: $30 to $60 using basic pine or reclaimed timber. Pine is widely available and affordable, though it won’t last as long as denser wood in wet conditions.
- Mid-range build: $80 to $150 using cedar. Cedar costs more upfront, but it resists moisture and rot naturally, so the bed lasts significantly longer.
On top of lumber, factor in:
- Deck screws: around $8 to $12 for a box
- Soil mix: $40 to $80 depending on volume and whether you buy bagged or bulk
- Corner brackets (optional): $10 to $15
Prices vary by region, so check your local timber merchant or home improvement store rather than relying on a fixed number. If you already own a drill and a saw, your hardware costs drop to almost nothing.
Where to Save Money Without Cutting Corners
A few straightforward ways to reduce what you spend:
- Buy lumber in standard lengths. An 8 ft board is a standard cut at most suppliers, so you pay for what you use with no wasted offcuts.
- Source untreated wood locally. Smaller timber yards often stock it more affordably than large chain stores.
- Use free or low-cost compost. Many municipalities run composting programs and offer material free to residents. Check with your local council or waste management service.
- Repurpose solid materials. Stacked bricks, stones, or concrete blocks can form the short ends of a basic bed, reducing how much lumber you need.
Avoid treated wood as a cost-cutting shortcut — the reasons are covered in the materials section below.
Which Materials Work Best for a DIY Raised Bed?

Wood is the most common material for a first raised bed, and you have several solid options:
- Cedar: The top choice for longevity. Cedar contains natural oils that resist moisture, insects, and decay. A well-built cedar bed can last 10 to 15 years with minimal maintenance. It costs more than pine but pays for itself over time.
- Pine: The most affordable option. It’s easy to find, easy to cut, and works well. Expect a lifespan of 3 to 5 years before rot becomes an issue, depending on your climate.
- Douglas fir: A strong middle-ground choice. It’s denser than pine, holds screws well, and lasts longer in wet soil conditions. Often available at similar prices to pine.
- Untreated wood: Any of the above in untreated form is the safest option for growing food. More on why below.
If wood isn’t your preference, there are alternatives. Galvanised steel beds are extremely durable and increasingly popular. Cinder blocks stack easily and require no tools at all. Fabric grow bags are the most portable option for renters or small spaces. Each works well, though this guide focuses on the timber build.
Why Untreated Wood Is the Safer Choice for Vegetable Gardens
Pressure-treated lumber goes through a chemical process to resist rot and insect damage. Older treatments used chromated copper arsenate, which contained arsenic. Modern treatments have moved away from that formula, but many still use copper-based compounds that can leach into surrounding soil over time.
In a food garden, your vegetables draw water and nutrients directly from the bed’s soil. Most gardeners prefer not to introduce chemicals into that environment.
Cedar and Douglas fir are naturally rot-resistant without any chemical treatment. They are the practical choice for anyone building a food-growing bed. If cost pushes you toward pine, untreated pine is still far preferable to treated pine for an edible garden.
What Size and Shape Should Your Raised Bed Be?
The most practical size for a first raised bed is 4 ft wide by 8 ft long.
The 4 ft width is the key measurement. It means you can reach the centre of the bed from either side without stepping into the growing area. Stepping into the bed compacts the soil and undoes much of the drainage benefit you built the bed for.
For depth:
- 10 to 12 inches covers most vegetables, including tomatoes, lettuce, peppers, and herbs.
- 12 to 18 inches is better for root crops like carrots, parsnips, and potatoes, which need room to grow downward without hitting compacted ground.
If your backyard space is tight, a 4×4 ft square bed is a manageable starting point. It holds more than it looks like it will and is easy to tend from all four sides.
These dimensions feed into the lumber cuts and soil volumes in the sections below.
What Basic Tools Do You Need to Build a Raised Garden Bed?
A common misconception is that this project requires speciality tools. It doesn’t. Here’s what you actually need.
Must-have tools:
- Measuring tape: For marking accurate board lengths and checking your final frame dimensions.
- Pencil or chalk: For marking cut lines and corner positions on the wood.
- Hand saw or circular saw: A hand saw is enough for a small build. A circular saw speeds things up but is optional.
- Drill with drill bits: Used for pre-drilling holes before driving screws. This prevents the wood from splitting at the corners.
- Mallet or hammer: For tapping boards into position before driving screws.
- Speed square: A small triangular tool that helps you mark straight cut lines and check that corners are at a true 90-degree angle.
Helpful but not required:
- Clamps: Hold boards steady while you drill. A second pair of hands works just as well.
- Spirit level: Useful if you’re placing the bed on sloped ground.
- Brad nailer: Speeds up corner assembly, but adds nothing a drill and screws can’t handle.
No router, joiner, planer, or table saw is needed. The tools in the must-have list cost well under $100 combined if you’re starting from scratch, and most people already own several of them.
Can You Build a Raised Bed Without a Power Drill?
Yes, though it takes more care.
Pre-drilling pilot holes is strongly recommended because it stops the wood from splitting when you drive screws near the ends of the boards. Without a drill, driving screws into hardwood at the corners will almost certainly crack the timber.
For softwood like pine, you can sometimes drive deck screws carefully by hand using a screwdriver or a screw bit in a hand brace, but it’s slow, and the results are less consistent.
The easiest solution: a basic corded drill costs under $40 at most hardware stores. It’s the single most useful tool you can own for home projects, and this build is a good reason to get one.
If buying a drill isn’t an option, many hardware stores will pre-drill holes for you at the point of purchase for a small fee. Ask when you buy your lumber.
Step-by-Step Instructions to Build a Raised Garden Bed with Basic Tools
This section covers a standard 4×8 ft raised bed using 2×8 lumber, which gives you a finished depth of 7.5 inches per board layer. Stack two layers for a 15-inch depth, or use 2×10 lumber for a single-layer 9.5-inch depth.
Materials for one standard 4×8 ft frame:
- Two boards at 8 ft long (the long sides)
- Two boards at 3 ft 9 in (the short sides, cut to account for board thickness at corners)
- 3-inch exterior-grade deck screws (16 screws total: 4 per corner, 2 per join)
Step 1 — Measure and Cut Your Lumber
Start with your two 8 ft boards. These run along the long sides of the bed and don’t need any cutting if you buy them at standard length.
For the short sides, you need to account for the thickness of the long boards at each corner. Standard 2x lumber is actually 1.5 inches thick. Two boards overlap at each corner, so you subtract 3 inches total from your short-side length:
48 inches (4 ft) minus 3 inches = 45 inches, or 3 ft 9 in.
Mark this measurement on each short board using your measuring tape and pencil. Use your speed square to draw a straight line across the board at the mark — this gives you a clean, accurate cut line.
Cut along the line with your hand saw or circular saw. If cutting by hand, keep your saw vertical and let the weight of the tool do most of the work. Work slowly on the first cut to establish a straight path.
Measure twice before every cut.
Many hardware stores will cut lumber to length for a small fee, sometimes free with purchase. If you’re not confident about cutting, take your measurements in writing and ask them to do it.
Step 2 — Pre-Drill and Assemble the Frame
Lay your four boards out flat on the ground in the shape of the finished frame. Position the two short boards inside the long boards at each corner — this is called the corner-overlap method. The short boards sit flush inside the frame, and the long boards wrap around them at each end.
At each corner, mark two hole positions: one near the top edge of the board and one near the bottom edge, set in about half an inch from the end.
Using a drill bit slightly narrower than your screw diameter, drill a pilot hole at each marked point. Go all the way through the outer board so the screw path is already started before you reach the inner board.
Hold the boards firmly together at the corner (clamps help here; a helper works just as well). Drive a 3-inch deck screw into each pilot hole until the head sits flush with the surface. Two screws per corner, top and bottom, give you eight screws total for a single-layer frame.
Use your speed square at each corner as you work. Place it against the inside of the joint and adjust the boards until the angle reads 90 degrees before driving the final screws.
Step 3 — Check for Square and Reinforce the Frame
Before you move the frame anywhere, check that it’s square. A frame that looks square can still be slightly off, and a few degrees of error means your bed will sit crooked and the boards will be under uneven stress.
The method is simple: measure diagonally from one corner to the opposite corner. Then measure the other diagonal. If both measurements match, the frame is square. If they don’t, apply gentle pressure to the longer diagonal corner until the numbers even out, then re-tighten the screws.
For a basic 4×8 ft bed, this is all the reinforcement you need. For larger builds, consider:
- Interior corner brackets: Metal L-brackets screwed to the inside of each corner joint add significant strength.
- A centre support board: For beds longer than 8 ft, a board running across the middle of the frame stops the long sides from bowing outward when the bed is full of soil.
- Exterior ground stakes: Lengths of rebar or timber stakes driven into the ground against the outside of the frame keep it from shifting on uneven ground.
Step 4 — Position the Bed and Prepare the Ground Below
Choose a spot that receives at least 6 to 8 hours of direct sunlight each day. Most vegetables need this to produce well. Morning sun with some afternoon shade works for leafy greens, but tomatoes, peppers, and beans want full sun.
Before placing the frame, lay a layer of cardboard directly on the ground inside the bed’s footprint. Overlap the pieces so there are no gaps. This blocks light from reaching the weeds and grass below, killing them off over the first few weeks. The cardboard breaks down within a few months and won’t harm your soil.
You do not need to add a solid base to the frame. An open-bottom bed sits directly on the ground, which means plant roots can grow down into the native soil below if they need more depth. It also means water drains freely downward rather than pooling inside the bed.
Place the frame over the cardboard, press it down lightly to seat it, and check that it’s reasonably level before filling.
How Much Soil Do You Need and What Should Go Inside?
Getting the soil right matters more than almost anything else in this build. The frame is just a container. What you fill it with is what grows your plants.
Working out volume:
Use this formula: Length x Width x Depth (in feet) = cubic feet of soil needed.
For a 4×8 ft bed at 1 ft deep: 4 x 8 x 1 = 32 cubic feet.
If your bed is 10 inches deep rather than 12, calculate: 4 x 8 x 0.83 = approximately 26.6 cubic feet.
This helps you buy the right amount of bagged or bulk soil without guessing.
What to put inside:
A reliable standard mix for raised beds:
- 60% quality topsoil
- 30% compost (well-aged garden compost or bagged compost)
- 10% perlite or coarse sand for improved drainage
This blend gives roots the structure to anchor, organic material to feed from, and drainage to stay healthy between waterings.
An alternative popular with gardeners is Mel’s Mix, made from equal parts peat moss (or coconut coir), compost, and vermiculite. It’s lightweight, drains well, and is very forgiving for beginners. The main drawback is cost — vermiculite can be expensive in large volumes.
Soil depth by crop:
- 10 to 12 inches: lettuce, herbs, peppers, tomatoes (with support), beans
- 12 to 18 inches: carrots, beets, potatoes, parsnips
Should You Line the Bottom of Your Raised Bed?
Gardeners disagree on this, and the right answer depends on your situation.
Landscape fabric: Placing permeable weed fabric across the bottom allows water to drain through while blocking weeds from growing up from below. It works, though over time, weed roots find their way through any liner.
No liner at all: Leaving the base completely open lets plant roots grow down into the native soil below, which is beneficial for deep-rooted crops. Weed pressure is manageable if you laid cardboard before placing the frame.
Hardware cloth (wire mesh): If burrowing animals like gophers or moles are a problem in your area, laying a layer of galvanised hardware cloth across the base before filling stops them from entering through the bottom. This is worth doing if you know the issue exists.
Avoid solid plastic sheeting across the base. It blocks drainage entirely, and a waterlogged bed will kill most crops quickly.
Common Beginner Mistakes to Avoid When Building a Raised Garden Bed
Most are easy to prevent once you know what to look for.
Mistake 1: Making the bed too wide to manage. If you can’t comfortably reach the centre from the edge without stepping in, the bed is too wide. The fix: keep width at 4 ft maximum. If you can only access the bed from one side, reduce to 2 ft wide.
Mistake 2: Using treated or painted wood. Chemically treated timber and painted or stained reclaimed wood can leach compounds into the soil. The fix: stick with untreated cedar, pine, or Douglas fir for any bed growing food.
Mistake 3: Skipping pilot holes at the corners. Driving screws without pre-drilling splits the wood, especially near the board ends. The fix: always drill a pilot hole first. It takes 30 extra seconds per hole and saves the board.
Mistake 4: Filling with straight topsoil. Plain topsoil compacts quickly in a raised bed, drains poorly, and provides limited nutrition. The fix: use a blended mix of topsoil, compost, and a drainage material like perlite.
Mistake 5: Placing the bed in a low-light spot. A raised bed in shade produces poor results regardless of how well it’s built. The fix: choose your site before you build. Walk the yard at different times of day and identify where the sun actually falls.
Mistake 6: Not topping up the soil after the first water. A new soil mix settles significantly once it’s watered. The bed that looked full will drop several inches. The fix: water the bed thoroughly before planting, wait 24 hours, then top up with more mix before putting anything in the ground.
How to Make Your Raised Bed Last Longer
A wooden raised bed won’t last forever, but a few simple habits can extend its life significantly.
Apply a natural oil finish: Linseed oil or tung oil applied to the exterior of untreated wood slows moisture absorption and pushes back the timeline on rot. Apply it before first use and again every two to three years. These oils are food-safe once cured and won’t affect your soil.
Replace boards individually: When rot eventually starts in one board, you don’t need to rebuild the whole frame. Unscrew the affected board, cut a replacement to the same dimensions, and screw it back in. This is much easier if you used standard lumber dimensions from the start.
Choose thicker lumber from the start: 2×8 lumber (1.5 inches thick) holds up better than 2×6 over time, simply because there’s more material for moisture to work through before it compromises the structure.
Elevate the base contact points: Placing the frame on a thin layer of gravel rather than directly on soil reduces the moisture that wicks up into the bottom edge of the boards, where rot typically starts.
With these habits, a cedar bed can last 10 to 15 years. Pine with the same care can reach 7 to 10 years in most climates.
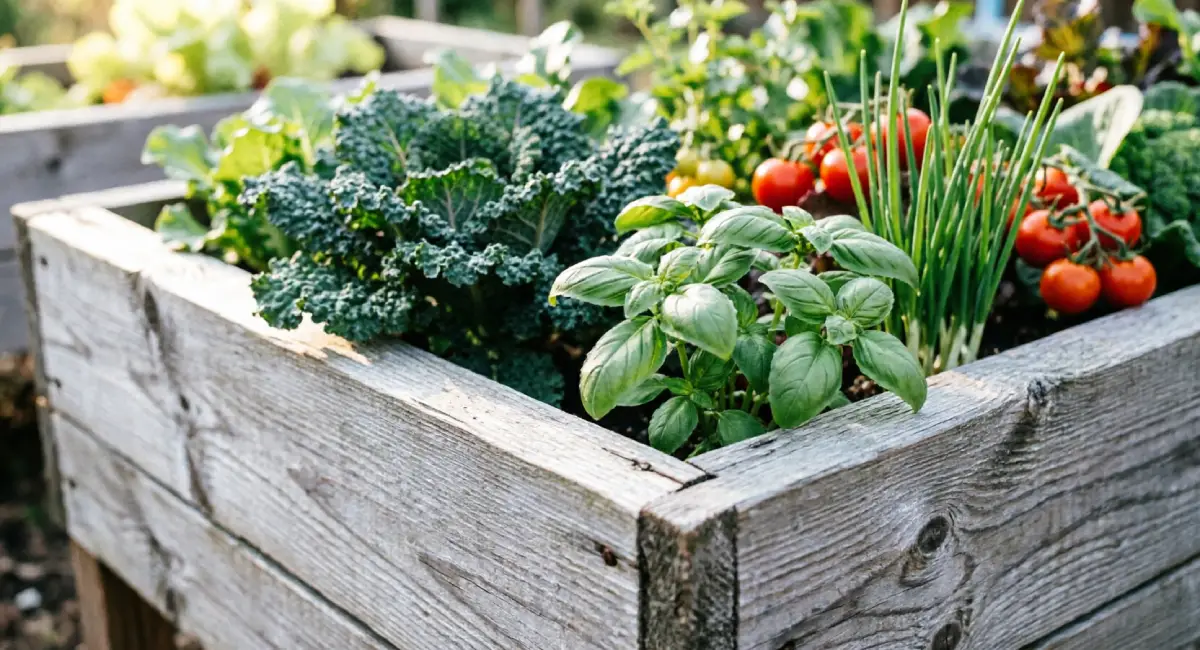
What Can You Grow in a Raised Garden Bed for Beginners?
Most vegetables do well in a raised bed, but some are better starting points than others.
Crops that perform reliably for beginners:
- Lettuce and salad greens: Fast-growing, shallow-rooted, and ready to harvest in 4 to 6 weeks. One of the best confidence-builders for new gardeners.
- Radishes: Ready in as little as 25 days. A good way to see results quickly.
- Herbs: Basil, parsley, chives, and mint thrive in raised beds and are practical to grow close to the kitchen.
- Tomatoes: Need support stakes or cages, but produce heavily in a warm sunny spot with good soil.
- Peppers and beans: Both do well once the soil is warm and the bed gets full sun.
The controlled soil in a raised bed gives you an advantage over in-ground gardening: clean, nutrient-rich soil and good drainage from day one. No battling compacted ground or poor native soil.
Start with two or three crops rather than filling the bed with ten different things. Lettuce and herbs are the lowest-risk starting point. Once you’ve seen how the bed performs through a full growing season, you’ll know what conditions you’re working with.
For a broader look at planning your growing space, our guide on starting a small backyard garden with no experience covers everything from site selection to soil preparation before you build anything.
Conclusion
Building a raised garden bed with basic tools is a one-day project. The frame is four boards, cut to length. The tools are things most people already own or can pick up cheaply. The soil mix follows a simple formula. None of it requires experience.
What separates a bed that works from one that doesn’t is doing the small things right: choosing untreated wood, pre-drilling your corners, picking a sunny spot, and filling with a proper blended soil mix rather than plain topsoil.
Start simple. A 4×8 ft bed built from pine and filled with a basic topsoil-compost mix will grow more food than you expect. You can always add a second bed once you’ve seen how the first one performs.
If you’re still planning your outdoor space, our full guide on starting a small backyard garden with no experience walks through everything before and after the build — from assessing your yard to choosing what to grow in your first season.