
Planning your first solo international trip comes with a long list of questions. Which country do you pick? How much money do you need? What documents do you bring? Before long, what started as a dream feels like a mountain of decisions.
- Why Planning a Solo International Trip Feels Overwhelming (And Why It Doesn’t Have to Be)
- Step 1 — Choose the Right Destination for Your First Solo Trip
- Step 2 — Set a Realistic Solo Travel Budget Before Booking Anything
- Step 3 — Handle Passports, Visas, and Entry Requirements Early
- Step 4 — Book Flights and Accommodation With Solo Travel in Mind
- Step 5 — Build a Flexible Itinerary That Leaves Room to Breathe
- Step 6 — Sort Travel Insurance Before You Leave Home
- Step 7 — Prepare for Safety and Stay Connected While Travelling Alone
- First Solo Travel Tips That Experienced Travellers Wish They Knew Earlier
- What This Guide Covers — and What Comes Next
- Conclusion
Here is the truth: most of the stress around solo travel comes from trying to figure everything out at once. When you break it down into clear steps, the whole process becomes manageable — even enjoyable.
This guide walks you through exactly how to plan your first solo international trip, from choosing a destination to packing your bag with confidence. Follow the steps in order, and you will be ready to board that flight without second-guessing yourself.
Why Planning a Solo International Trip Feels Overwhelming (And Why It Doesn’t Have to Be)
Most first-time solo travellers do not struggle because the trip is complicated. They struggle because they try to solve every problem on day one.
You open one tab to compare flights. Then another to check visa rules. Then a Reddit thread about safety, a YouTube video about packing, and three different articles that all say something different. Within an hour, you feel more lost than when you started.
This is decision fatigue, and it is normal. Your brain is not wired to process dozens of unrelated choices at the same time.
The solution is not to research harder. It is to work in stages. Each step in this guide has one job. Finish that job, then move to the next.
Step 1 — Choose the Right Destination for Your First Solo Trip
Your destination sets the tone for everything else. A poorly matched destination can make even a well-planned trip feel hard. A well-matched one makes everything easier.
For a first solo trip, look for countries with strong tourist infrastructure: well-marked public transport, plenty of English signage, locals accustomed to visitors, and accessible medical care. You want a place where asking for help is easy, even if you do not speak the local language.
Countries that consistently rank well for beginner solo travellers include Portugal, Japan, New Zealand, Iceland, and Canada. Each has low language barriers, high safety ratings, and an existing solo travel community you can tap into for advice.
That said, the best destination is the one that fits your comfort level — not someone else’s highlight reel.
How to Match a Destination to Your Comfort Level
Think about how you handle unfamiliar situations. Be honest with yourself.
If you feel anxious in new environments and prefer predictability, start with an English-speaking country that has a straightforward transport system and is politically stable. Ireland, New Zealand, and Canada are solid choices.
If you are comfortable with mild uncertainty but want some structure, consider Portugal, Japan, or Thailand. These countries have excellent infrastructure and friendly locals, with enough novelty to feel like a real adventure.
If you enjoy figuring things out on the go and have some domestic travel experience, you can consider destinations like Colombia, Vietnam, or Georgia. Still manageable for a first solo trip, but they require more preparation.
Pick the tier that makes you say “excited and a little nervous” rather than “terrified.”
What to Research Before You Commit to a Country
Before you book anything, run through this checklist:
- Visa requirements: Does your passport allow visa-free entry, or do you need to apply in advance?
- Government travel advisories: Check your own government’s official travel advisory website for up-to-date safety information.
- Solo traveller reviews: Search Reddit’s r/solotravel and Lonely Planet forums for recent first-hand accounts from travellers with a similar background to yours.
- Seasonality: Research the best and worst times to visit. Travelling during monsoon season or a national holiday blackout can complicate everything.
Do this research before you fall in love with a destination. It saves a lot of heartbreak later.
Step 2 — Set a Realistic Solo Travel Budget Before Booking Anything
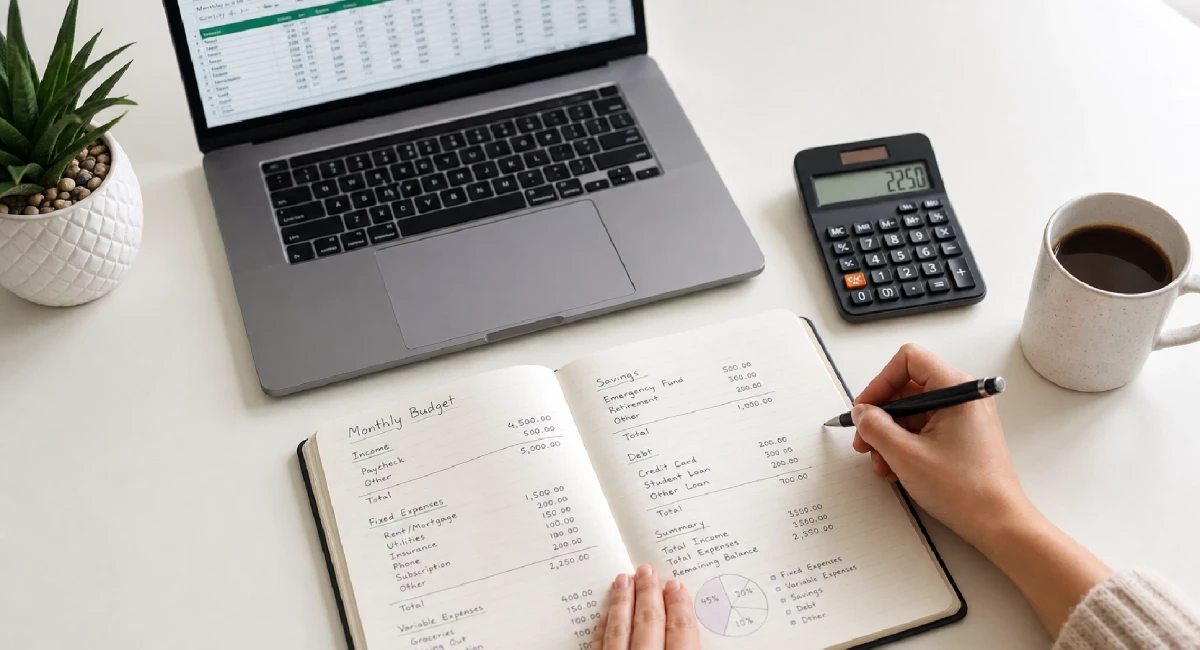
This is the step most beginners skip, and it causes the most problems. Booking a flight before you have a budget is like starting a road trip without checking how much fuel you have.
Your solo travel budget needs to cover six areas:
- Flights (return fare)
- Accommodation (cost per night × number of nights)
- Daily expenses (food, local transport, activities)
- Travel insurance (non-negotiable — covered in Step 6)
- Visa fees (if applicable)
- Emergency buffer (at least 10–15% of your total budget, set aside and untouched unless necessary)
Here is a sample breakdown for a 10-day solo trip to Portugal:
| Budget Category | Estimated Cost (USD) |
|---|---|
| Return flights | $500 – $800 |
| Accommodation (10 nights) | $300 – $600 |
| Daily expenses ($50–$80/day) | $500 – $800 |
| Travel insurance | $60 – $120 |
| Visa fees | $0 (visa-free for most passports) |
| Emergency buffer (15%) | $200 – $350 |
| Total estimate | $1,560 – $2,670 |
Numbers will vary based on your home country, travel style, and destination. But having a range before you book keeps you grounded.
How to Estimate Daily Costs in Any Country
Daily costs vary depending on where you are going:
- Budget destinations (Southeast Asia, Eastern Europe, Central America): $30–$60 per day for food, local transport, and activities
- Mid-range destinations (Western Europe, South America, parts of East Asia): $60–$120 per day
- Premium destinations (Japan, Scandinavia, Australia, Switzerland): $120–$200+ per day
For accurate, city-specific numbers, use Numbeo (cost of living comparisons) and Budget Your Trip (traveller-reported daily averages). These are far more reliable than generic blog estimates.
Building a Financial Safety Net for Solo Travel
Set up your finances before you leave — not at the airport.
Notify your bank about your travel dates and destination. A blocked card in a foreign country with no companion to help is stressful. Most banks let you set travel notifications through their mobile app in under two minutes.
Carry at least two payment methods. A debit card that refunds ATM fees internationally (like Wise or Charles Schwab in the US) paired with a backup credit card works well. Keep them in separate bags in case one is lost or stolen.
Research ATM fees in your destination country before you arrive. In some countries, withdrawal fees can be $5–$10 per transaction. Knowing this helps you plan larger, less frequent withdrawals.
Step 3 — Handle Passports, Visas, and Entry Requirements Early
Documentation is not glamorous, but it is the part of solo travel planning that causes the most panic when you leave it until the last minute.
Start here: check your passport right now. Most countries require your passport to be valid for at least six months beyond your intended return date. Some require a full year. If yours expires within six months, renew it before you book anything. Passport renewal timelines can stretch to several weeks during busy periods.
Once your passport is sorted, move to visas. Requirements depend on your citizenship and your destination. Do not assume you know what is required — always verify.
Apply for any required visas as early as possible. Some involve biometric appointments, bank statement requirements, or processing times of several weeks.
Where to Check Visa Requirements for Your Destination
Use only official sources for visa information. Outdated blog posts are one of the most common sources of incorrect visa advice online.
Reliable sources:
- Your own government’s travel advisory website (e.g., travel.state.gov for US citizens, gov.uk/foreign-travel-advice for UK citizens)
- The destination country’s official embassy or immigration website
- IATA Travel Centre (timaticweb.com), which airlines use to verify passenger entry requirements
Cross-check at least two of these sources, especially if your trip is more than three months away. Entry requirements can change with little notice.
Documents to Carry and Back Up Before You Fly
On the day you leave, your document kit should include:
- Passport (and a printed copy stored separately)
- Visa approval or e-visa printout
- Travel insurance certificate with emergency contact numbers
- Accommodation confirmations for at least the first night
- A printed emergency contact list (family member, local embassy)
- A loose printed copy of your itinerary
Back everything up digitally. Email scanned copies to yourself, save them to a cloud storage folder (Google Drive or iCloud), and keep one physical copy in a different bag from your originals. If your bag is stolen, you still have access to every document you need.
Step 4 — Book Flights and Accommodation With Solo Travel in Mind
Booking as a solo traveller requires different thinking than booking as part of a group. You make every decision yourself, which means the choices you make here directly affect how safe and comfortable you feel on arrival.
The most important rule for your first solo trip: arrive in daylight. Landing in an unfamiliar city at 11 pm, navigating an unfamiliar transport system with jet lag setting in, is the kind of start that makes people swear off solo travel. A daytime arrival gives you time, light, and energy to orient yourself.
For accommodation, central locations matter more when you travel alone. Staying near a city centre or a well-connected transport hub means you are never far from help, services, or other travellers.
How to Find and Compare Flights as a Solo Traveller
Use Google Flights or Skyscanner to compare fares. Both allow flexible date searches, which can reveal big price differences by shifting your departure by just one or two days.
For a first solo trip, prioritise direct flights even if they cost slightly more. Connecting flights add complexity: missed connections, baggage transfer issues, and longer travel times are all easier to manage with a companion. Solo, they become your problem alone.
Consider booking refundable or flexible tickets for your first international trip. Plans change, and the peace of mind is worth the small price difference.
Choosing the Best Accommodation Type for First-Time Solo Travellers
There is no single right answer here. It depends on what you want from the trip.
Social hostels are excellent for meeting other travellers, keeping costs down, and feeling less alone in a new city. They work best for outgoing travellers comfortable in shared spaces. Look for hostels with common areas, regular social events, and strong recent reviews on Hostelworld.
Private rooms in guesthouses or boutique hotels give you personal space without the full cost of a hotel. Good for travellers who want some social energy nearby but also need quiet time to recharge. Often the best middle ground for first-timers.
Hotels or serviced apartments offer the most privacy and comfort. They cost more but are worth considering if you are heading somewhere unfamiliar and want a base that feels secure and consistent.
Step 5 — Build a Flexible Itinerary That Leaves Room to Breathe
Your itinerary is a guide, not a contract. This is one of the biggest mindset shifts first-time solo travellers need to make.
Over-planning leads to exhaustion. When every hour is scheduled, there is no room for the things that become your favourite memories: a conversation with a local that changes your afternoon, a market you stumble into, a view that makes you sit down and stay for an hour.
Underplanning leads to anxiety. Waking up in a new city with no idea where to go and decision fatigue already setting in is its own kind of stress.
The goal is a loose daily structure: one or two anchor activities per day that are confirmed, and open blocks around them that you fill in as you go.
A sample day structure:
| Time Block | Plan |
|---|---|
| Morning | Visit one major attraction (booked in advance if needed) |
| Midday | Lunch and local exploration, unplanned |
| Afternoon | One optional activity or rest time |
| Evening | Walking, dinner, journaling, socialising |
How Many Activities to Plan Per Day as a Solo Traveller
Two to three planned activities per day is a realistic ceiling for solo travel, and even that can feel like a lot in a new place.
Solo travel takes more mental energy than travelling with others. Every decision — which direction to walk, which restaurant to pick — is yours alone. That adds up over the course of a day.
Build in buffer time between activities. What takes 20 minutes with a clear plan can take 45 when you are navigating an unfamiliar city alone. Rushing between sights is a fast track to frustration.
Using Maps and Travel Apps to Stay Oriented Without Stress
Download what you need before you land. Do not rely on having strong mobile data from the moment you arrive.
- Google Maps: Download the offline map for your destination city before your flight. You can navigate without data.
- Maps.me: Another strong offline option with detailed walking routes.
- Rome2Rio: Enter any two locations, and it shows you every transport option between them, including cost estimates.
- Local transit apps: Research which apps locals use for public transport in your destination city. Many cities have their own official transit apps that work better than Google Maps for buses and trains.
Having these set up before you land means you step off the plane already oriented.
Step 6 — Sort Travel Insurance Before You Leave Home
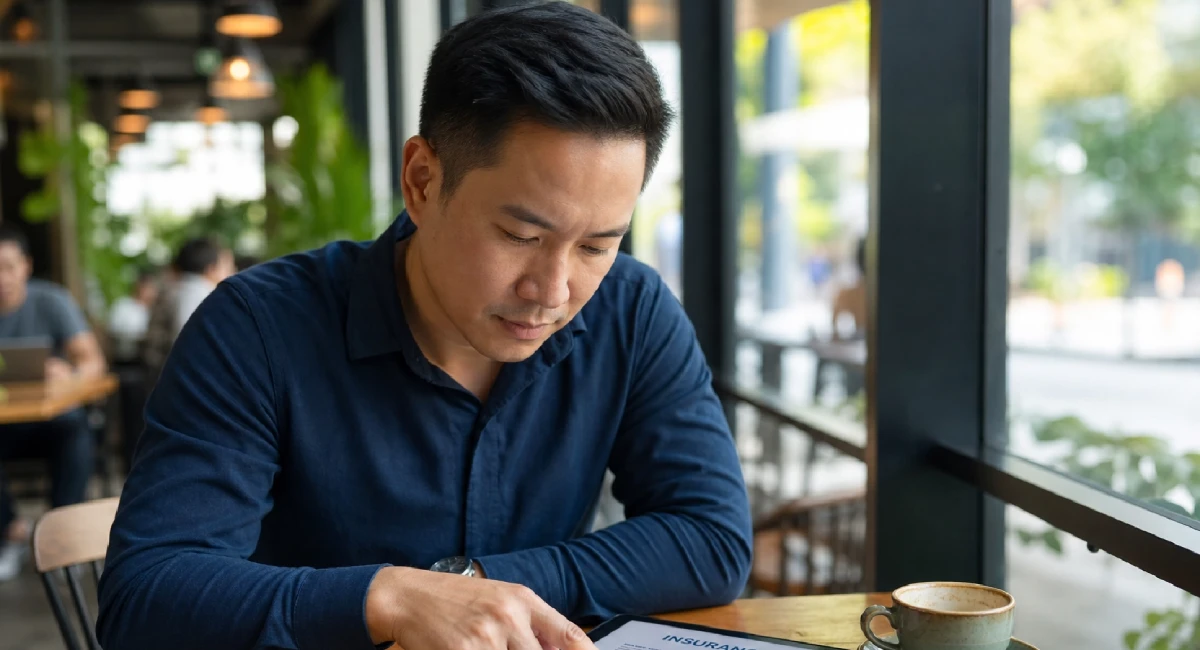
Travel insurance is the one item on this list you cannot afford to skip, especially as a solo traveller.
When you travel with a group, there is always someone to help if something goes wrong — a medical emergency, a missed flight, a stolen bag. Solo, you handle everything yourself. Insurance is the support system that replaces what a travel companion would otherwise provide.
A solid travel insurance policy should cover:
- Emergency medical treatment and hospitalisation
- Medical evacuation (airlifting you home if needed, which can cost tens of thousands without coverage)
- Trip cancellation or interruption
- Lost, stolen, or delayed baggage
- 24-hour emergency assistance line
To compare policies, use World Nomads (popular with independent travellers and good for adventure activities) or InsureMyTrip (side-by-side policy comparison from multiple providers). Read the exclusions section of any policy before you buy. That is where most surprises hide.
What Travel Insurance Should Cover for International Solo Trips
The cheapest policy is rarely the right one for solo international travel. Here is what actually matters:
Emergency medical and hospitalisation: Look for a minimum of $100,000 USD in medical coverage. Healthcare in some countries is extraordinarily expensive without it.
Medical evacuation: This is separate from medical treatment. If you need to be flown home for specialist care, evacuation alone can cost $50,000–$200,000. Make sure your policy covers it explicitly.
Trip interruption: If a family emergency calls you home mid-trip, this covers the cost of rebooking flights and recovering prepaid accommodation.
Baggage loss or delay: Useful, but less critical than medical coverage. Still worth having.
Personal liability: Covers you if you accidentally cause damage or injury to someone else. Rarely needed, but important to have.
Step 7 — Prepare for Safety and Stay Connected While Travelling Alone
Feeling safe while travelling alone is mostly a product of preparation, not luck. Most things that go wrong for first-time solo travellers are preventable with a few simple steps taken before departure.
Before you leave, share your full itinerary with at least one trusted contact at home. Include flight details, accommodation addresses, and a rough daily plan. Tell them when to expect check-in messages and what to do if they do not hear from you by a certain time.
Consider registering your trip with your country’s embassy or consulate in your destination. This is a free service most governments offer. If there is a natural disaster, civil unrest, or a personal emergency, your embassy knows you are there and can reach you.
Set up a regular check-in routine: a quick message home each evening confirming you are settled. It takes 30 seconds and gives both you and the people at home real peace of mind.
How to Set Up Communication Before You Land
Being contactable from the moment you land matters. Do not assume your home SIM will work abroad, or that airport Wi-Fi will be enough.
Three options to consider:
- Local SIM card: Buy one at the airport or a local phone shop on arrival. Often the cheapest option for data and calls within the country.
- International data plan: Check if your current mobile provider offers an affordable international add-on. Some providers offer daily international data passes at reasonable rates.
- eSIM: If your phone supports it, an eSIM from providers like Airalo or Holafly lets you activate a local data plan before you land, directly from your phone.
Once you have data, set up WhatsApp or Signal for communication with people at home. Both apps work over Wi-Fi and mobile data, making international messaging free regardless of country.
Simple Safety Habits Every Solo Traveller Should Build
These habits are not about fear. They are about keeping your attention where it belongs.
- Keep your accommodation address saved offline, not just in an app that requires data to open.
- Know the local emergency number for your destination before you arrive (it is not always 911 or 999).
- Avoid walking around with your phone or wallet visibly in your hand in crowded areas.
- Keep a small amount of cash in a secondary location, separate from your main wallet.
- Trust your instincts. If a situation or person makes you uncomfortable without an obvious reason, move away. You do not owe anyone an explanation.
These small habits cost nothing and add up to a more comfortable trip.
First Solo Travel Tips That Experienced Travellers Wish They Knew Earlier
Some of the most valuable advice does not fit neatly into any planning step. These are the small details most first-timers discover the hard way.
Pack lighter than you think you need to. You carry your own luggage up every staircase, onto every bus, and through every airport connection. A bag that felt fine at home becomes exhausting within 48 hours of actual travel. Lay out what you plan to pack, then remove one-third of it.
Arrive in a new city during daylight. This has been mentioned already because it matters enough to repeat. Disorientation is normal when you arrive somewhere new. Daylight makes everything easier: finding your accommodation, reading your surroundings, and feeling settled.
Carry local currency for your first 24 hours. ATMs can be hard to find, out of service, or limited in new cities. Having enough local cash on arrival to cover a meal, transport to your accommodation, and a small emergency removes one source of stress.
Learn five phrases in the local language. Hello, thank you, please, excuse me, and “Do you speak English?” These five phrases, spoken with effort, change how locals respond to you. You do not need fluency. You need basic courtesy.
Keep a portable power bank charged and in your bag every day. Your phone is your map, your translator, your booking confirmation, and your emergency contact tool. Running out of battery in an unfamiliar place is a completely avoidable problem.
Eat where the locals eat. Tourist-facing restaurants in city centres often charge much more for lower-quality food. Walk two or three streets back from the main tourist drag and the difference is obvious.
Permit yourself to do nothing. A restful afternoon in a park or a quiet café is not wasted time. Solo travel is mentally demanding in ways group travel is not. Recovery time is part of the trip, not a distraction from it.
What This Guide Covers — and What Comes Next
Planning well and travelling safely are not two separate topics. They are the same topic from different angles.
Every step in this guide — from choosing the right destination to sorting travel insurance to building check-in routines — is also a safety decision. When you arrive prepared, you reduce the number of situations where panic or uncertainty puts you at risk.
This guide focuses on the planning process. The broader question of whether solo international travel is safe for beginners in unfamiliar countries, and what the real risks look like versus the perceived ones, is a deeper conversation. If that question is on your mind, read the companion article: Is Solo Travel Safe for Beginners in Unfamiliar Countries? It separates media-driven fear from ground-level reality and gives you a clear picture of what to prepare for. That context, combined with the planning steps above, gives you a full foundation for your first solo trip.
Conclusion
Planning your first solo international trip is not about getting everything perfect before you leave. It is about building enough of a foundation that you feel capable of handling what comes up along the way.
The seven steps in this guide follow a clear order: choose your destination, set your budget, sort your documents, book smart, build a flexible itinerary, get travel insurance, and prepare for safety. Each step builds on the last. None requires expert knowledge. You just have to do them.
If you are feeling overwhelmed right now, here is the most practical advice possible: do not try to complete all seven steps this weekend. Start with Step 1 and Step 2. Pick a destination you want to visit and figure out what it will cost. That is enough for day one.
Once you know where you want to go and what it will realistically cost, everything else follows. The moment you sit down with a clear destination and a rough budget, the plan to finally travel solo starts feeling real. That is the shift that turns first-time travellers into lifelong solo travellers.
When you are ready, this guide will be here. Start with one step. The rest will follow.