
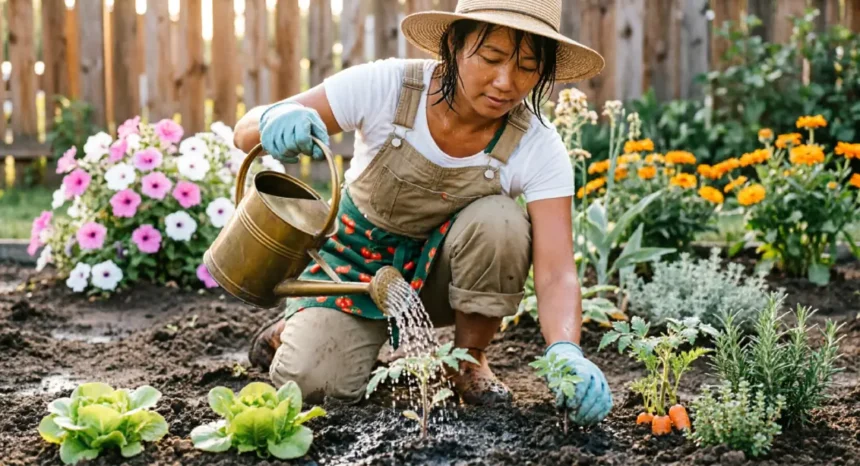
For most small backyard gardens, watering two to three times per week is a good starting point. But the right frequency depends on your soil type, local climate, plant growth stage, and the time of year. There is no single number that works everywhere.
- Why Watering Frequency Is Not One-Size-Fits-All
- How Soil Type Affects Your Garden Watering Schedule
- How Often to Water a Small Backyard Garden by Season
- How Plant Growth Stage Changes How Much Water You Need
- Reading Your Soil — The Most Reliable Watering Guide You Have
- Recognizing the Signs of Overwatering Plants
- Practical Watering Tips That Save Time and Water
- Building a Simple Garden Watering Schedule You Can Actually Follow
- Conclusion
This guide breaks down each factor so you can build a watering schedule that fits your garden — and adjust it whenever conditions change.
Why Watering Frequency Is Not One-Size-Fits-All
Look up watering schedules online, and you will find answers ranging from “every day” to “twice a week.” Both can be right. Both can kill your plants without the right context.
A freshly planted seedling and a mature tomato plant in the same garden have different water needs. The seedling needs gentle, consistent moisture to survive. The tomato plant needs deep, infrequent watering to push its roots downward. Water them both daily, and the seedling might thrive while the tomato develops shallow roots that leave it vulnerable to drought for the rest of the season.
The same logic applies across soil types, seasons, and growth stages. Sandy soil dries out in a day. Clay soil holds water for nearly a week. A summer heatwave doubles your garden’s water demand. A rainy spring week may mean you do not need to water at all.
The best watering habit is not a fixed routine — it is a small set of skills. Once you understand what drives your garden’s water needs, you will know exactly when to water and when to hold off. That is what the rest of this article covers.
How Soil Type Affects Your Garden Watering Schedule
Before you set any watering schedule, you need to know what kind of soil you are working with. Soil structure determines how quickly water moves through the ground and how long plant roots can access it. Two gardens sitting next to each other can have very different watering needs simply because of what is underneath.
Sandy Soil Drains Fast and Needs More Frequent Watering
Sandy soil is made up of large, coarse particles with plenty of space between them. Water flows through it quickly — sometimes within minutes of watering. That speed is both its strength and its weakness.
Sandy soil rarely becomes waterlogged. But it dries out fast — roots can go thirsty within a day if you are not paying attention.
If your garden has sandy soil, plan to water every one to two days during warm weather. Check soil moisture daily by pressing a finger into the ground near the root zone. If it feels dry at one inch deep, it is time to water.
Over time, adding organic compost to sandy soil will improve its water retention. Even a two-inch layer worked into the top few inches makes a noticeable difference in how long moisture stays in the soil.
Clay Soil Holds Moisture Longer — But Can Suffocate Roots
Clay soil is dense and made of tiny, tightly packed particles. It holds water extremely well — sometimes too well. After heavy rain or a deep watering, clay soil can remain saturated for days, cutting off the oxygen supply to plant roots.
Consistent waterlogging leads to root rot, and clay soil is where it happens most.
If you are gardening in clay, water every three to four days and always check the soil before adding more. Push a finger two inches into the ground. If it still feels moist and cool, wait another day. If it feels dry and crumbly, go ahead and water.
Raised garden beds sidestep clay soil problems entirely. Filling them with a mix of compost, topsoil, and a small amount of sand gives you control over drainage from the start.
Loamy Soil Is the Sweet Spot for Most Backyard Gardens
Loamy soil combines sand, silt, and clay in a balanced proportion. It drains well enough to prevent waterlogging but holds enough moisture to keep roots hydrated between watering sessions. Most experienced gardeners aim to build toward loam for this reason.
For loamy soil, water every two to three days in most weather. During heat waves, you may need to water every other day. During mild or rainy periods, every three days is usually enough.
You can identify loamy soil by squeezing a handful. It holds its shape briefly when squeezed but crumbles easily when poked. It feels neither gritty like sand nor sticky like clay. If your soil does this, you are in good shape.
How Often to Water a Small Backyard Garden by Season
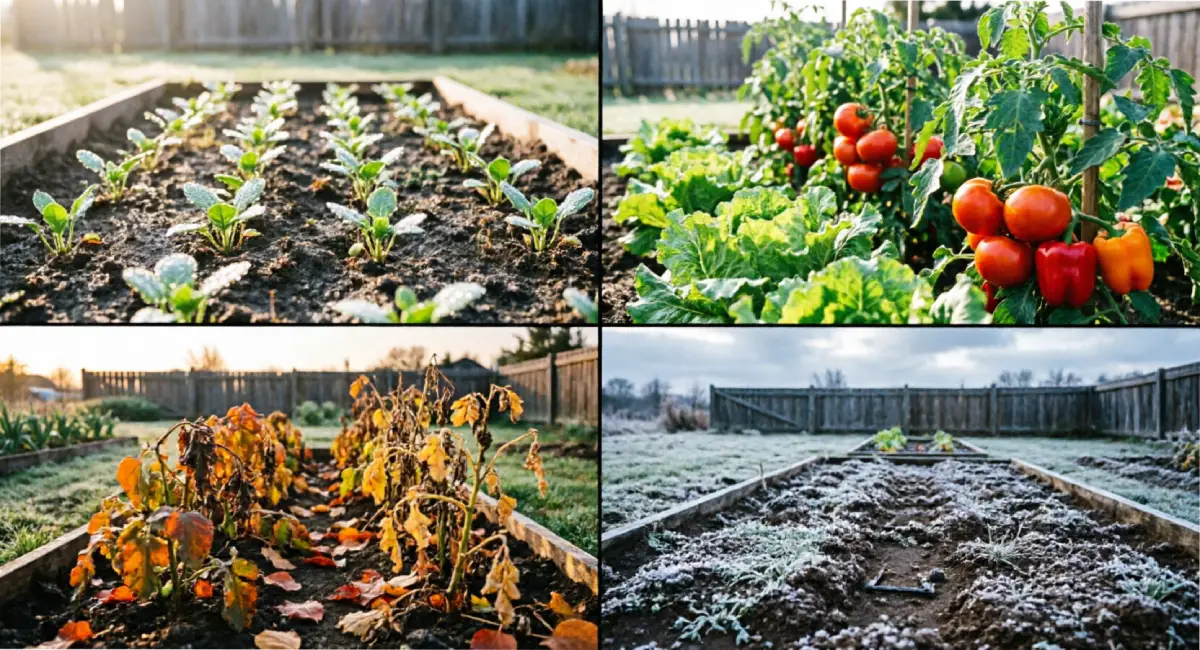
Your garden’s water needs shift as the seasons change. Temperature, sunlight hours, rainfall, and plant activity all rise and fall throughout the year. Learning to adjust by season will save you from most beginner watering mistakes.
Spring — Starting Light and Building Up
Spring is the most forgiving season for a new gardener. Soil often still holds moisture from winter rainfall, temperatures are mild, and evaporation is low. Plants are beginning to wake up, so water demand is modest.
For most small gardens, watering two to three times per week is a solid starting point in spring. Morning temperatures below 60°F (15°C) mean water evaporates slowly, so you do not need to water more than that.
The bigger risk in early spring is overwatering. Many beginners see bare soil and assume it needs water, but the soil beneath the surface is often still moist from recent rain or snowmelt. Always check two inches down before watering in spring.
New leaf growth is a good sign. When your plants are actively pushing out new leaves, they are taking up water effectively. If growth seems stalled and the soil is wet, ease off watering and give roots a chance to breathe.
Summer — When Heat Puts the Most Pressure on Plants
Summer is when your garden works hardest and needs the most support. High temperatures, longer days, and stronger sunlight pull moisture out of the soil quickly. Plants in active growth are also transpiring more water through their leaves.
Container plants dry out the fastest and may need watering every day in peak summer heat. In-ground garden beds generally need watering every two to three days, though a heat wave above 90°F (32°C) can push that to every other day.
Always water in the early morning, ideally between 6 and 10 AM. Roots absorb moisture before daytime heat causes evaporation, and leaves dry before evening, reducing disease risk. Watering at midday wastes most of it to evaporation.
A two-to-three-inch layer of mulch over your garden bed makes a major difference in summer. It slows surface evaporation, keeping the soil moist longer between waterings. Straw, wood chips, and shredded leaves all work well.
Autumn — Slowing Down as Temperatures Drop
As temperatures drop in autumn, your garden’s water needs drop with them. Days shorten, sunlight weakens, and many plants start winding down.
Reduce watering to once or twice per week in early autumn. By mid-to-late autumn, natural rainfall often covers most of what your garden needs, depending on your region.
Pay attention to your plants rather than the calendar. Yellowing leaves, slowing stems, and soil that stays moist longer all signal that water demand is dropping. Follow those signals, not your summer schedule.
As plants enter full dormancy, stop supplemental watering for most species. Overwatering dormant plants wastes water and causes the same root problems as overwatering in summer.
Winter — When Most Small Gardens Need Almost Nothing
In cold climates where ground temperatures drop below freezing, most small backyard gardens need no supplemental watering through winter. Dormant plants have no active growth to support, and frozen ground cannot absorb water.
The exception is mild-winter climates. If you are in a region where temperatures stay above 40°F (4°C) through winter — parts of the US Southwest, coastal regions, or similar climates elsewhere — some plants may still be growing slowly and will need occasional moisture.
A practical rule for winter: press two fingers into the soil to a depth of two inches. If it feels completely dry and you are in a mild-winter area with actively growing plants, give the bed a light watering. If the soil feels cool and slightly moist, leave it alone.
Container plants in winter need more attention than in-ground beds, since less soil dries out faster even in cool conditions.
How Plant Growth Stage Changes How Much Water You Need
Even when season and soil type stay the same, one factor can shift your watering needs almost overnight: where your plant is in its life cycle. A tomato seedling and a tomato plant bearing ripe fruit are the same species, but they need very different care.
Seeds and Seedlings Need Consistent but Gentle Moisture
For seeds to germinate successfully, the top layer of soil must stay consistently moist. If it dries out even briefly at this stage, germination can fail or produce weak, stressed seedlings.
Water seeds lightly once or twice per day using a misting attachment or a watering can with a fine rose head. The goal is to keep the surface damp without saturating the soil beneath. Heavy watering at this stage can wash seeds away or compact the soil surface.
Once seedlings emerge and put out their first set of true leaves, you can reduce to once daily. Keep the soil evenly moist but not wet. Avoid overhead watering that beats down on fragile stems — direct water to the soil surface around the base of the plant instead.
Established Plants Need Deeper, Less Frequent Watering
After two to four weeks in the ground, most plants become established. Their roots have spread into the surrounding soil, and they no longer depend on surface moisture to survive.
At this point, the goal shifts. Instead of keeping the surface moist, you want to water deeply and less often. This means giving the soil a thorough soaking that penetrates six to eight inches down, then letting the top inch or two dry out before watering again.
Deep watering encourages roots to follow the moisture downward. Shallow, frequent watering does the opposite — it keeps roots near the surface, where they are vulnerable to heat and drought. Water two to three times per week at this stage, deeply each time, and you will build stronger, more resilient plants.
Flowering and Fruiting Plants Have Increased Water Demands
When plants shift their energy into producing flowers and fruit, their water requirements rise. This stage matters most for vegetables.
Inconsistent moisture during flowering and fruiting causes visible problems. Tomatoes crack when the soil swings from dry to saturated. Pepper plants drop their blossoms during drought stress. Cucumbers turn bitter when watering is inconsistent.
Check soil moisture more frequently during this phase — every one to two days rather than relying on a fixed schedule. The goal is steady, even moisture rather than cycles of drought and saturation. If the top two inches of soil feel dry, water thoroughly. If they still feel cool and moist, wait another day.
Reading Your Soil — The Most Reliable Watering Guide You Have
Every watering schedule is a starting point, not a rule. The most reliable guide you will ever have is the soil itself. Learning to read your soil takes the guesswork out of when to water, regardless of season or growth stage.
The Finger Test — A Simple Way to Check Soil Moisture
The finger test is exactly what it sounds like. Push your index finger one to two inches into the soil near the base of a plant. If it feels dry and crumbly at that depth, it is time to water. If it feels cool and slightly moist, wait another day and check again.
This test works for any soil type and any plant. It costs nothing, takes five seconds, and gives you more accurate information than any fixed schedule.
Make the finger test part of your morning routine, especially during summer and whenever the weather changes. Once it becomes a habit, you will rarely need to think twice about whether your garden needs water.
Using a Moisture Meter for More Accurate Results
If you want a step up from the finger test, a basic soil moisture meter is a practical investment. Entry-level models cost well under $15 and require no batteries. You insert the probe into the soil and read the result on a numbered scale.
Most meters use a scale from 1 to 10. A reading below 3 indicates dry soil that needs water. A reading of 4 to 7 indicates adequate moisture. A reading of 8 or above means the soil is saturated and should not be watered yet.
Insert the probe at least three to four inches deep and position it near the root zone rather than at the surface. Surface readings can be misleading, especially after rain, when the top inch is wet while deeper soil remains dry. Moisture meters are especially useful for container gardens, where soil can dry unevenly from the edges inward.
What Dry, Moist, and Waterlogged Soil Looks and Feels Like
With a little practice, you can read soil moisture with your eyes and hands — no tools needed.
Dry soil is lighter in color than moist soil, often pale tan or gray. It pulls away from the edges of containers and crumbles when you squeeze it. In beds, it may crack along the surface.
Moist soil is darker, holds its shape loosely when compressed, and feels cool to the touch. It does not stick to your fingers or clump into a ball. This is the state you want to maintain for most plants.
Waterlogged soil feels heavy and dense. It may smell sour or musty from anaerobic activity, and it holds its shape when squeezed without crumbling at all. If you see standing water between plants or puddles that do not drain within an hour of watering, your soil is waterlogged.
Recognizing the Signs of Overwatering Plants
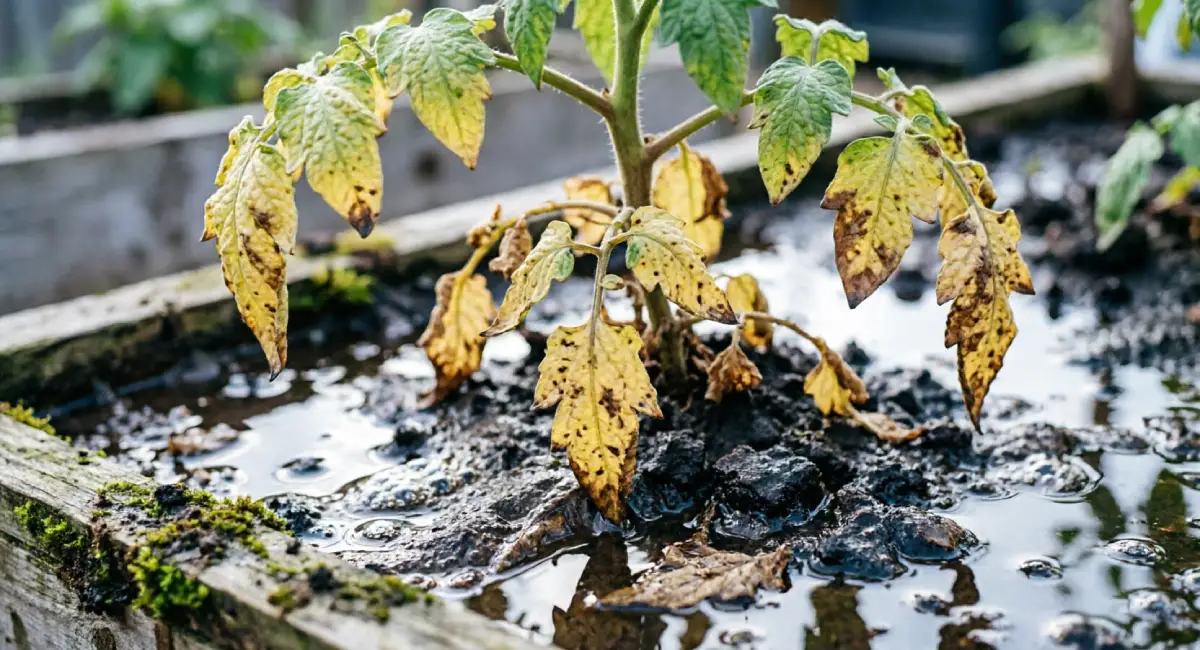
Overwatering is the most common mistake beginner gardeners make. It is also one of the most damaging, because the harm builds slowly and the signs are easy to misread. Many gardeners see a wilting plant and reach for the watering can, when the plant is wilting because its roots are already drowning.
Yellowing Leaves Are the Earliest Warning Sign
Yellow leaves are one of the first visible signs that something is wrong, and overwatering is often the cause. When roots sit in saturated soil, they cannot take up oxygen. They begin to deteriorate, and the plant loses its ability to absorb nutrients even when they are present in the soil.
The yellowing pattern matters. Overwatering typically causes uniform yellowing across the lower leaves, which feel soft and may fall off easily. The soil will feel wet when you check it.
Nutrient deficiency, by contrast, tends to produce yellowing in patches or along leaf veins, and it usually occurs alongside dry soil. If your soil feels wet and your lower leaves are turning uniformly yellow, reduce watering for several days and watch for recovery before looking for other causes.
Root Rot — What Happens When Overwatering Goes Too Far
Root rot is what happens when overwatering goes unchecked. When soil stays consistently saturated, oxygen-depleted conditions allow fungal pathogens to take hold in the root zone. The roots begin to decompose while the plant is still trying to grow.
Symptoms include a foul, musty smell rising from the soil even when it has not been disturbed. If you gently dig up a small section of root and examine it, affected roots will appear slimy, dark brown, or black rather than firm and white.
Above ground, the plant may wilt despite wet soil — the key indicator that something is wrong beneath the surface. Leaves may turn yellow, then brown, then begin to drop.
Mild root rot can be fixed by stopping all watering, removing mulch from the affected area, and gently aerating the soil to improve drainage. Severe cases may require removing the plant entirely to prevent spread to nearby plants.
How to Fix Overwatered Garden Beds Before Losing Your Plants
If you catch overwatering early, recovery is straightforward. Stop watering and do not resume until the soil dries to a proper moisture level. This may take three to five days depending on soil type and weather.
Remove any mulch from the surface of the affected area to let the top layer of soil dry faster. Use a garden fork to gently loosen the top three to four inches, which improves air circulation around the root zone without disturbing the roots.
Leave the bed alone for five to seven days, then reassess plant health. A plant that was stressed from overwatering but not yet suffering from rot will usually recover within a week. New leaf growth, firmer stems, and leaves returning to a healthy green color are all positive signs.
A healthy plant can recover from a brief dry period far more reliably than it can recover from sustained root rot. When in doubt, err toward slightly drier rather than consistently wet.
Practical Watering Tips That Save Time and Water
Good watering habits are not just about frequency. The way you water matters as much as how often. These tips save water and improve results.
Water in the Morning — Not the Evening
Timing matters as much as frequency. Watering between 6 and 10 AM does several things at once.
Roots absorb water effectively when temperatures are still mild, and evaporation is low. Any water that lands on leaves has time to dry before evening, reducing the risk of fungal diseases like powdery mildew. The soil stays moist long enough through the warmer part of the day to keep plants hydrated, then has time to drain slightly overnight.
Evening watering does the opposite. Moisture sits on leaves and soil surfaces through the night, when temperatures drop and air circulation slows. This creates ideal conditions for mold, mildew, and pest activity. If morning watering is not possible, midday is better than evening.
Mulching Reduces How Often You Need to Water
Mulch is one of the most effective ways to reduce watering frequency. By covering the soil surface, mulch slows evaporation significantly.
During summer, mulched beds can retain soil moisture 30 to 50 percent longer than unmulched beds. That translates directly into fewer watering sessions per week. Straw, wood chips, and shredded dried leaves all work well and are inexpensive.
Apply mulch to a depth of two to three inches over the entire bed. Keep it pulled back slightly from the base of each plant stem — mulch pressed directly against stems can trap moisture and cause rot at the crown of the plant.
Grouping Plants by Water Needs Makes Scheduling Easier
Grouping plants by water needs simplifies your entire watering schedule. Plants with similar requirements are best placed together in the same bed or section of your garden.
Drought-tolerant herbs like rosemary, thyme, and sage need far less water than vegetables like tomatoes, cucumbers, and squash. If they share a bed and you water for the vegetables, the herbs receive far more than they need. Over time, that excess causes the same problems as overwatering.
A simple way to organize this: dedicate one section of your backyard to low-water plants and another to high-water plants. Even if your garden is small, this division makes watering more efficient and reduces the risk of giving one group too much or too little.
Drip Irrigation Gives Small Backyard Gardens Consistent Moisture
For gardeners who want to water less often while keeping moisture even, a basic drip irrigation kit works well. Drip systems deliver water directly to the root zone of each plant, bypassing leaves and reducing evaporation to near zero.
Entry-level kits suitable for a small backyard garden start at $20 to $40 and can be connected to a simple timer so watering happens automatically at the best time of day. This is useful for gardeners with busy schedules who cannot water manually every morning.
Drip systems also reduce water waste compared to overhead watering, since every drop goes where it is needed.
Building a Simple Garden Watering Schedule You Can Actually Follow
Everything covered in this article comes down to one practical outcome: a schedule you can use. The table and guidance below give you a clear starting point based on your season and soil type. Adjust from there as you learn your garden.
A Sample Weekly Watering Schedule for a Small Vegetable Garden
Use this as a starting framework. Apply the finger test before each session and skip any watering if the soil still feels moist at one to two inches deep.
| Season | Watering Frequency | Best Time | Notes |
|---|---|---|---|
| Spring | 2 to 3 times per week | 6 to 10 AM | Check soil before watering; the risk of overwatering is high early in the season |
| Summer | Every 1 to 2 days (containers); every 2 to 3 days (in-ground) | 6 to 10 AM | Mulch beds to extend moisture; increase frequency during heat waves above 90°F (32°C) |
| Autumn | 1 to 2 times per week | 6 to 10 AM | Reduce as plants slow down; let rainfall do the work where possible |
| Winter | Rarely to never (cold climates) | Morning if needed | Water only if the soil is completely dry and the plants are still actively growing |
These numbers assume loamy soil. Add one watering session per week for sandy soil. Subtract one for clay soil, and always check drainage before adding more.
How to Adjust Your Schedule When Rain Does the Work for You
Rainfall is free irrigation, and a well-timed rain event can replace one or more of your scheduled watering sessions. The key is knowing how much rain is reaching your plant roots.
A general rule: one inch of rainfall replaces a standard watering session for most in-ground garden beds. Light rain, the kind that passes in five minutes and barely darkens the pavement, delivers less than 0.25 inches. That may wet the surface but rarely penetrates deep enough to reach established roots.
Check rainfall totals using a free weather app or a simple rain gauge placed in your garden. After any rainfall, press two fingers into the soil to verify penetration. If the top two inches are moist, skip your next scheduled session. If only the surface is wet, water as planned.
Log weekly rainfall on your phone. Over time, you will spot patterns and adjust your schedule with more confidence as the season progresses.
Conclusion
Getting garden watering right is less about following a strict rule and more about learning to read the signals your plants and soil give you. Every factor covered here — season, soil type, growth stage, rainfall — connects back to one question: does my garden need water right now?
The fastest way to answer that accurately is the finger test. Start there. Check the soil before every watering session until it becomes second nature. From that foundation, add the seasonal adjustments, soil-specific guidance, and time-saving habits covered in this article.
If you are still building confidence in your first backyard garden, watering correctly is one of the first skills worth learning. It protects your plants, saves water, and removes a major source of beginner stress.
Ready to take the next step? Head back to the main guide on how to start a small backyard garden with no experience for the full step-by-step process.